|
Home » Sponsored » Pi Speakers » Build Thread: 2Pi Towers, 6Pi Corner horns (and possibly a sub and center) (Building some Pi Speakers)
| Re: Build Thread: 2Pi Towers, 6Pi Corner horns (and possibly a sub and center) [message #88446 is a reply to message #88057] |
Sun, 15 July 2018 19:37   |
 joshua43214
Messages: 35
Registered: October 2016
Location: USA
|
Baron |
|
|
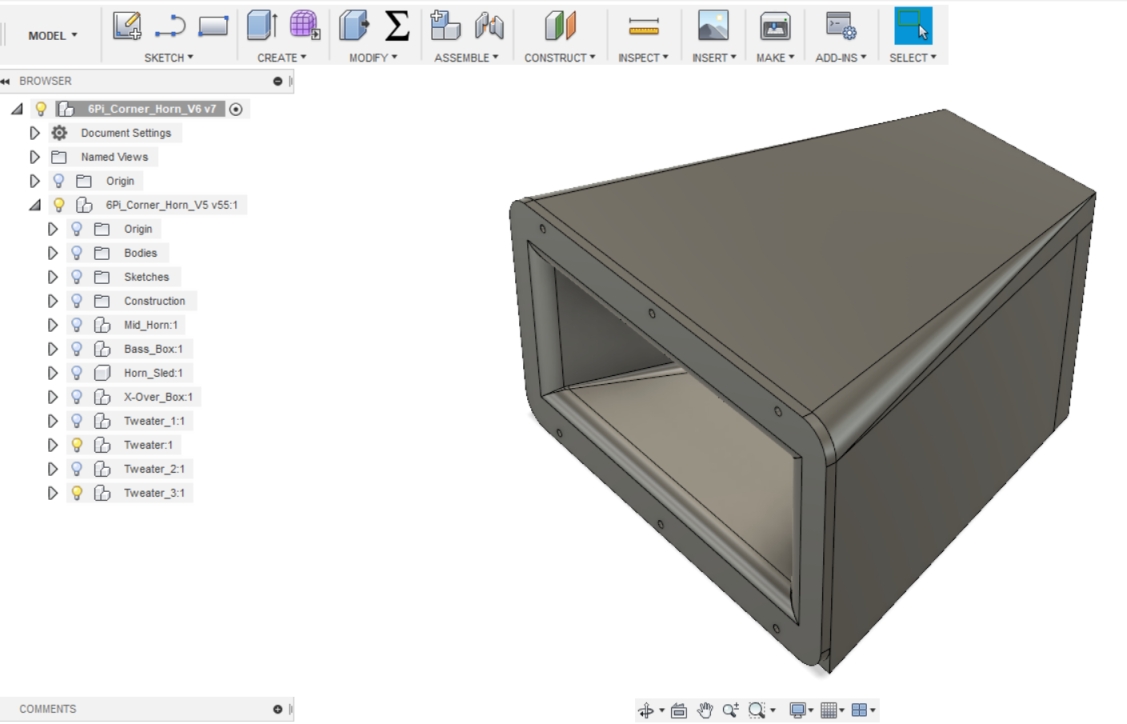
I designed and discarded a number of tweeter enclosures. The problem is that the horn itself is simply ugly and utilitarian, and putting an enclosure around it just makes it that much more obvious you are hiding something.
In the end, I just decided to embrace its ugliness, and wrap it in a box that looks like it is serving some puropose.
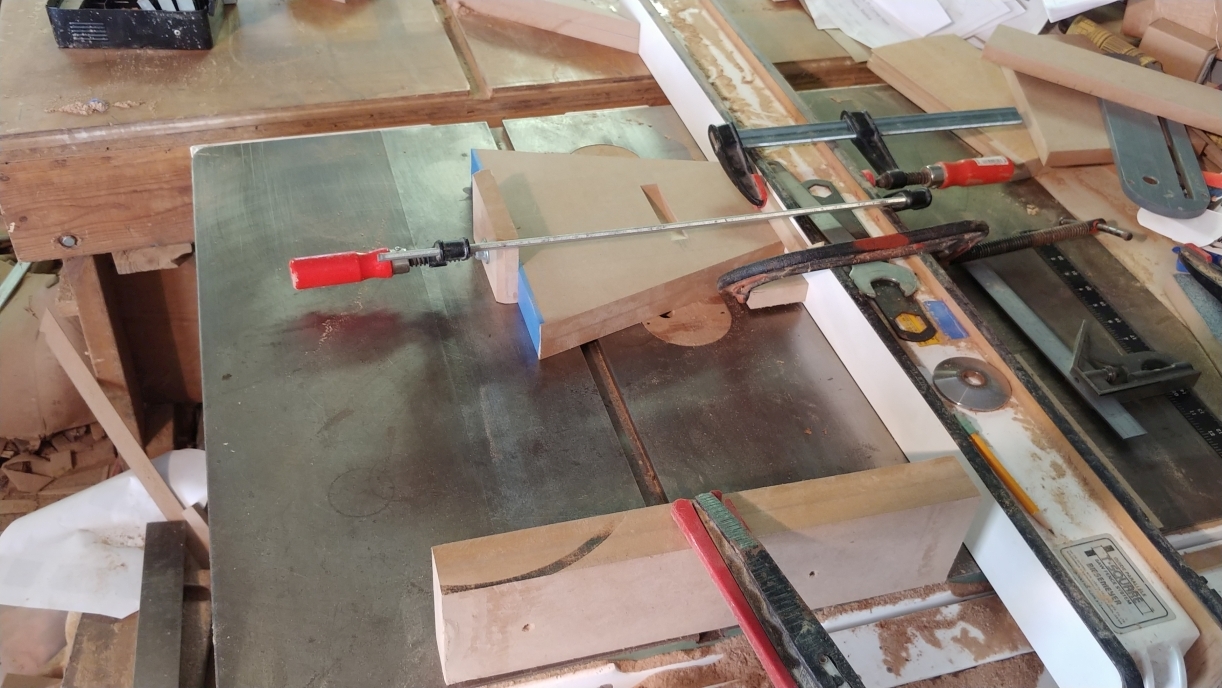
The tweeter boxes are "as built." I began by marking out the dimensions of the top. I used a piece of scrap that I ripped to be parallel to set the angle of the miter gauge. The scrap is held against the rip fence, and the miter gauge is adjusted until the other edge lays on the pencil line.

The fence is then moved out of the way, and the tops are cut to the line.
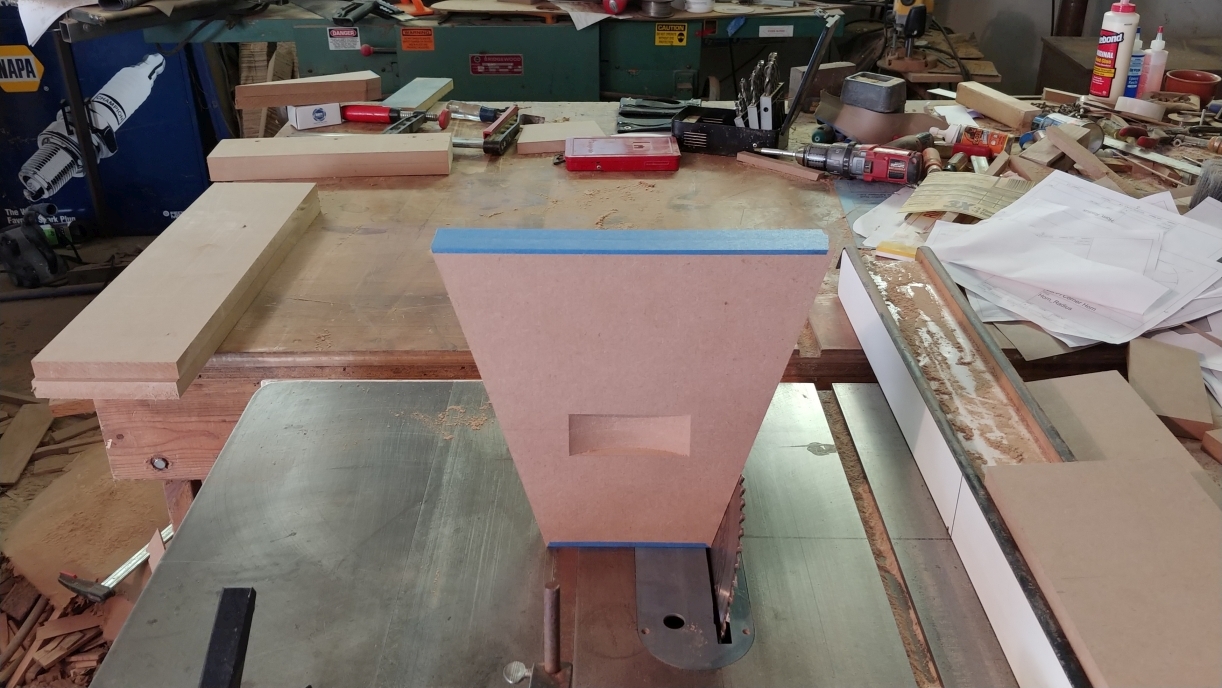
The driver is large enough that a relief is needed in the top. I cut the relief with a dado. A bit of trial and error was able to locate the position of the material so the relief would be centered.
The pic below has all the details. A stop is clamped the to the fence with a large C clamp. A piece of scrap is clamped above the work to prevent it from shifting upward when the dado head is raised. The work itself is held in place with a bar clamp. A large piece of scrap is clamped at the front of the saw as a last safety device should the worst occur, and it will prevent the work from hitting me in the face as I kneel to raise the blade.
After the cut is made on both sides, the fence is moved over about 3/4" (19mm) and the operation repeated.
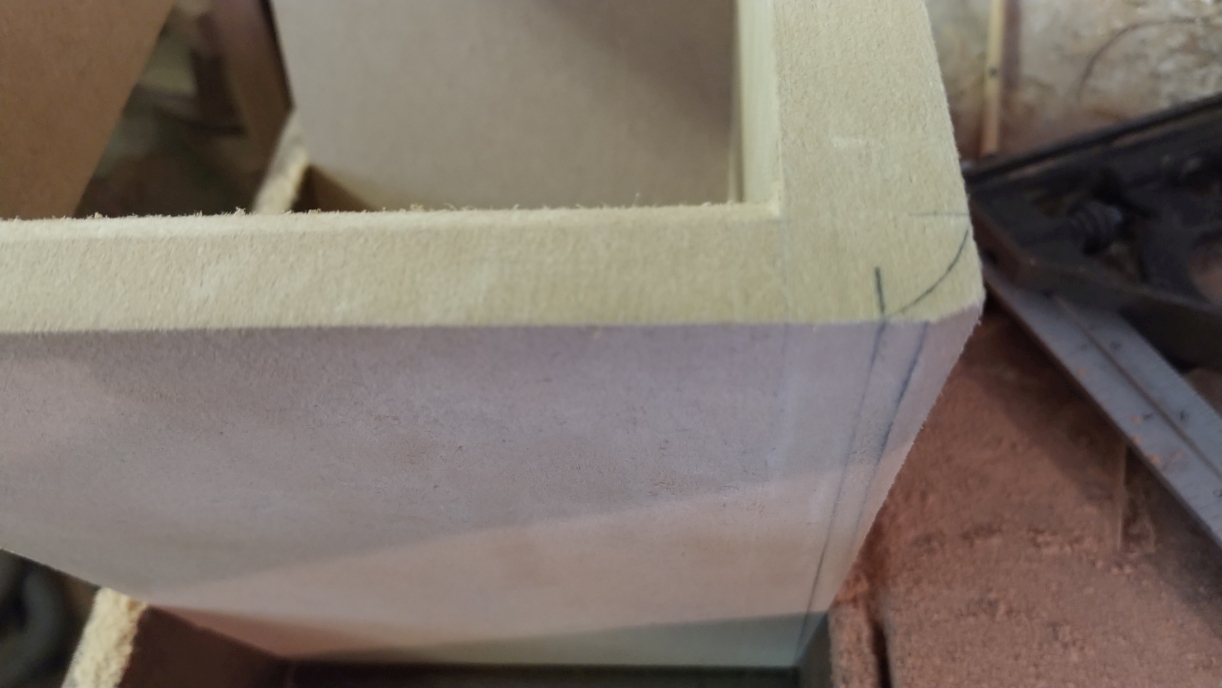
Once the angles are cut, the top itself is then used to set the blade angle for cutting the sides.
The bottom is little more than a brace to keep the front end of the sides positioned, and the back is just a cap. After glue up, I used the horn to scribe the radius at the front, and sanded the taper with a long hard sanding block and 80 grit sandpaper.
|
|
|
|
 |
|
Build Thread: 2Pi Towers, 6Pi Corner horns (and possibly a sub and center)
|
|
|
Re: Build Thread: 2Pi Towers, 6Pi Corner horns (and possibly a sub and center)
|
|
|
Re: Build Thread: 2Pi Towers, 6Pi Corner horns (and possibly a sub and center)
|
|
|
Re: Build Thread: 2Pi Towers, 6Pi Corner horns (and possibly a sub and center)
|
|
|
Re: Build Thread: 2Pi Towers, 6Pi Corner horns (and possibly a sub and center)
|
|
|
Re: Build Thread: 2Pi Towers, 6Pi Corner horns (and possibly a sub and center)
|
|
|
Re: Build Thread: 2Pi Towers, 6Pi Corner horns (and possibly a sub and center)
|
|
|
Re: Build Thread: 2Pi Towers, 6Pi Corner horns (and possibly a sub and center)
|
|
|
Re: Build Thread: 2Pi Towers, 6Pi Corner horns (and possibly a sub and center)
|
|
|
Re: Build Thread: 2Pi Towers, 6Pi Corner horns (and possibly a sub and center)
|
|
|
Re: Build Thread: 2Pi Towers, 6Pi Corner horns (and possibly a sub and center)
|
|
|
Re: Build Thread: 2Pi Towers, 6Pi Corner horns (and possibly a sub and center)
|
|
|
Re: Build Thread: 2Pi Towers, 6Pi Corner horns (and possibly a sub and center)
|
|
|
Re: Build Thread: 2Pi Towers, 6Pi Corner horns (and possibly a sub and center)
|
|
|
Re: Build Thread: 2Pi Towers, 6Pi Corner horns (and possibly a sub and center)
|
|
|
Re: Build Thread: 2Pi Towers, 6Pi Corner horns (and possibly a sub and center)
|
|
|
Re: Build Thread: 2Pi Towers, 6Pi Corner horns (and possibly a sub and center)
|
|
|
Re: Build Thread: 2Pi Towers, 6Pi Corner horns (and possibly a sub and center)
|
|
|
Re: Build Thread: 2Pi Towers, 6Pi Corner horns (and possibly a sub and center)
|
|
|
Re: Build Thread: 2Pi Towers, 6Pi Corner horns (and possibly a sub and center)
|
|
|
Re: Build Thread: 2Pi Towers, 6Pi Corner horns (and possibly a sub and center)
|
|
|
Re: Build Thread: 2Pi Towers, 6Pi Corner horns (and possibly a sub and center)
|
|
|
Re: Build Thread: 2Pi Towers, 6Pi Corner horns (and possibly a sub and center)
|
|
|
Re: Build Thread: 2Pi Towers, 6Pi Corner horns (and possibly a sub and center)
|
|
|
Re: Build Thread: 2Pi Towers, 6Pi Corner horns (and possibly a sub and center)
|
|
|
Re: Build Thread: 2Pi Towers, 6Pi Corner horns (and possibly a sub and center)
|
|
|
Re: Build Thread: 2Pi Towers, 6Pi Corner horns (and possibly a sub and center)
|
Goto Forum:
Current Time: Sun Apr 28 06:25:02 CDT 2024
|


 Posting Rules
 Members
 Search
 Help
Help Register
 Login
Login Get a T-Shirt!


")

