|
Home » Sponsored » Pi Speakers » Build Thread: 2Pi Towers, 6Pi Corner horns (and possibly a sub and center) (Building some Pi Speakers)
| Re: Build Thread: 2Pi Towers, 6Pi Corner horns (and possibly a sub and center) [message #88435 is a reply to message #88057] |
Sat, 14 July 2018 14:45   |
 joshua43214
Messages: 35
Registered: October 2016
Location: USA
|
Baron |
|
|
The horn box is a bit more challenging than it looks at first glance. Clamping the 45degree sides will be very difficult. The method I detail below was not my first choice, but it worked quite well and was of minimal hassle. The best method in my opinion would be to rabbit grooves in the top and bottom that are a snug fit for the sides. This would allow clamping the angled portion without having to worry about everything getting pushed out of alignment. If you opt to get the parts CNC cut, I highly suggest this as a method. Setting up a router guide/jig as way more hassle than the method I used, but if your work style goes in this direction, follow your urges.
It is really important that the miter joint in the sides be cut perfectly square to the top and bottom edges. If this joint is not square, a joint somewhere in the box will not close fully. If this happens, just spread some 5 minute epoxy on the inside of the joint to seal it. The Midhorn is the heart of the 6Pi, it is important that the box be fully sealed and airtight. Taking the time to get all the joints perfect will pay off in the end.
I also made a design change at this point. In my original design, the rear portion of the sides entrapped the front - the assembly method I visualized would have been easier that way. I decided that I preferred the front portion to entrap the rear so less end grain would be visible. My parts had already been rough cut, so I played with the parts to convince myself that I could still make it work. Prudence being the better part of valor, I stopped everything and changed the design in Fusion 360. What looked to be fine on the bench, turned out to not work. After some fiddling, I was able to find a way to use the parts I had already cut. In the end, I settled on using the venerable screw and glue method for getting the sides to close up at the miter. After some experimentation, I found that 5/8" #6 screws (3.3mm x 16mm) worked well.
The back is screwed onto the box, and in my design, I am mounting the crossovers in a box that will attach to the back cover on the midhorn. The back is one of the major weak points in the design - this is a large area that needs to be sealed, and it is made from a material that does not take screws well at all. Poorly executed, the rear cover will degrade the sound. I opted to glue 1x2 pine to the inside of the box to carry the threaded inserts for attaching the rear cover.
I began by ripping a 45degree angle on one edge of the pine, then ripped a 45 degree miter on the rear portion of the side. I carefully marked the position of the pine, clamped a guide along the line, then glued the pine to the sides
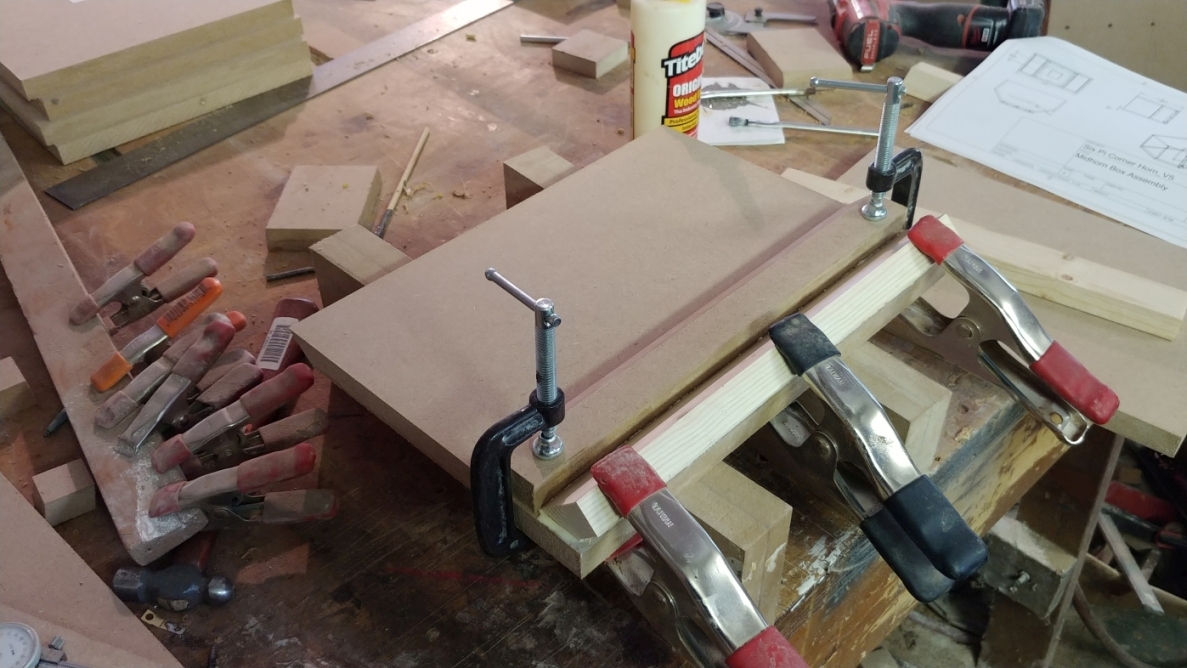 Note the severe angle of the spring clamps. This angle has to be steep enough to force the glue joint to close at the feathered edge. The guide prevents any slippage. Note the severe angle of the spring clamps. This angle has to be steep enough to force the glue joint to close at the feathered edge. The guide prevents any slippage.
Once the glue dried, I ripped the 45degree angle on the back edge. After carefully squaring the miter gauge (a good time to get really fussy), I trimmed all the sides to length.
Next, I carefully marked out the inside width of the box on the top and bottom using the trammel. I used the sides to mark out their lengths, and glued pine corner braces in place.
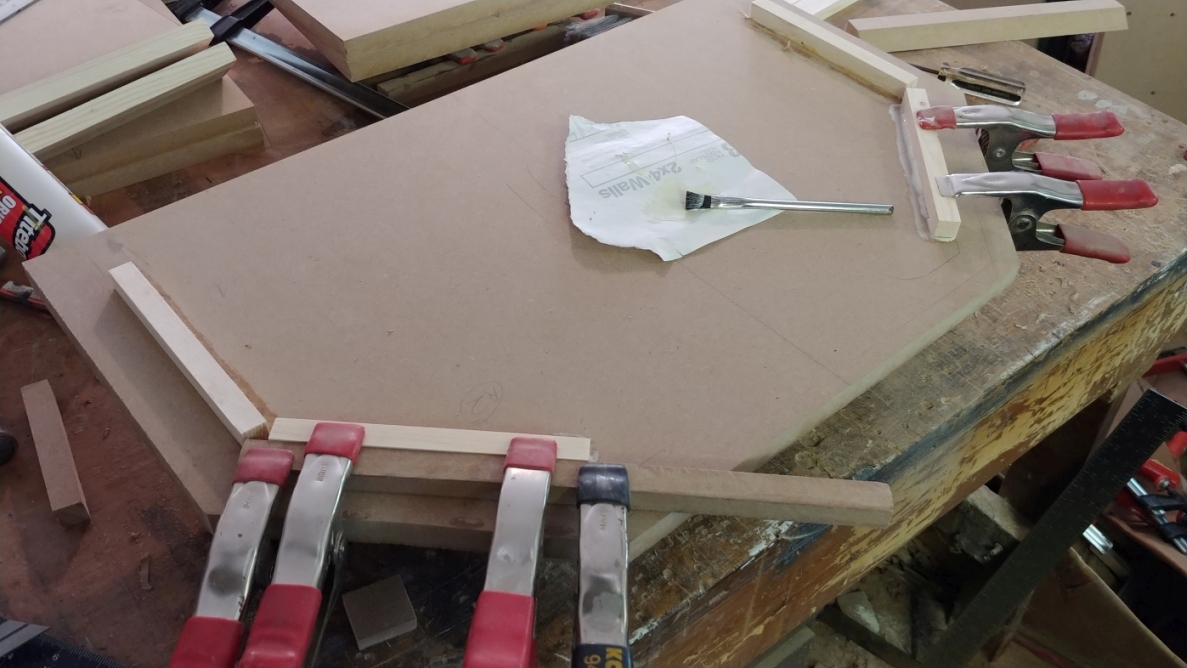
note the scrap clamped along the layout lines. This ensure the pencil line is not lost when the glue squeezes out over it.
I clamped a fence to the drill press table, and drilled the holes for the miter joint screws
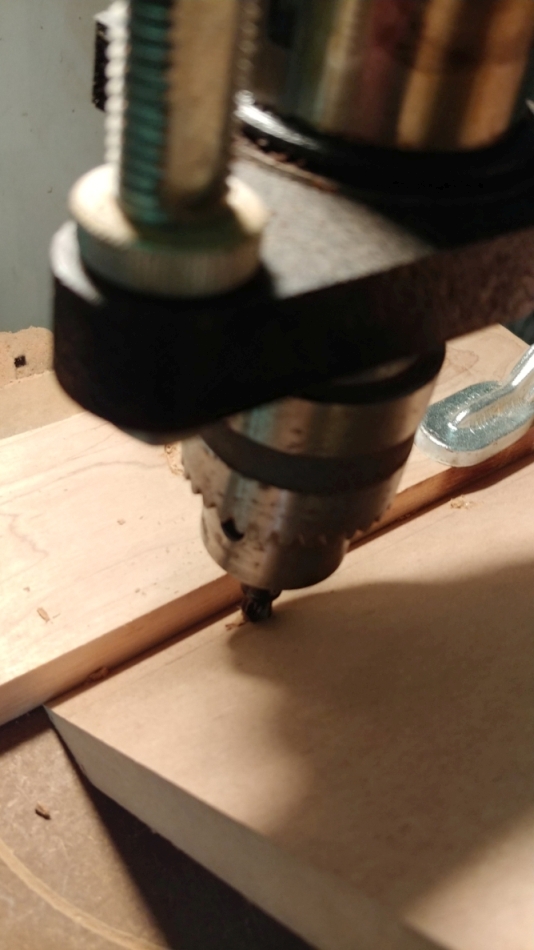
I did not pre-drill the sides for the threaded portion. Instead it assembled and disassembled the parts repeatedly while cleaning up the holes with a counter sink between each assembly. You will not be able to tighten these little screws enough to crush the parts together, so it is important that it get cleaned up well.
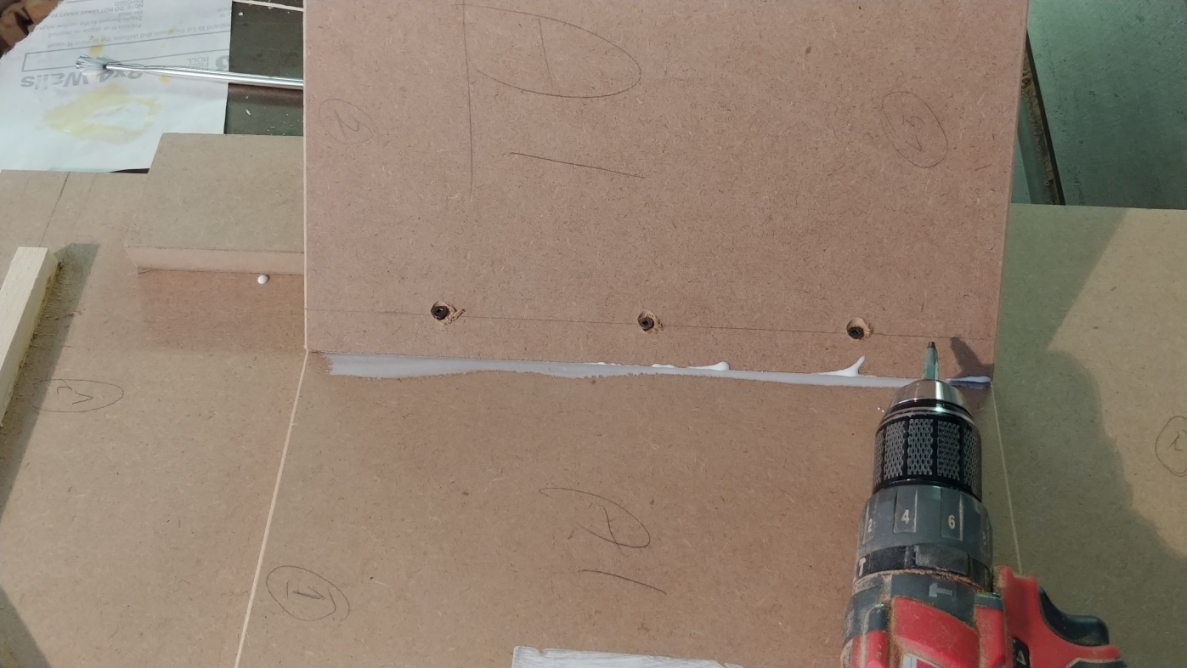
It was immediately apparent during dry assembling the box, that it would take too much time for Tight Bond glue, so I opted for old fashioned Elmer's White Glue.
I chamfered the edges of the sides where they meet the braces. Not doing this might prevent the sides from drawing up to the bracing if any residual glue remains.
I began the assembly by gluing the miter. I tightened the screws just enough to begin cloing the joint, but not enough to make it rigid.
I then put the sides on, followed by the top.
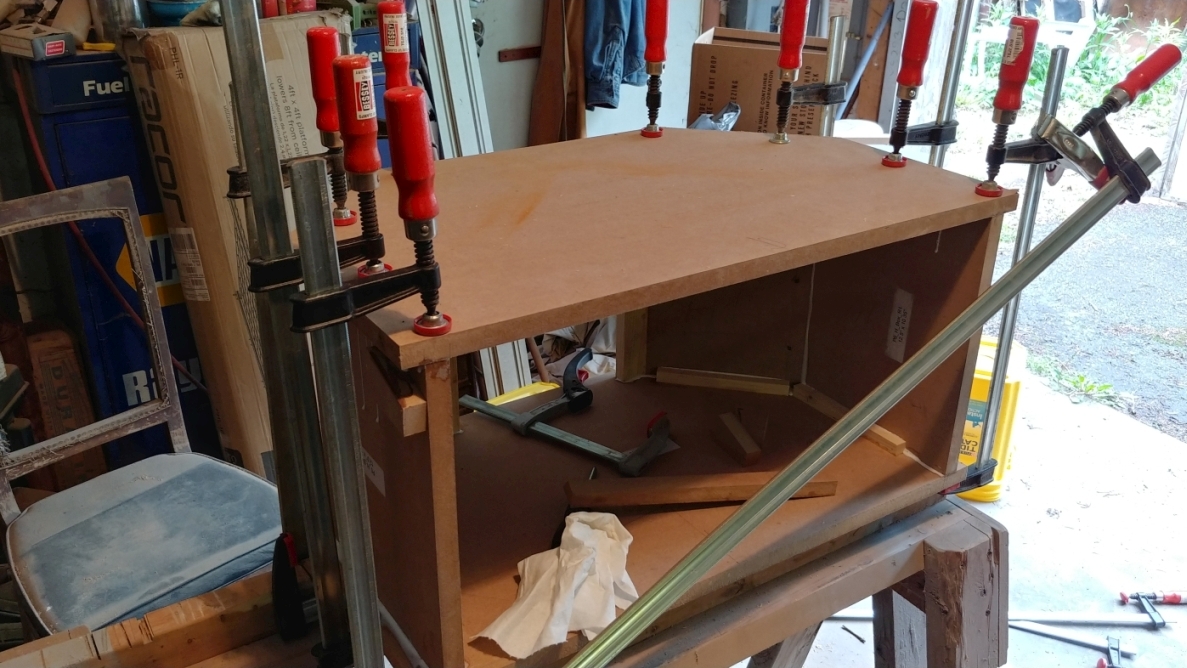
Clamping order is important here. I flushed all the front edges and lightly clamped vertically just at the front. I then clamped the cross wise to pull the side panels up against the braces. Next, I tightened the screws at the miter to draw that shut, and added a vertical clamp over the miter. I only have one clamp large enough to draw the rear side up to the braces that is still light enough to not be unwieldy. So I used this clamp with a piece of scrap to pull the rear sides up to the braces, followed by a vertical clamp to hold it in place. The horizontal clamp is then removed since it will draw the box out of square. Lastly, I measured corner to corner and clamped diagonally to square up the mouth of the box. The mouth needs to be as square as possible. Mine only required a little bit of coercion to square it up.
Next, More midhorn building 
|
|
|
|
 |
|
Build Thread: 2Pi Towers, 6Pi Corner horns (and possibly a sub and center)
|
|
|
Re: Build Thread: 2Pi Towers, 6Pi Corner horns (and possibly a sub and center)
|
|
|
Re: Build Thread: 2Pi Towers, 6Pi Corner horns (and possibly a sub and center)
|
|
|
Re: Build Thread: 2Pi Towers, 6Pi Corner horns (and possibly a sub and center)
|
|
|
Re: Build Thread: 2Pi Towers, 6Pi Corner horns (and possibly a sub and center)
|
|
|
Re: Build Thread: 2Pi Towers, 6Pi Corner horns (and possibly a sub and center)
|
|
|
Re: Build Thread: 2Pi Towers, 6Pi Corner horns (and possibly a sub and center)
|
|
|
Re: Build Thread: 2Pi Towers, 6Pi Corner horns (and possibly a sub and center)
|
|
|
Re: Build Thread: 2Pi Towers, 6Pi Corner horns (and possibly a sub and center)
|
|
|
Re: Build Thread: 2Pi Towers, 6Pi Corner horns (and possibly a sub and center)
|
|
|
Re: Build Thread: 2Pi Towers, 6Pi Corner horns (and possibly a sub and center)
|
|
|
Re: Build Thread: 2Pi Towers, 6Pi Corner horns (and possibly a sub and center)
|
|
|
Re: Build Thread: 2Pi Towers, 6Pi Corner horns (and possibly a sub and center)
|
|
|
Re: Build Thread: 2Pi Towers, 6Pi Corner horns (and possibly a sub and center)
|
|
|
Re: Build Thread: 2Pi Towers, 6Pi Corner horns (and possibly a sub and center)
|
|
|
Re: Build Thread: 2Pi Towers, 6Pi Corner horns (and possibly a sub and center)
|
|
|
Re: Build Thread: 2Pi Towers, 6Pi Corner horns (and possibly a sub and center)
|
|
|
Re: Build Thread: 2Pi Towers, 6Pi Corner horns (and possibly a sub and center)
|
|
|
Re: Build Thread: 2Pi Towers, 6Pi Corner horns (and possibly a sub and center)
|
|
|
Re: Build Thread: 2Pi Towers, 6Pi Corner horns (and possibly a sub and center)
|
|
|
Re: Build Thread: 2Pi Towers, 6Pi Corner horns (and possibly a sub and center)
|
|
|
Re: Build Thread: 2Pi Towers, 6Pi Corner horns (and possibly a sub and center)
|
|
|
Re: Build Thread: 2Pi Towers, 6Pi Corner horns (and possibly a sub and center)
|
|
|
Re: Build Thread: 2Pi Towers, 6Pi Corner horns (and possibly a sub and center)
|
|
|
Re: Build Thread: 2Pi Towers, 6Pi Corner horns (and possibly a sub and center)
|
|
|
Re: Build Thread: 2Pi Towers, 6Pi Corner horns (and possibly a sub and center)
|
|
|
Re: Build Thread: 2Pi Towers, 6Pi Corner horns (and possibly a sub and center)
|
Goto Forum:
Current Time: Sun Apr 28 08:15:36 CDT 2024
|


 Posting Rules
 Members
 Search
 Help
Help Register
 Login
Login Get a T-Shirt!


")

