|
Home » Sponsored » Pi Speakers » Build Thread: 2Pi Towers, 6Pi Corner horns (and possibly a sub and center) (Building some Pi Speakers)
| Re: Build Thread: 2Pi Towers, 6Pi Corner horns (and possibly a sub and center) [message #88075 is a reply to message #88057] |
Wed, 23 May 2018 22:52   |
 joshua43214
Messages: 35
Registered: October 2016
Location: USA
|
Baron |
|
|
Before I even began making the CAD drawings, I was worried about finishing. If the hulking monolith of the 2Pi gets a low WAF score, the 6Pi Cornerhorn gets a total fail. Fortunately, I no longer have to worry about WAF scores, but I do prefer things to look good.
Veneering was definitely an option. I have several hundred board feet of "African Mahogany" that I let my lumber supplier talk me into a bunch of years ago. The stuff is so awful to work with I have never sold it, but I would be otherwise "free" material. After much consideration, I decided that it just has too much figure and would serve only to draw attention to the speakers. Not such a problem with the 2Pi's but I don't really want to make the 6Pi's stand out too much. I have close to a thousand board feet of White Oak, and a fuming chamber large enough to hold even the largest parts. Fumed oak is wonderful, and would match my house nicely. Fuming veneer creates an entire new set of issues because the ammonia will attack the glue if it is too thin, and veneer thick enough to fume has a major effect on construction and joinery. I am knee deep in projects already, and I need new speakers more than I need yet another showcase piece.
In the end I decided to paint the speakers, and after looking at thousands of pictures of painted speakers, I settled on black paint. What I want is for the eye to not be drawn to the speakers. Flat chalk black actually creates a negative space that the eye is drawn too. Likewise, gloss ivory black demands attention because it is so lovely. I also knew I wanted some texture to the paint. I wanted just enough eggshell to prevent reflections, but not so much it once again creates negative space. This eliminates using my spray equipment, and eliminates high texture paints like Duratex.
I started experimenting with paints the day after I began sawing up materials, and was still experimenting with paints while I was applying primer. I finally settled on Sherwin Williams satin black All Purpose latex enamel. The color is exactly what I wanted.
I will point out at this point that I am not an expert on the subject of paint. I have some knowledge on the topic, I would say I have enough knowledge to get myself in trouble, and not enough to bail myself out. The vast majority of my experience relates to finishing furniture where I used nitrocellulose lacquer or solvent based automotive lacquers in conjunction with stains or shellac.
While I do feel confident detailing my approach to painting these speakers, I urge anyone with real knowledge of painting to chime in and add their knowledge.
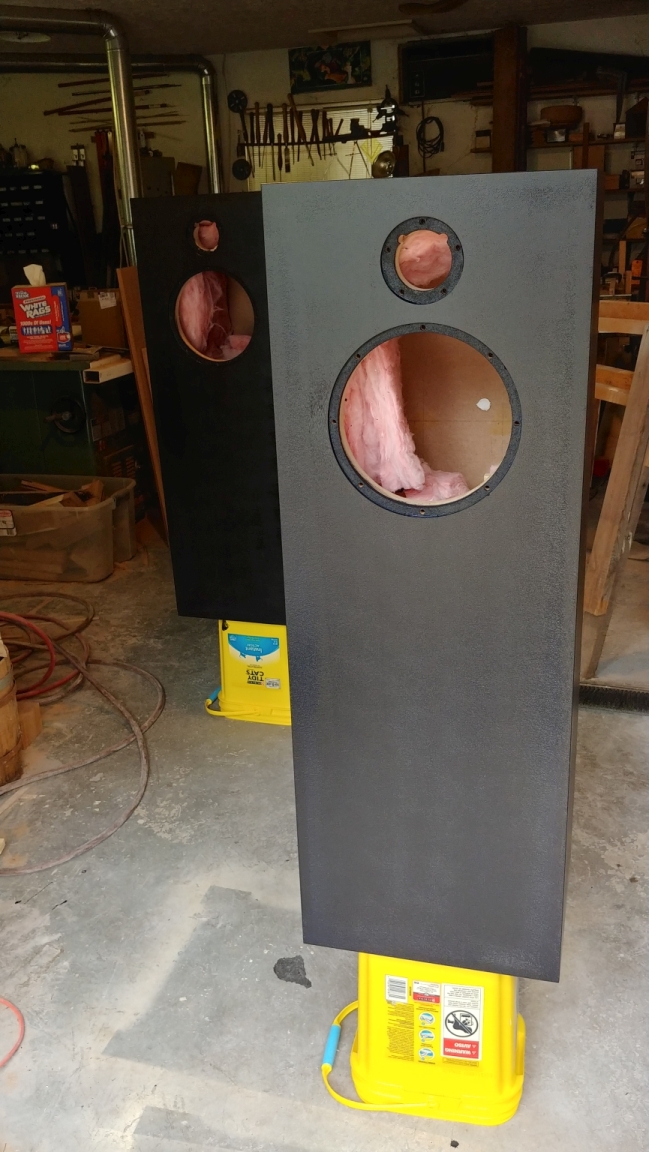
At this point, construction of the speaker is complete except for the cut out for the wires. I also still have not made a decision about whether to add acoustic fabric to the baffle or not. I decided at the last moment not to use the terminal cup that comes with the kit. By the time I made this decision, the primer was already on. A word of warning, the wire kit that comes with the 2Pi tower is about 3 feet too short, something I did not notice until after I had installed the binding posts. I drilled the holes for the binding posts as close to the floor as I could go and still be able to reach them on the inside through the driver hole (this is about mid-speaker). The wire is so short, you have to put the terminals almost directly behind the driver.
Finishing:
I began by sanding the entire speaker with 80 grit paper on a hard block, paying special attention to making sure the ends are flush with the panels. I closed off the driver cut-outs with 2" painters tape. I just stretched the tape over the holes, then used a sharp knife to cut the tape around the hole and let the tape fall into the recess. I want to make sure the inside edges of the recess get filler. I removed the tape after sanding so the recess could get a coat of black.
After sanding, I wiped the speaker down with a very lightly dampened clothe and covered the entire thing with filler. I use garden variety all-purpose joint compound meant for drywall. The stuff I use is gypsum in a vinyl binder.
Do not be shy with filler. Force it into the MDF with a trowel, especially the raw edges. I let it dry overnight, then sanded it entirely off with 180 grit paper and a hard block.
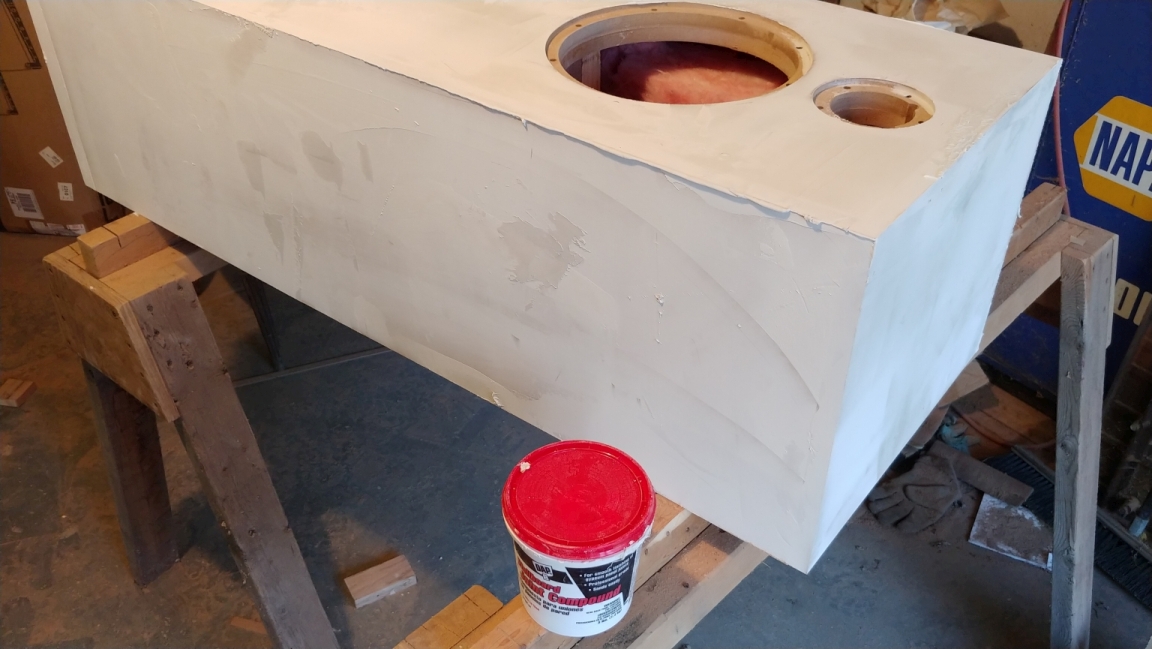
Once the filler was sanded off, I sanded the corners to about a 1/16" (1.5mm) radius. The reason for doing this last is because the MDF edges are very fragile, and the corner radius will get damaged rolling the speakers around, or even by the trowel itself. Making a consistent radius by hand is not difficult, but it does require a lot of practice for most people. A round over bit in the router, followed by 220grit on a hard block is a good idea. I suggest not using a soft or contoured block since it will ruin the nice crisp transition the router should produce if adjusted properly.
I then sprayed the speakers with Rustoleum all purpose primer. I was still experimenting with paints at this point, and I knew from experience that this primer will work with about anything. I sanded the primer back with 180grit and a soft block to remove the stubble, but not enough to remove the paint.
I should make a few notes here. A paint ready surface is a much higher quality surface than a stain ready surface. Paint will reveal and magnify the smallest flaw in the surface, and the smoother the paint, the more it will magnify it. If you plan to use a gloss paint, it is very important to get a really good surface under it.
Mixing types or even brands of filler/primer/paint can lead to binding and curing issues. This is not such a problem with latex, but it can be a huge problem with polyurethanes and lacquers. If you plan to use any type of oil, urethane, or solvent based finish, I strongly suggest using filler, primer, and paint from the same brand unless there is a real expert at the counter that can attest that the products will work together.
Lastly, just because the can says "1 coat, primer and paint in one" does not mean that it will do the job in one coat. Take this statement the same way you do "gap filling" glue - it is a fictional character that only exists in science fiction. If you are not getting proper coverage, don't just roll on more paint, wait a bit and roll on another coat.
After some experimentation, I settled on a faux mo-hair roller. This produced a modest eggshell finish that looked nice on the test boards.
At this point the first of my problems emerged. The latex paint dries far too fast for the surface to fully flow out. I had some paint extender from another project a few years ago, it looks and smells like white glue. I added some to the paint, and decided I would attempt to tip off the surface after I rolled it up. Like I said, I know enough to get myself into trouble, but not enough to bail myself out. Tipping off 5 panels proved to be beyond my skills and I wound up with 3 or 4 minor sags at some of the edges. To make matters worse, the paint proved to be very slow to cure. After 5 days, it was finally hard enough to sand. It would pill up a bit, but not enough to clog the paper. I will say the paint was extremely tough, I had to use 100grit paper to cut it, 180grit would not cut through it.
I returned to Sherwin Williams where I interrupted their resident expert from his important work, and laid out the full story. He agreed the Rustoleum should not be a problem, and that the filler I used is also known to be fine. That left the extender or the weather. We had a string of days under 60 (15C), and the days it did get over 60 it rained.
I was also not satisfied with the texture, it had more texture than I really wanted (see above pic), which was why I had attempted to tip it off. After more discussion with the expert, I decided to try a flock roller, and purchased some M-1 extender.
I sanded the previous paint back enough to remove the old eggshell texture with 100grit. I probably should have done a finish sand with 180grit because some of the scratches left by the 100grit telegraphed through the next coat. My plan was to give them a final coat when they got moved to their final position as rear speakers, since I expected them to get damaged if I chose to put feet under them or add fabric. Currently they are being used as mains while the 6Pi's are being constructed.
dirty hand prints courtesy of my son 
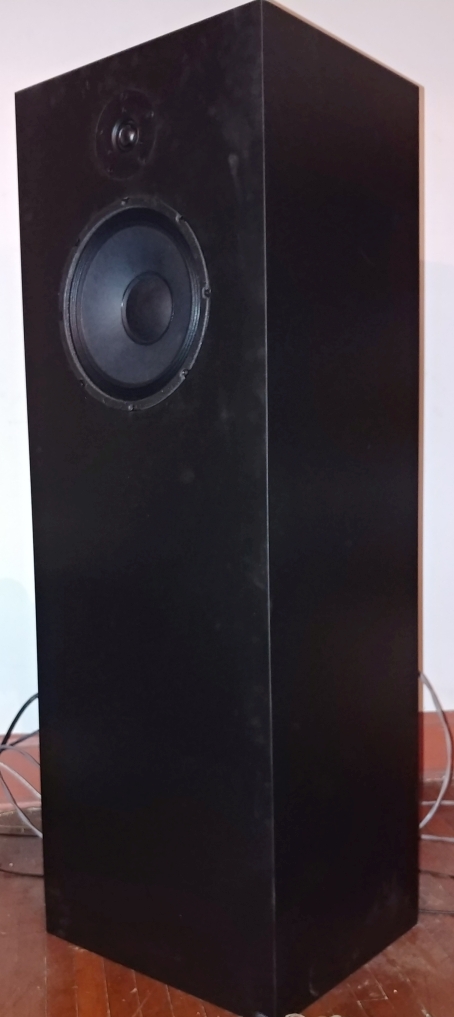
The color and texture do exactly what I want, but it also makes them difficult to photograph. After they have their final coat, I will try to get some shots of them in sunlight.
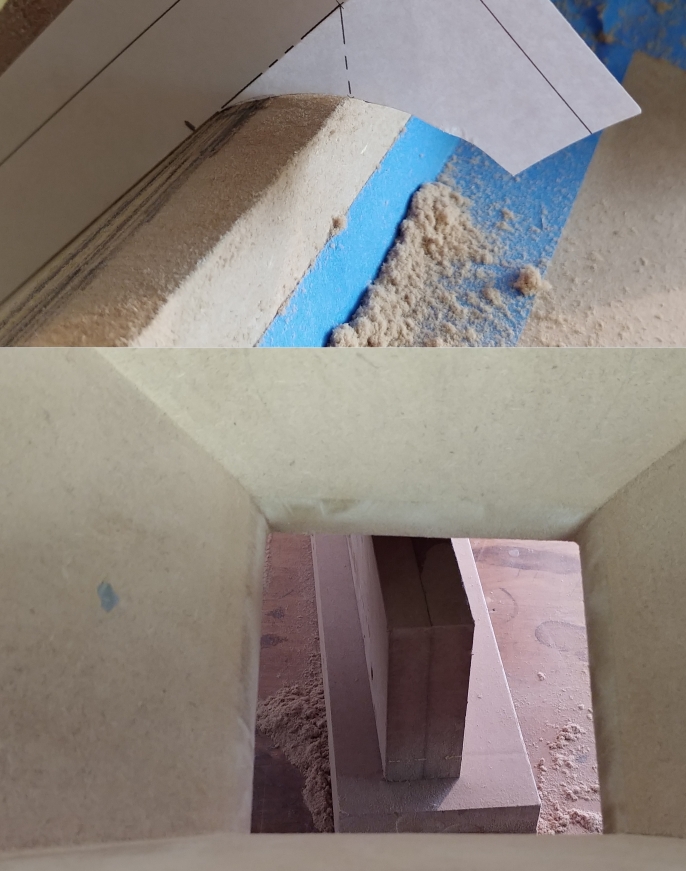
Up Next: The 6Pi's (what we are all waiting for) or a review of the 2Pi Tower sound (will depend on my mood).
Here is a teaser from the 6Pi build
|
|
|
|
 |
|
Build Thread: 2Pi Towers, 6Pi Corner horns (and possibly a sub and center)
|
|
|
Re: Build Thread: 2Pi Towers, 6Pi Corner horns (and possibly a sub and center)
|
|
|
Re: Build Thread: 2Pi Towers, 6Pi Corner horns (and possibly a sub and center)
|
|
|
Re: Build Thread: 2Pi Towers, 6Pi Corner horns (and possibly a sub and center)
|
|
|
Re: Build Thread: 2Pi Towers, 6Pi Corner horns (and possibly a sub and center)
|
|
|
Re: Build Thread: 2Pi Towers, 6Pi Corner horns (and possibly a sub and center)
|
|
|
Re: Build Thread: 2Pi Towers, 6Pi Corner horns (and possibly a sub and center)
|
|
|
Re: Build Thread: 2Pi Towers, 6Pi Corner horns (and possibly a sub and center)
|
|
|
Re: Build Thread: 2Pi Towers, 6Pi Corner horns (and possibly a sub and center)
|
|
|
Re: Build Thread: 2Pi Towers, 6Pi Corner horns (and possibly a sub and center)
|
|
|
Re: Build Thread: 2Pi Towers, 6Pi Corner horns (and possibly a sub and center)
|
|
|
Re: Build Thread: 2Pi Towers, 6Pi Corner horns (and possibly a sub and center)
|
|
|
Re: Build Thread: 2Pi Towers, 6Pi Corner horns (and possibly a sub and center)
|
|
|
Re: Build Thread: 2Pi Towers, 6Pi Corner horns (and possibly a sub and center)
|
|
|
Re: Build Thread: 2Pi Towers, 6Pi Corner horns (and possibly a sub and center)
|
|
|
Re: Build Thread: 2Pi Towers, 6Pi Corner horns (and possibly a sub and center)
|
|
|
Re: Build Thread: 2Pi Towers, 6Pi Corner horns (and possibly a sub and center)
|
|
|
Re: Build Thread: 2Pi Towers, 6Pi Corner horns (and possibly a sub and center)
|
|
|
Re: Build Thread: 2Pi Towers, 6Pi Corner horns (and possibly a sub and center)
|
|
|
Re: Build Thread: 2Pi Towers, 6Pi Corner horns (and possibly a sub and center)
|
|
|
Re: Build Thread: 2Pi Towers, 6Pi Corner horns (and possibly a sub and center)
|
|
|
Re: Build Thread: 2Pi Towers, 6Pi Corner horns (and possibly a sub and center)
|
|
|
Re: Build Thread: 2Pi Towers, 6Pi Corner horns (and possibly a sub and center)
|
|
|
Re: Build Thread: 2Pi Towers, 6Pi Corner horns (and possibly a sub and center)
|
|
|
Re: Build Thread: 2Pi Towers, 6Pi Corner horns (and possibly a sub and center)
|
|
|
Re: Build Thread: 2Pi Towers, 6Pi Corner horns (and possibly a sub and center)
|
|
|
Re: Build Thread: 2Pi Towers, 6Pi Corner horns (and possibly a sub and center)
|
Goto Forum:
Current Time: Sun Apr 28 11:35:56 CDT 2024
|


 Posting Rules
 Members
 Search
 Help
Help Register
 Login
Login Get a T-Shirt!


")

