|
Home » Sponsored » Pi Speakers » Build Thread: 2Pi Towers, 6Pi Corner horns (and possibly a sub and center) (Building some Pi Speakers)
| Re: Build Thread: 2Pi Towers, 6Pi Corner horns (and possibly a sub and center) [message #88060 is a reply to message #88057] |
Tue, 22 May 2018 10:07   |
 joshua43214
Messages: 35
Registered: October 2016
Location: USA
|
Baron |
|
|
If this was the carcass for a cabinet, one would typically glue the 4 sides in one go, then glue on the top and bottom.
A speaker though has bracing and stuffing, both of which would be very difficult to install from the ends.
I used a somewhat unconventional method of assembly that both allowed me to keep everything square, yet still gave access for installing braces and stuffing.
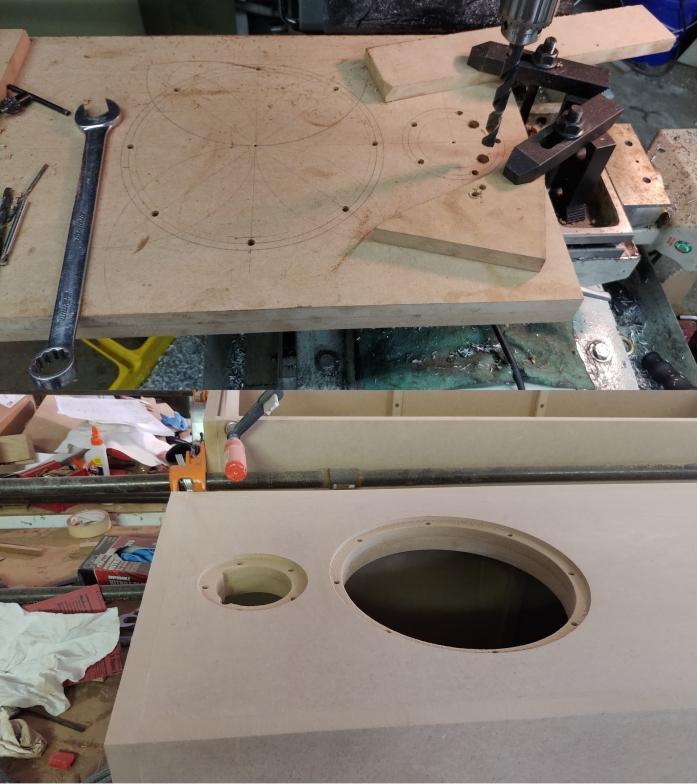
My milling machine has a DRO, so I used the hole pattern feature on it to drill the mounting holes, then used a circle guide and router to cut the rabbit and cut out for the drivers. The mounting holes are deep and close to the cut out, a drill guide is a really good idea if you do not have a drill press large enough to accommodate the baffle.
I should mention that I am a huge advocate of the "file to fit, and paint to hide" school. This is the essential element to "as built" construction. I also believe that it is almost impossible to dry fit parts too many times, and large glue up should always be practiced.
Glue seems to turn into a first class lubricant at the worst possible times leaving parts that joined up perfectly hopelessly out of alignment. Making a dry run will not only ensure you really can assemble things in your planned order, but also put clamps where you plan too. It will also ensure you have everything on hand.
My plan was as follows: glue the sides to the baffle, glue the top and bottom on, install the stuffing, install the bracing, glue in the rear panel.
My design has the front and rear panel fully captured on all 4 sides. I choose this to take advantage of the extra surface area of the doubled baffle even though it puts the raw edges of the sides to the front of the speaker. I also want the sides, top and bottom to be very slightly proud of the baffle so they can be sanded back flush.
Since the back and baffle are fully captured, it is important that the speaker carcass be glued up so the back can be installed last - in other words, the carcass cannot be allowed to twist out of shape while the glue is drying.
I began by cutting scrap to space the baffle and back. These spacers will do double duty later for attaching the bracing. I used one of the off cuts from the baffle to position the spacer, and glued them down. The pic should be pretty self explanatory. It is important that the spacers be square.
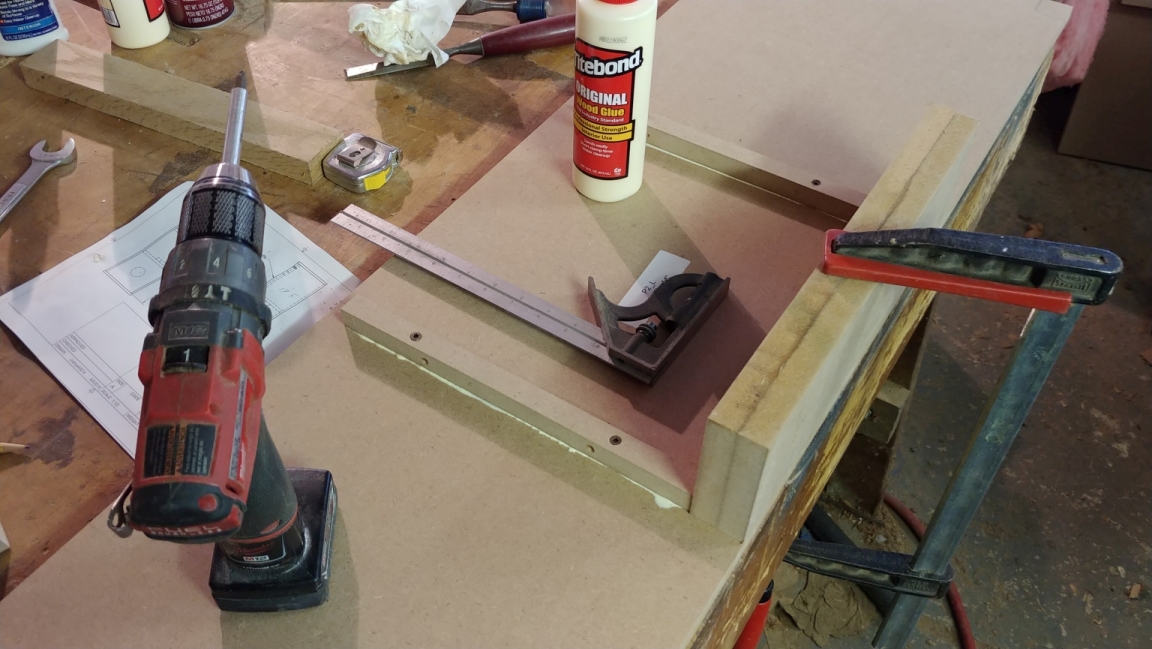
Those off cuts from the baffle proved to be extremely useful during the entire build process to lift parts off the bench for clamping. It was a happy accident for me, but I would suggest adding a few inches to the rough cut baffles for them.
I then dry assembled the parts to make sure everything fit properly.
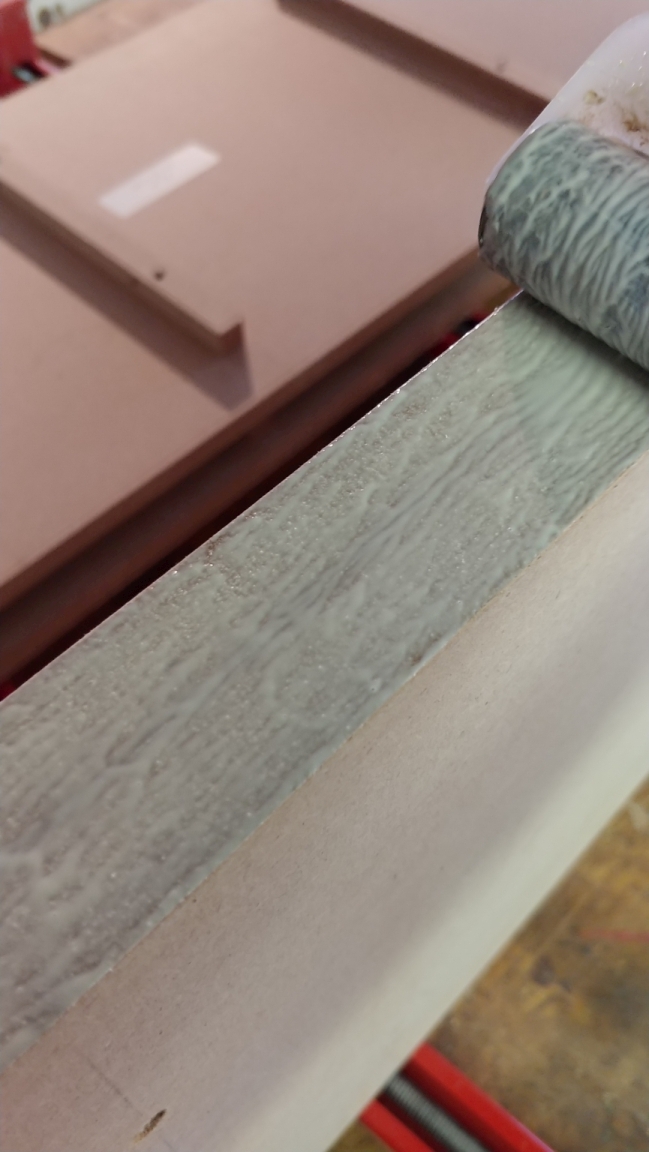
Rollers are excellent for quickly spreading glue. Not only do they easily put down the right amount, they force it into the wood. Note this is the perfect amount of glue, it is just thick enough to be almost opaque.
I used Tightbond for the carcass. In my opinion, it is the ideal glue for this. It has a very short clamping time, and well constructed joints can be handled in about an hour.
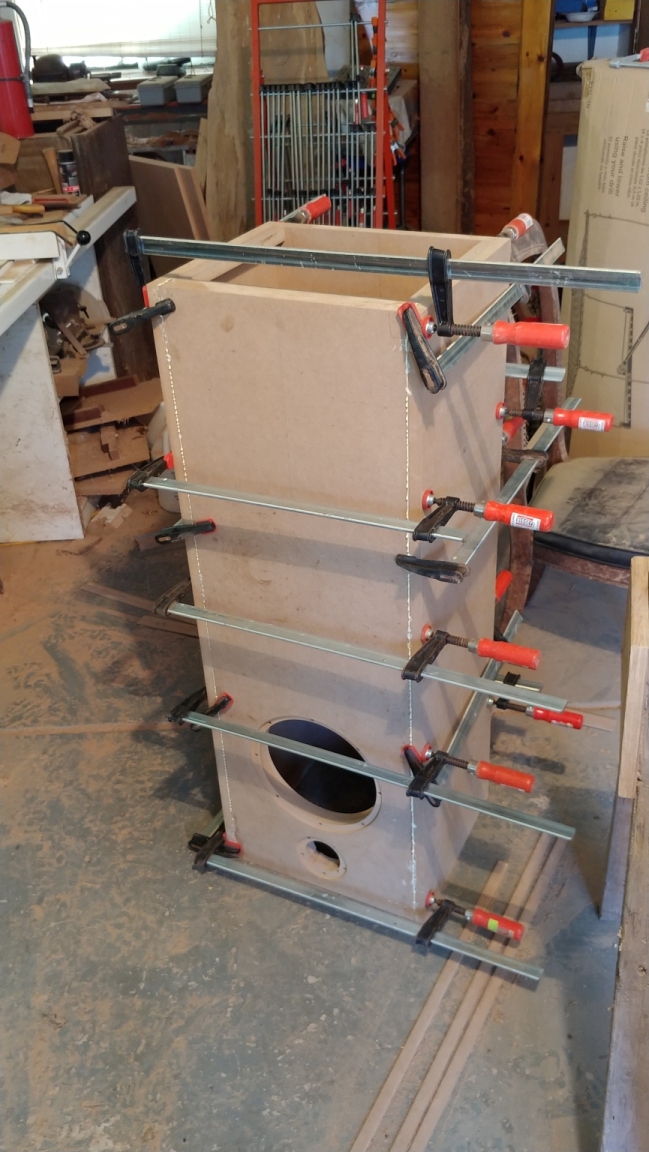
To get everything to come together in proper alignment, I used the following order of operations:
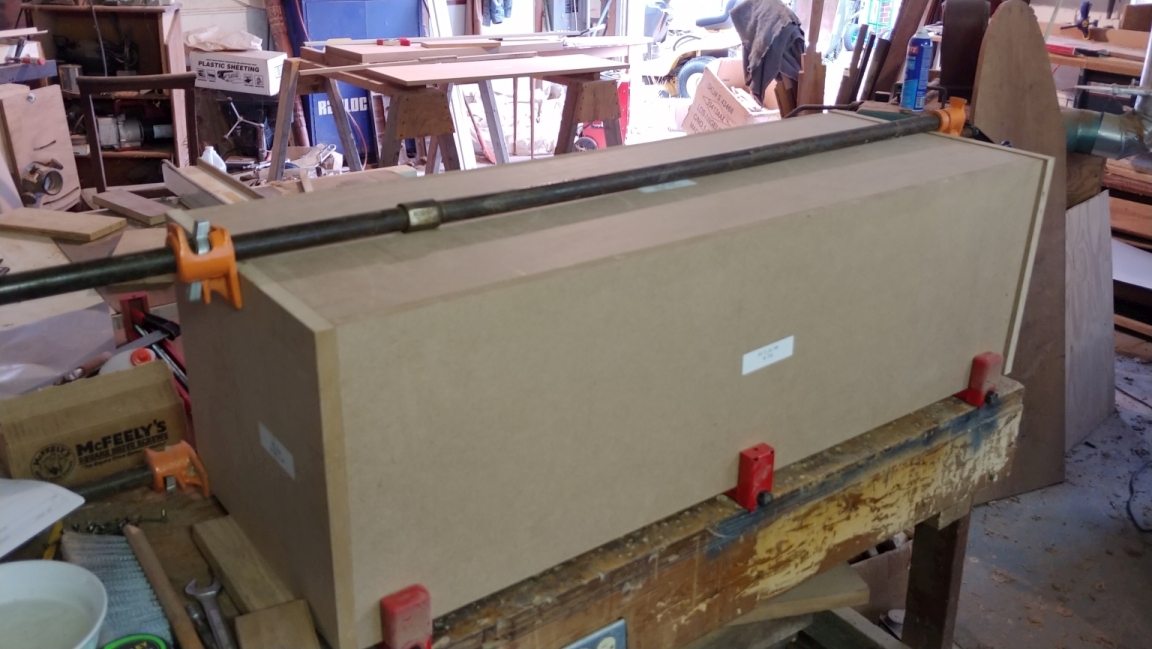
Apply glue to the edges of the baffle and the sides. Set the baffle on the bar clamps, then place the sides. close the clamps just enough to keep the sides from tipping over, but not enough to squeeze out any glue.
Set the back into place with no glue.
Place the top and bottom panels into position, and apply mild pressure with pipe clamps.
Place bar clamps front to back over the spacers to pull the baffle against them.
Double check all is lined up, and tighten the bar clamps to close the joint between the sides and baffle.
Let sit for 5 minutes for the working time to expire, then remove the pipe clamps and pop the top and bottom off. Don't wait too long or they will get glued on.
It might sound a bit complicated, but it really is not. A single practice run showed me I had to make some adjustment to clamp placement so I could remove the pipe clamps, and it took less than 2 minutes to complete the clamping.
After about 10 minutes, the carcass can be moved out of the way to dry for an hour before the next stage.
To be Continued...
|
|
|
|
 |
|
Build Thread: 2Pi Towers, 6Pi Corner horns (and possibly a sub and center)
|
|
|
Re: Build Thread: 2Pi Towers, 6Pi Corner horns (and possibly a sub and center)
|
|
|
Re: Build Thread: 2Pi Towers, 6Pi Corner horns (and possibly a sub and center)
|
|
|
Re: Build Thread: 2Pi Towers, 6Pi Corner horns (and possibly a sub and center)
|
|
|
Re: Build Thread: 2Pi Towers, 6Pi Corner horns (and possibly a sub and center)
|
|
|
Re: Build Thread: 2Pi Towers, 6Pi Corner horns (and possibly a sub and center)
|
|
|
Re: Build Thread: 2Pi Towers, 6Pi Corner horns (and possibly a sub and center)
|
|
|
Re: Build Thread: 2Pi Towers, 6Pi Corner horns (and possibly a sub and center)
|
|
|
Re: Build Thread: 2Pi Towers, 6Pi Corner horns (and possibly a sub and center)
|
|
|
Re: Build Thread: 2Pi Towers, 6Pi Corner horns (and possibly a sub and center)
|
|
|
Re: Build Thread: 2Pi Towers, 6Pi Corner horns (and possibly a sub and center)
|
|
|
Re: Build Thread: 2Pi Towers, 6Pi Corner horns (and possibly a sub and center)
|
|
|
Re: Build Thread: 2Pi Towers, 6Pi Corner horns (and possibly a sub and center)
|
|
|
Re: Build Thread: 2Pi Towers, 6Pi Corner horns (and possibly a sub and center)
|
|
|
Re: Build Thread: 2Pi Towers, 6Pi Corner horns (and possibly a sub and center)
|
|
|
Re: Build Thread: 2Pi Towers, 6Pi Corner horns (and possibly a sub and center)
|
|
|
Re: Build Thread: 2Pi Towers, 6Pi Corner horns (and possibly a sub and center)
|
|
|
Re: Build Thread: 2Pi Towers, 6Pi Corner horns (and possibly a sub and center)
|
|
|
Re: Build Thread: 2Pi Towers, 6Pi Corner horns (and possibly a sub and center)
|
|
|
Re: Build Thread: 2Pi Towers, 6Pi Corner horns (and possibly a sub and center)
|
|
|
Re: Build Thread: 2Pi Towers, 6Pi Corner horns (and possibly a sub and center)
|
|
|
Re: Build Thread: 2Pi Towers, 6Pi Corner horns (and possibly a sub and center)
|
|
|
Re: Build Thread: 2Pi Towers, 6Pi Corner horns (and possibly a sub and center)
|
|
|
Re: Build Thread: 2Pi Towers, 6Pi Corner horns (and possibly a sub and center)
|
|
|
Re: Build Thread: 2Pi Towers, 6Pi Corner horns (and possibly a sub and center)
|
|
|
Re: Build Thread: 2Pi Towers, 6Pi Corner horns (and possibly a sub and center)
|
|
|
Re: Build Thread: 2Pi Towers, 6Pi Corner horns (and possibly a sub and center)
|
Goto Forum:
Current Time: Sun Apr 28 04:53:37 CDT 2024
|


 Posting Rules
 Members
 Search
 Help
Help Register
 Login
Login Get a T-Shirt!


")

