|
Home » Sponsored » Pi Speakers » Build Thread: 2Pi Towers, 6Pi Corner horns (and possibly a sub and center) (Building some Pi Speakers)
| Re: Build Thread: 2Pi Towers, 6Pi Corner horns (and possibly a sub and center) [message #88059 is a reply to message #88057] |
Tue, 22 May 2018 08:17   |
 joshua43214
Messages: 35
Registered: October 2016
Location: USA
|
Baron |
|
|
After completing the model, I ordered up all the little parts that would be needed. Lots of threaded inserts, #10 cap head screws, banana plugs, etc. I also decided to replace my 20year old speaker wires. I sourced all the fasteners from McMaster Carr. I use them only because they are very reliable, there are cheaper places. I sourced the wire (Belden 5000UE) and banana plugs from Blue Jean Cable, and banana jacks (Dayton Audio BPA-38G) from Parts Express.
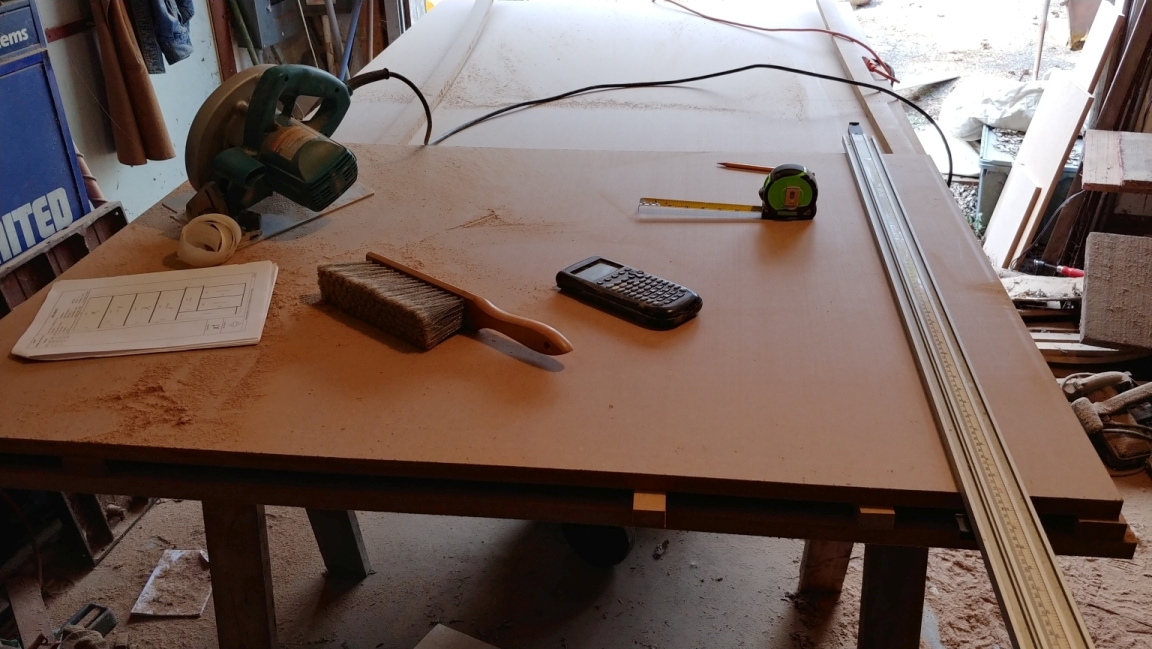
Cutting the Parts:
Cutting large panels that are both consistent in size, and square is always a challenge. Most big box lumber yards will cut sheet goods for you. My experience is that the cuts are never very dimensionally accurate, never consistent, and usually have damage to the edge from the operator not being careful enough. The raw edge of MDF is very rough, and when it is pushed through a vertical panel saw, it rocks around on the rollers, to make matters worse, the off cut is pulled down onto the blade by gravity. If you can't transport the full sheets home, I suggest only letting the lumber yard rough cut the panels into more manageable sizes, and do all the finish cutting at home. Store MDF flat on the floor, or as vertical as possible to prevent bowing.
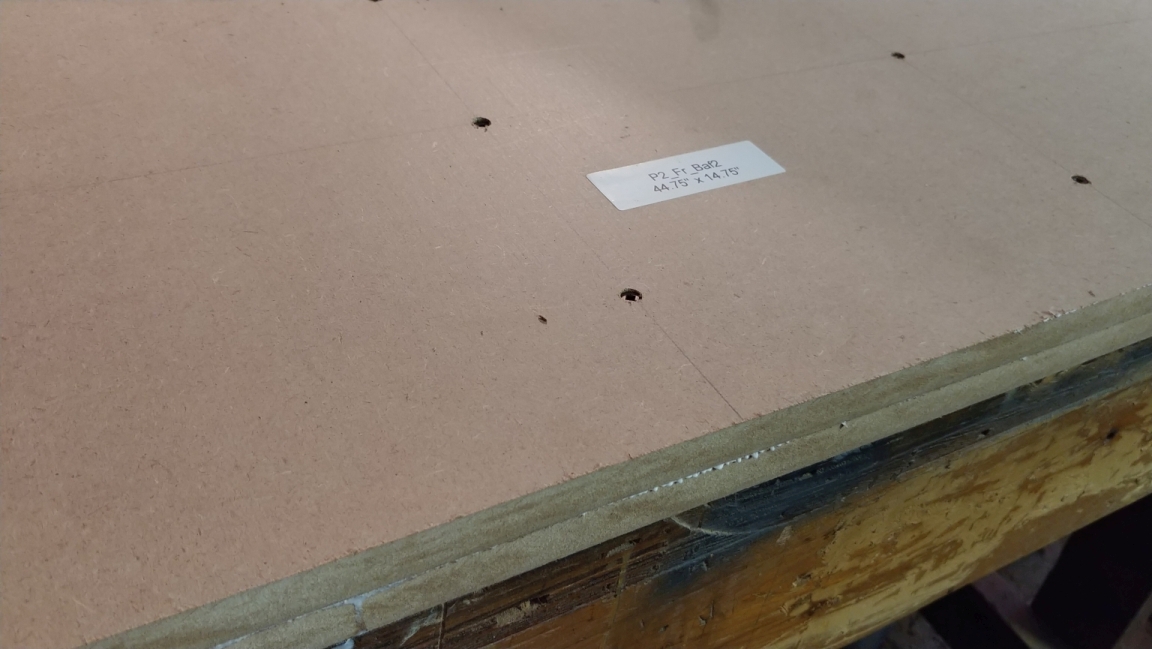
I stacked all my sheets on a pair of saw horses, then used pieces of scrap up elevate the top sheet for rough cutting. Label your parts! If you are like me, the rough cut parts at the end of the panel get left over-sized and easily get mistaken for a different part. Use stick on labels, blank labels and a sharpie are fine if you don't want to print them. I print my labels before I cut, and I know I am done when I run out of labels. I suggest not using pencil (it easily rubs off MDF), and never use a marker directly on the MDF (it bleeds through).
I used 3/4" (19mm) MDF, and allowed 3/8" (10mm) between parts during the roughing. This gives me about 3mm of extra to trim off.
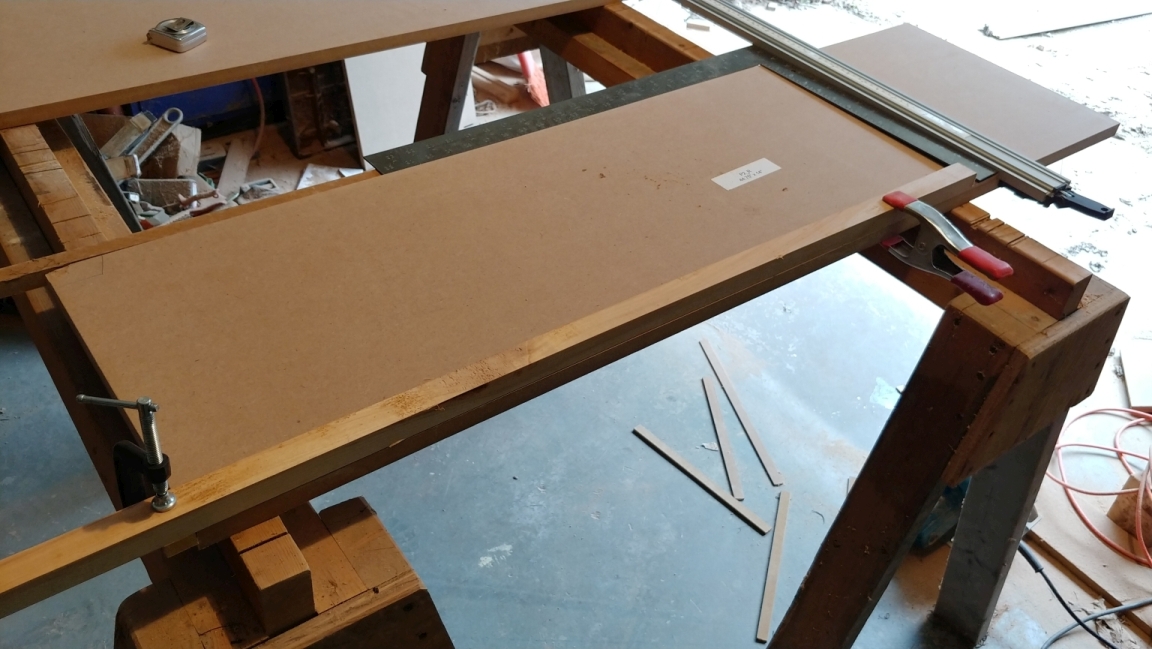
Once all the panels are rough cut, I ripped them to final width on the table saw. I start by putting the straightest rough edge against the fence, rip slightly over-sized, then run the fresh edge along the fence for final dimension. This last fresh edge is your reference edge, mark it with an arrow as it comes off the saw. It is important (like really important) to always work from a single reference.
The tricky part is cross cutting so the panels are both consistent in length and square.
I use a framing square to set the cross cut guide. You can spend a lot of money of a precision square, but unless you need the scale to be really precise and need a ground edge on it, I suggest saving your money for better things. Google up "squaring a square with a punch." A cheap square can be made extremely accurate very easily by hand, and then abused to your heart's content with no worries. My preference is for cheap plated squares because it is easier to scrape glue off of them.
Study the image below for getting the second cut both square and consistent. The square is placed along the reference edge. The end already cut has a square drawn at the square corner (upper left). A piece of long scrap has a block of wood clamped to it, and is used as a story stick to get consistent lengths. The story stick is held to the panel with a spring clamp, and the square carefully butted up against it and used to set the cutting guide. If you are better with a circular saw than me, you can probably just use the square as a guide. If you take your time and are careful, you will probably be pleasantly surprised at how square and consistent your panels are.
Save your off cuts! You will need them later.
Laminating the Baffle:
It is the glue you can't see that is holding your parts together.
When I built my shop, one of the things that was imperative was the ability to be able to saw my own veneer, and do large laminations. I have a vacuum panel clamp big enough to laminate full sheets of MDF, and I have done quite a bit of laminating using a whole range of techniques. For this job, it was not worth the trouble of setting up the panel clamp, instead I used the tried and true screw and glue method.
There are any number of glues that can be used to laminate panels, some good and some bad. The 2 worst glues to use for this are yellow glue (Tightbond), polyurethane (Gorrilla Glue). Yellow glues have a short open time and even shorter working time. Unless you have a big panel clamp, it will be about impossible to spread the glue properly and get it clamped before the working time expires. Yellow glue is also very thick, and requires huge clamping force to get it to flow, and it will resist flowing even more once the working time has expired. Polyurethane flows well, but it expands like crazy during its cure. If you can put sufficient pressure evenly across the panels (something like a pile of cement blocks or your car), polyurethane is a better choice than yellow glue.
There are glues made specifically for laminating, and these are the best options. They flow well, are thinner so they penetrate with less pressure, and have extended working times.
My choice for this is PVA. PVA is the white glue your grade school teacher told you not to eat. When properly used, PVA is exceptionally strong, has a long working time, and flows very well. PVA resists water better than MDF does, so it is a good choice even in very humid or damp environments.
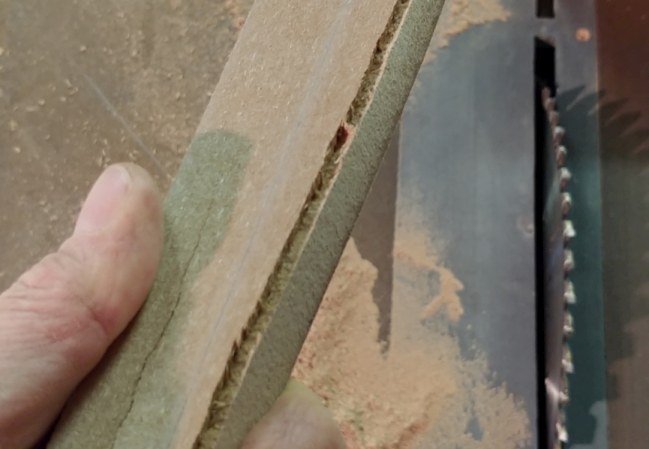
You can see the MDF fails before the glue joint when I tried to break this off cut.
There are two things pay special attention to when using screws and glue.
first, the screws will cause the material to bulge. Drill pilot holes and counter sink on the inside of the joint. Test on some scrap to determine how much counter sinking is required. Failing to do this will result in large voids where the panels got pushed apart by the bulging.
Second, use the right amount of glue. The glue needs to be spread evenly into the material, and it should be thick enough to be almost opaque. I used a large notched trowel like the type used for mortaring up tiles. The glue is spread evenly on both surfaces with the smooth edge of the trowel forcing it into the MDF, then the notched edge is swept over the glue. The last step is important, if the glue is not notched, the glue will not flow out properly.
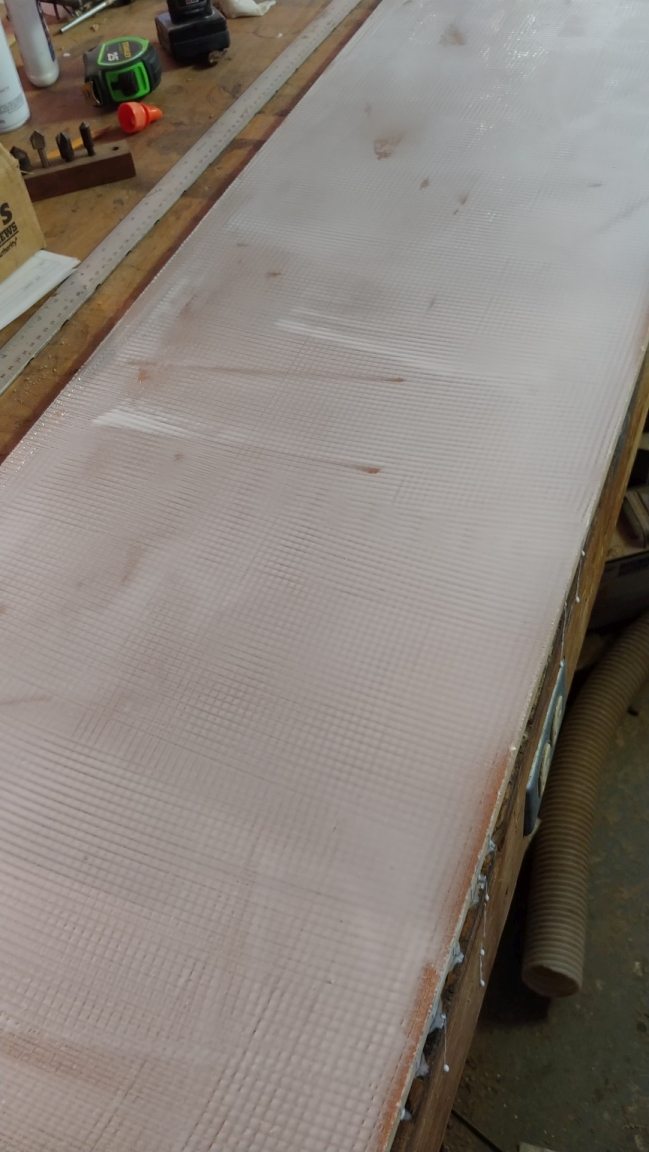
The panels are layed up, and screwed together. When the proper amount of glue is used with the proper amount of pressure, a fine line of glue beads will form at the edge of the joint, drips mean too much glue or too much pressure. I use special screws (McFeely) that are designed for this application, but I used to use plain old drywall screws with good luck. Drywall screws are easier to strip out, so best to run the screw gun gently and tighten with a screw driver. Work from the center out, and work at a pace slow enough to let the glue flow to the outside. It is worth testing the process on some scrap, then sawing the parts in half through the screw hole for a post-mortem if you have never done this before. Two hours of dry time is enough to test a practice piece. The panels should be allowed to cure overnight.
The biggest enemy of a good glue joint is dust and debris. Debris will prevent the joint from closing, and dust will simply ruin the join. The entire panel should be given a quick rub with a hard sanding block to check for anything that would prevent the joint from closing, and the edges should be lightly chamfered. I wipe my panels down with solvent before gluing. Too much pressure will force all the glue from the joint leaving it starved, and not enough pressure will mean the joint is depending on the tensile strength of the adhesive rather than the chemical bond it forms. A proper glue joint with any woodworking glue is several microns thick, and should be invisible.
My work flow for this was pick up the MDF on the way home from work, rough cut all the panels, and glue the laminations so they could cure overnight. The next day, I ripped the panels to width, and trimmed to final length. The top and bottom panels where ripped to the same width as the sides, but only 1 edge was cut square at this point.
Up Next: gluing up the panels
|
|
|
|
 |
|
Build Thread: 2Pi Towers, 6Pi Corner horns (and possibly a sub and center)
|
|
|
Re: Build Thread: 2Pi Towers, 6Pi Corner horns (and possibly a sub and center)
|
|
|
Re: Build Thread: 2Pi Towers, 6Pi Corner horns (and possibly a sub and center)
|
|
|
Re: Build Thread: 2Pi Towers, 6Pi Corner horns (and possibly a sub and center)
|
|
|
Re: Build Thread: 2Pi Towers, 6Pi Corner horns (and possibly a sub and center)
|
|
|
Re: Build Thread: 2Pi Towers, 6Pi Corner horns (and possibly a sub and center)
|
|
|
Re: Build Thread: 2Pi Towers, 6Pi Corner horns (and possibly a sub and center)
|
|
|
Re: Build Thread: 2Pi Towers, 6Pi Corner horns (and possibly a sub and center)
|
|
|
Re: Build Thread: 2Pi Towers, 6Pi Corner horns (and possibly a sub and center)
|
|
|
Re: Build Thread: 2Pi Towers, 6Pi Corner horns (and possibly a sub and center)
|
|
|
Re: Build Thread: 2Pi Towers, 6Pi Corner horns (and possibly a sub and center)
|
|
|
Re: Build Thread: 2Pi Towers, 6Pi Corner horns (and possibly a sub and center)
|
|
|
Re: Build Thread: 2Pi Towers, 6Pi Corner horns (and possibly a sub and center)
|
|
|
Re: Build Thread: 2Pi Towers, 6Pi Corner horns (and possibly a sub and center)
|
|
|
Re: Build Thread: 2Pi Towers, 6Pi Corner horns (and possibly a sub and center)
|
|
|
Re: Build Thread: 2Pi Towers, 6Pi Corner horns (and possibly a sub and center)
|
|
|
Re: Build Thread: 2Pi Towers, 6Pi Corner horns (and possibly a sub and center)
|
|
|
Re: Build Thread: 2Pi Towers, 6Pi Corner horns (and possibly a sub and center)
|
|
|
Re: Build Thread: 2Pi Towers, 6Pi Corner horns (and possibly a sub and center)
|
|
|
Re: Build Thread: 2Pi Towers, 6Pi Corner horns (and possibly a sub and center)
|
|
|
Re: Build Thread: 2Pi Towers, 6Pi Corner horns (and possibly a sub and center)
|
|
|
Re: Build Thread: 2Pi Towers, 6Pi Corner horns (and possibly a sub and center)
|
|
|
Re: Build Thread: 2Pi Towers, 6Pi Corner horns (and possibly a sub and center)
|
|
|
Re: Build Thread: 2Pi Towers, 6Pi Corner horns (and possibly a sub and center)
|
|
|
Re: Build Thread: 2Pi Towers, 6Pi Corner horns (and possibly a sub and center)
|
|
|
Re: Build Thread: 2Pi Towers, 6Pi Corner horns (and possibly a sub and center)
|
|
|
Re: Build Thread: 2Pi Towers, 6Pi Corner horns (and possibly a sub and center)
|
Goto Forum:
Current Time: Sun Apr 28 07:11:12 CDT 2024
|


 Posting Rules
 Members
 Search
 Help
Help Register
 Login
Login Get a T-Shirt!


")

