| Heat Exchanger Design mods [message #47670] |
Mon, 05 September 2005 19:14  |
 Monomer
Messages: 18
Registered: May 2009
|
Chancellor |
|
|
|
I just started making mine, and they wont be used with a plate. They will be in free-air (the speaker's magnet structure sticks out into the horn, not the chamber: Tuba30slim) Chamfer the end that go's into the speaker (ID) This looks like it might help with turblence and whatnot. Same go's for the holes on the toppeice. I left a bit (I made it 2.100/inch long on my mag12ho) of space on the inside, you dont want it to rub the inside, and you want to allow air to easiley enter it. I'm learning howto use SolidWorks right now, and this looks like it might be a proper starting project to draw out. I'll try to get a cad drawing of it up when mine are finished and working.
PS: sorry for any mispelling above.
|
|
|
|
| Re: Heat Exchanger Design mods [message #47675 is a reply to message #47670] |
Mon, 05 September 2005 22:20  |
 |
Wayne Parham
Messages: 18678
Registered: January 2001
|
Illuminati (33rd Degree) |
|
|
That's good news, glad you've started on this. You will be pleased.I have a few suggestions. You must have a plate of some sort. That's the radiator, the plug is just the conductor. So make a flat plate, maybe an 8" disk or square plate, and bolt it to whatever is handy. Make a bracket to hold it or fasten it to one of the internal panels. 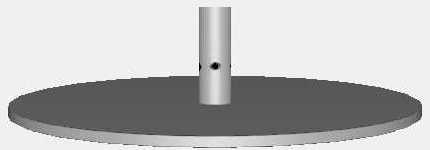
You want as much surface area contact between your cooling plug and the center pole, so make it long enough to reach all the way down into the pole. The hottest point is the front of the pole piece, so you definitely want your cooling plug to make contact there. If you want, stick a probe down into the cooling vent and touch the cone. Measure the distance from cone to the end of the magnet and you'll know how far you have before touching the cone at rest. You can then subtract xmech and give yourself some extra room for margin. You'll find that you have plenty of room to make the device longer without having mechanical interference problems. Below you'll see the CAD drawing of the 1.25" cooling plug used in the 12 π basshorn and for upgrading the LABhorn. 
People can order these plugs from us at low cost, and I'll help anyone follow in my footsteps and make their own, but I'm not going to provide the exact dimensions on the drawings for the plugs. I've put a lot of work into this project, and the only way for me to recuperate it is for people to buy plugs from us. To tell the truth, if a person doesn't have a machine shop, they will want to order them from us anyway, because unless you order a large quantity, the price for machining makes the cost very high.
|
|
|
|
| Re: Heat Exchanger Design mods [message #47680 is a reply to message #47675] |
Tue, 06 September 2005 12:48 |
Monomer
Messages: 18
Registered: May 2009
|
Chancellor |
|
|
|
So, I want is as long as possible, even if rubbing? (I dont know what it is inside right their) a finned heatsink screwed onto the plug should be sufficiant - The shops I work in dont carry as big of plate as mentined.
|
|
|
|
|
|
|
|
|
|
| Heat Exchanger / Cooling Plug Information [message #47743 is a reply to message #47741] |
Mon, 19 September 2005 06:21 |
|
Wayne Parham
Messages: 18678
Registered: January 2001
|
Illuminati (33rd Degree) |
|
|
To insert images directly in your posts, you will want to use the <img src> tag. That's HTML, and you can use it to do a lot of things within posts, like make tables, bullets, different character fonts, links, etc. If you just want to put a single picture at the top of your post, you can put the image file URL in the field called "Optional Image URL". That's an easy way to do it.Regarding the cooling plug, I've made two different types. The original prototype had 2.675" shank and 0.8125" stop. It works well in a 12π (or just about anything else) but the extraordinary close fit between the woofer and side panel of the LABhorn prompted us to have a version made with a thinner stop. The cross-drilled holes are cut with their axis at 30 degrees from the cooling plug center axis. It's a tight fit. But the area is sufficient to support the airflow at full excursion. The angle of the vents may actually help flow. We checked T/S and both plugs worked well without modifying Fts, so that's all we really cared about as far as airflow was concerned. The main thing was that it didn't create a backpressure that increased driver Fts. There is a balance between increasing heat conduction and reducing pressure drop. Conduction is improved by leaving a lot of aluminum in the plug. Pressure drop is reduced by removing aluminum and increasing vent flow. Of course, there comes a point where flow is good enough that there is very little pressure drop at any passband frequency at full excursion. There is no point exceding this amount of venting, as it would only reduce heat conduction. And vent area is not the only thing that affects flow. Other things like position, direction, shape and other features also affect flow characteristics. So the real trick to making the cooling plug work well is to get enough venting that there is no pressure drop but no more, because you want heat conduction through the aluminum to be maximized. One last thing. Several people have written about the cooling plug and a common misconception seems to be that the plug will work all by itself. It won't. A heat exchanger must be attached. In the case of the 12π and LABhorn, the heat exchanger also serves as the access plate. On other models, it may be located elsewhere. A simple plate of aluminum is all that is required, and I think 6" to 8" round or square would be sufficient.
|
|
|
|


 Posting Rules
 Members
 Search
 Help
Help Register
 Login
Login Get a T-Shirt!


")

