|
Home » Sponsored » Pi Speakers » Build Thread: 2Pi Towers, 6Pi Corner horns (and possibly a sub and center) (Building some Pi Speakers)
| Build Thread: 2Pi Towers, 6Pi Corner horns (and possibly a sub and center) [message #88057] |
Mon, 21 May 2018 21:09  |
 joshua43214
Messages: 35
Registered: October 2016
Location: USA
|
Baron |
|
|
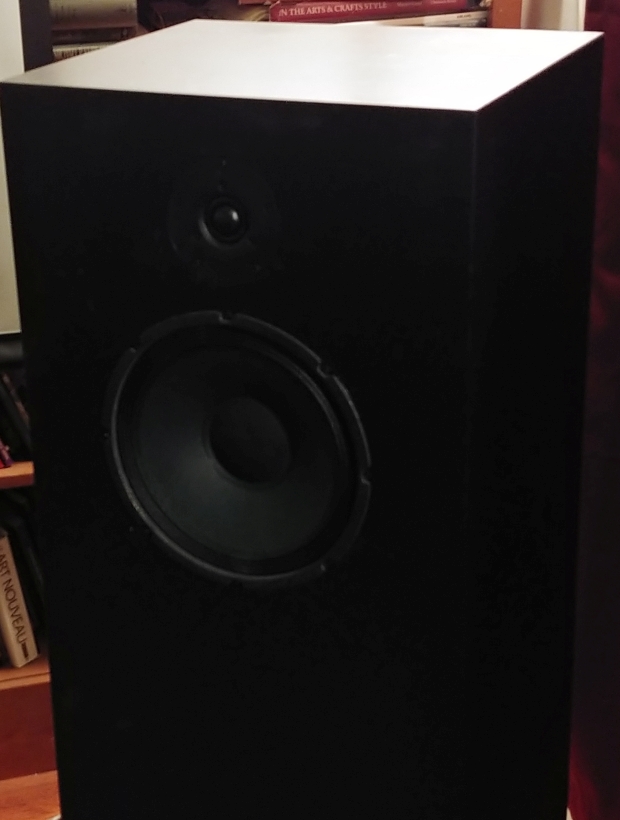
Greetings everyone!
This post will be mostly introduction and planning. At the time of this writing the 2Pi Towers are all but complete and in service, and the 6Pi mid-horns are in the last stages of construction.
Introduction:
Almost 20 years ago, I invested in a set of Athena Audio speakers for my home theater. They sat alongside my venerable Acoustic Research speakers which finally went to their maker about 5 years later. Acquiring a new set of high end speakers for music ended up getting put off because the cost of anything much better than the Athena's was cost prohibitive. I came across Pi Speakers 5 or so years ago, and giving them a try has been on my list of things to do ever since.
Last year, one of the drivers in my surrounds packed up, I thought this was a good chance to test the Pi Speaker philosophy and built a pair of 1Pi's. These little speakers are really amazing for what they are. If you are in the market for a pair of nice monitors, I highly recommend them.
A couple of months ago another speaker and the sub from my Athena kit failed, and I decided to go ahead and build corner horns and 2Pi surrounds.
When I started planning this project, I realized I have a lot of unusual experience, and that this would make a very nice build thread. I have been working with wood since I was a little boy, and have had the pleasure of being a professional furniture maker, a semi-professional wood worker, and now a hobbyist wood worker. In more recent years, I have acquired a some machine tools, and become a fairly competent hobby machinist. I have also been blessed with almost perfect pitch and very good hand-eye coordination, which made me a passable acoustic guitar player. I returned to college after a serious back injury ended my 2nd career, and now hold degrees in Molecular Genetics and Mathematics and work in a research capacity.
My intention is to write a detailed (and lengthy) thread on constructing these speakers, and I hope that my experience will benefit (or even inspire) others to take on the challenge of speaker making. In many ways this will be a series of "pro-tips," but I would like to also cover basics like tooling and adhesives, as well as alternative methods. In my view, the best method for doing something is the method that gets the job done with the expected degree of accuracy, and the minimal amount of fuss given the tools a person owns.
I quick word on safety. I will describe some techniques in this thread that might make you cringe at first glance. Please take a moment to look closely and read my descriptions before jumping to the conclusion I am being unsafe. Rest assured, I take safety more seriously than most people do.
That said, woodworking machinery is probably the most dangerous machinery I have used. My planer has a sizable dent from a sheet of plywood that climbed over the blade of my table saw and frizbee'd across the shop.
Choosing the Right Stuff:
Like many of us, I was at a quandary over which models to buy, and what options to buy. My room is not especially big, squeezing in a pair of 3Pi's or 4Pi's along with flanking subs would require some lifestyle changes. On the other hand, my screen comes down in front of the fireplace which is flanked by open bookshelves of questionable ancestry, so I am not convinced that corner horns are the best fit either. My reasoning for going with the corner horns is they use space more efficiently, are substantially cheaper to build, and the worst case is I have to (finally) replace the open shelves with closed front shelves. After reading through many threads on this forum, I also decided that the 7Pi is too big for my space and settled on the 6Pi. I also went with the basic kit with no upgrades. I learned from the 1Pi's that Wayne really gets the best out of Eminence drivers, and I am not convinced My Denon AVR produces high enough quality signal to take advantage of the upgraded electronics.
I chose the 2Pi Towers because I want the lower extension, and they save me the trouble of building stands.
I have not decided on what to do about a center channel yet, and I am shopping around for a plate amp for a 3Pi sub which I will try to include in this thread.
Planning:
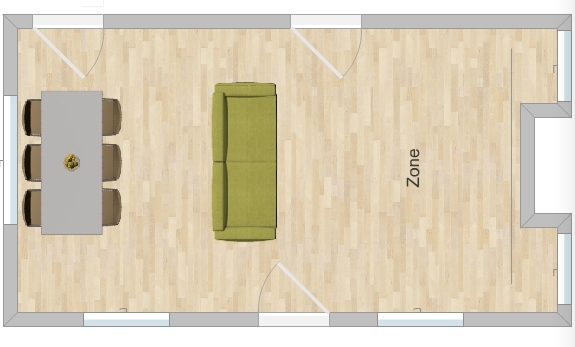
I began by modeling the speakers in CAD. I use Fusion 360, and I highly recommend it. The software is free to hobbyists, students, and small businesses. Certainly the 2Pis can be built from a napkin sketch (I did that for the 1Pi's), and even 3 or 4 Pi's can be built with little more than a simple sketch. The corner horns on the other hand have some complicated parts, and taking the time to draw them up in CAD has many benefits - some of which will come up during this thread. Most importantly, a CAD model lets you test different designs easily, test last minute design changes, take angle or radius measurements that would otherwise require some real math, and produce detailed drawings for the shop.
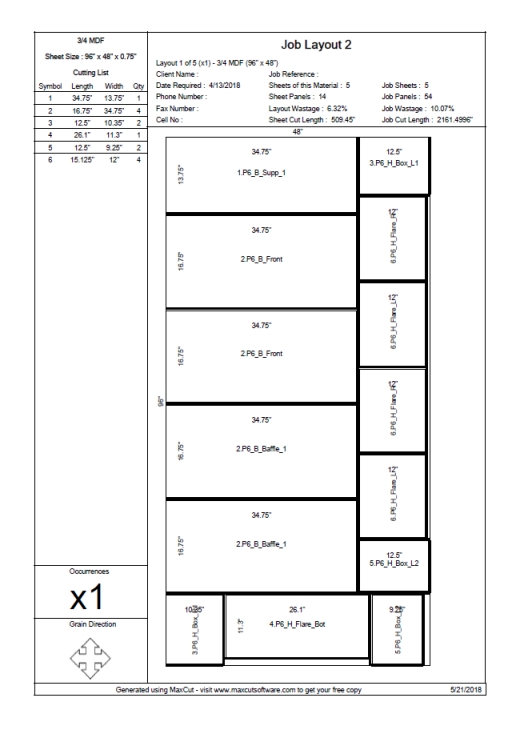
Once I had the major components drawn in CAD, I collected the dimensions and used MaxCut to optimize a cut list. I used MaxCut because it is free, and was the first software on a Google search that did what I needed. I am sure there are better programs out there. It does have one issue for this project - you can only give it rectangular parts. There is a script you can install into Fusion 360 that lets you place all the parts in your design onto a sheet, but you have to manually move stuff around to make it fit. It turned out that rectangular parts was fine, details later.
The 4 speakers combined have 54 major parts, and used 5 sheets of 3/4" MDF. This does not include the tweeter box for the 6Pi's and the assorted scrap needed. So I purchased a 6th sheet.
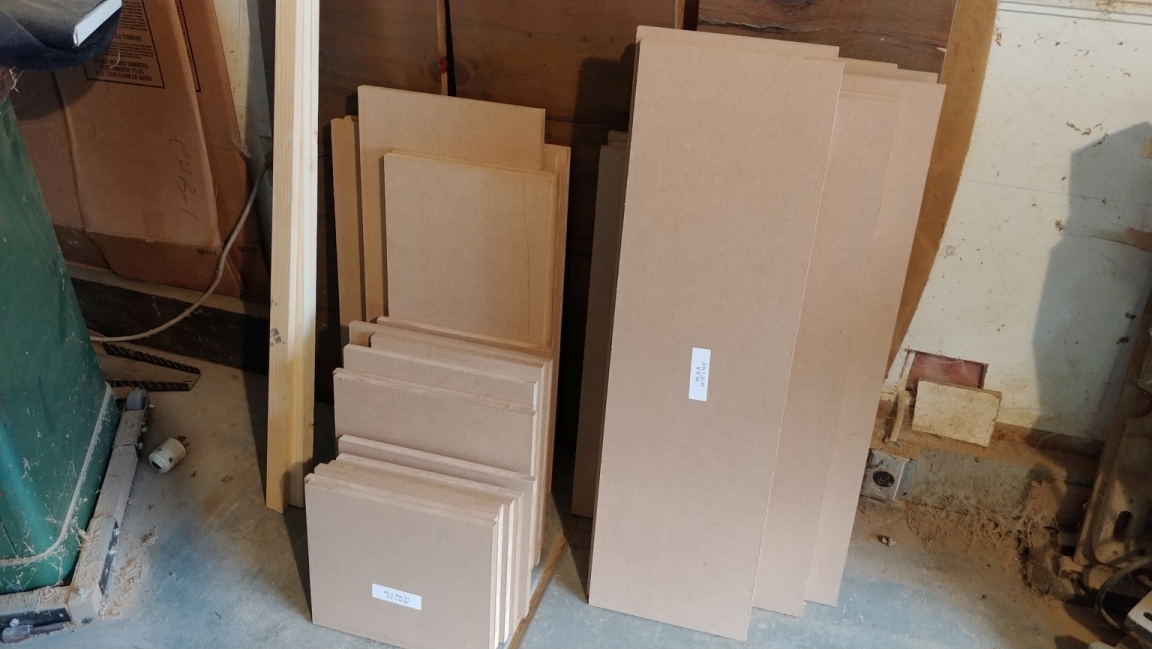
Up Next, the 2Pi Tower build.
-
 Attachment: room.jpg
(Size: 102.44KB, Downloaded 4195 times)
-
 Attachment: Teaser.jpg
(Size: 207.90KB, Downloaded 4240 times)
-
 Attachment: Cut_List.jpg
(Size: 83.72KB, Downloaded 4247 times)
-
 Attachment: Pile_O_Parts.jpg
(Size: 434.54KB, Downloaded 4224 times)
|
|
|
|
| Re: Build Thread: 2Pi Towers, 6Pi Corner horns (and possibly a sub and center) [message #88059 is a reply to message #88057] |
Tue, 22 May 2018 08:17   |
 joshua43214
Messages: 35
Registered: October 2016
Location: USA
|
Baron |
|
|
After completing the model, I ordered up all the little parts that would be needed. Lots of threaded inserts, #10 cap head screws, banana plugs, etc. I also decided to replace my 20year old speaker wires. I sourced all the fasteners from McMaster Carr. I use them only because they are very reliable, there are cheaper places. I sourced the wire (Belden 5000UE) and banana plugs from Blue Jean Cable, and banana jacks (Dayton Audio BPA-38G) from Parts Express.
Cutting the Parts:
Cutting large panels that are both consistent in size, and square is always a challenge. Most big box lumber yards will cut sheet goods for you. My experience is that the cuts are never very dimensionally accurate, never consistent, and usually have damage to the edge from the operator not being careful enough. The raw edge of MDF is very rough, and when it is pushed through a vertical panel saw, it rocks around on the rollers, to make matters worse, the off cut is pulled down onto the blade by gravity. If you can't transport the full sheets home, I suggest only letting the lumber yard rough cut the panels into more manageable sizes, and do all the finish cutting at home. Store MDF flat on the floor, or as vertical as possible to prevent bowing.
I stacked all my sheets on a pair of saw horses, then used pieces of scrap up elevate the top sheet for rough cutting. Label your parts! If you are like me, the rough cut parts at the end of the panel get left over-sized and easily get mistaken for a different part. Use stick on labels, blank labels and a sharpie are fine if you don't want to print them. I print my labels before I cut, and I know I am done when I run out of labels. I suggest not using pencil (it easily rubs off MDF), and never use a marker directly on the MDF (it bleeds through).
I used 3/4" (19mm) MDF, and allowed 3/8" (10mm) between parts during the roughing. This gives me about 3mm of extra to trim off.
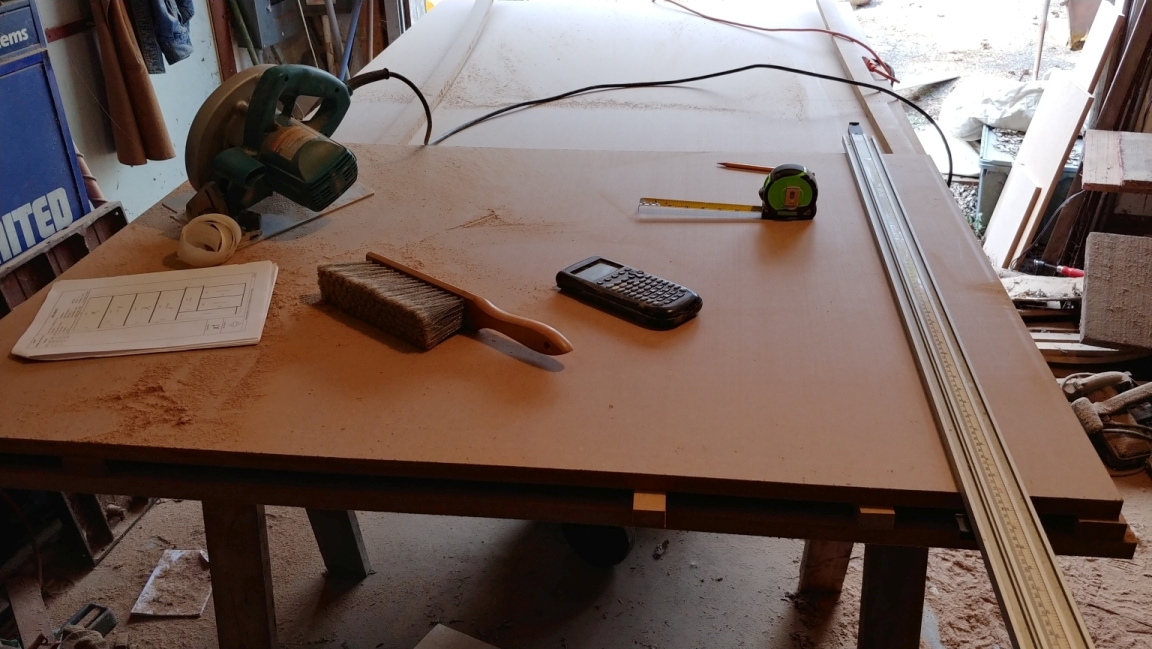
Once all the panels are rough cut, I ripped them to final width on the table saw. I start by putting the straightest rough edge against the fence, rip slightly over-sized, then run the fresh edge along the fence for final dimension. This last fresh edge is your reference edge, mark it with an arrow as it comes off the saw. It is important (like really important) to always work from a single reference.
The tricky part is cross cutting so the panels are both consistent in length and square.
I use a framing square to set the cross cut guide. You can spend a lot of money of a precision square, but unless you need the scale to be really precise and need a ground edge on it, I suggest saving your money for better things. Google up "squaring a square with a punch." A cheap square can be made extremely accurate very easily by hand, and then abused to your heart's content with no worries. My preference is for cheap plated squares because it is easier to scrape glue off of them.
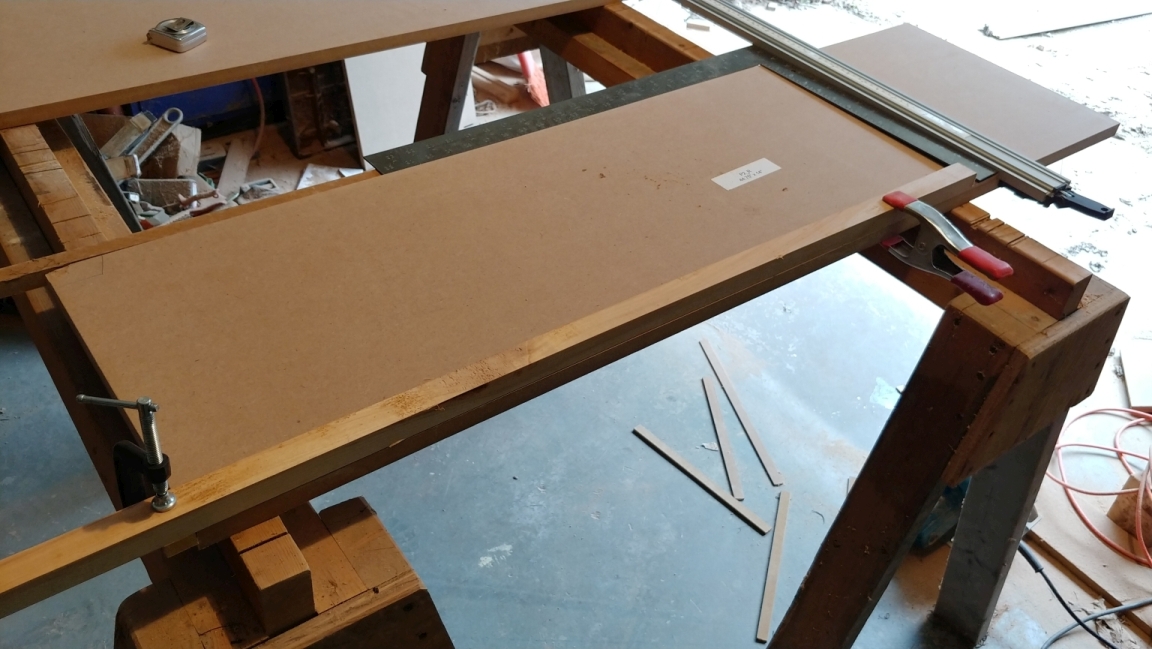
Study the image below for getting the second cut both square and consistent. The square is placed along the reference edge. The end already cut has a square drawn at the square corner (upper left). A piece of long scrap has a block of wood clamped to it, and is used as a story stick to get consistent lengths. The story stick is held to the panel with a spring clamp, and the square carefully butted up against it and used to set the cutting guide. If you are better with a circular saw than me, you can probably just use the square as a guide. If you take your time and are careful, you will probably be pleasantly surprised at how square and consistent your panels are.
Save your off cuts! You will need them later.
Laminating the Baffle:
It is the glue you can't see that is holding your parts together.
When I built my shop, one of the things that was imperative was the ability to be able to saw my own veneer, and do large laminations. I have a vacuum panel clamp big enough to laminate full sheets of MDF, and I have done quite a bit of laminating using a whole range of techniques. For this job, it was not worth the trouble of setting up the panel clamp, instead I used the tried and true screw and glue method.
There are any number of glues that can be used to laminate panels, some good and some bad. The 2 worst glues to use for this are yellow glue (Tightbond), polyurethane (Gorrilla Glue). Yellow glues have a short open time and even shorter working time. Unless you have a big panel clamp, it will be about impossible to spread the glue properly and get it clamped before the working time expires. Yellow glue is also very thick, and requires huge clamping force to get it to flow, and it will resist flowing even more once the working time has expired. Polyurethane flows well, but it expands like crazy during its cure. If you can put sufficient pressure evenly across the panels (something like a pile of cement blocks or your car), polyurethane is a better choice than yellow glue.
There are glues made specifically for laminating, and these are the best options. They flow well, are thinner so they penetrate with less pressure, and have extended working times.
My choice for this is PVA. PVA is the white glue your grade school teacher told you not to eat. When properly used, PVA is exceptionally strong, has a long working time, and flows very well. PVA resists water better than MDF does, so it is a good choice even in very humid or damp environments.
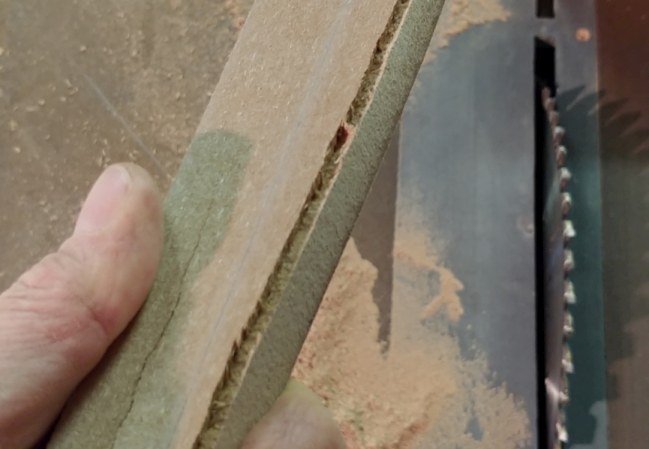
You can see the MDF fails before the glue joint when I tried to break this off cut.
There are two things pay special attention to when using screws and glue.
first, the screws will cause the material to bulge. Drill pilot holes and counter sink on the inside of the joint. Test on some scrap to determine how much counter sinking is required. Failing to do this will result in large voids where the panels got pushed apart by the bulging.
Second, use the right amount of glue. The glue needs to be spread evenly into the material, and it should be thick enough to be almost opaque. I used a large notched trowel like the type used for mortaring up tiles. The glue is spread evenly on both surfaces with the smooth edge of the trowel forcing it into the MDF, then the notched edge is swept over the glue. The last step is important, if the glue is not notched, the glue will not flow out properly.
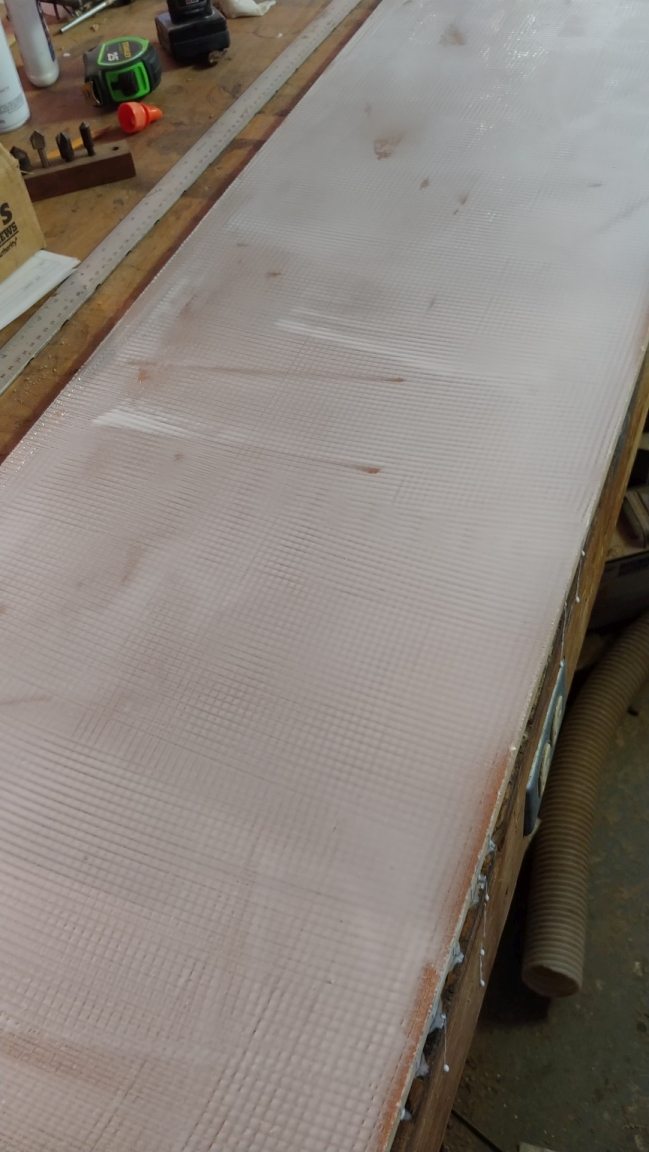
The panels are layed up, and screwed together. When the proper amount of glue is used with the proper amount of pressure, a fine line of glue beads will form at the edge of the joint, drips mean too much glue or too much pressure. I use special screws (McFeely) that are designed for this application, but I used to use plain old drywall screws with good luck. Drywall screws are easier to strip out, so best to run the screw gun gently and tighten with a screw driver. Work from the center out, and work at a pace slow enough to let the glue flow to the outside. It is worth testing the process on some scrap, then sawing the parts in half through the screw hole for a post-mortem if you have never done this before. Two hours of dry time is enough to test a practice piece. The panels should be allowed to cure overnight.
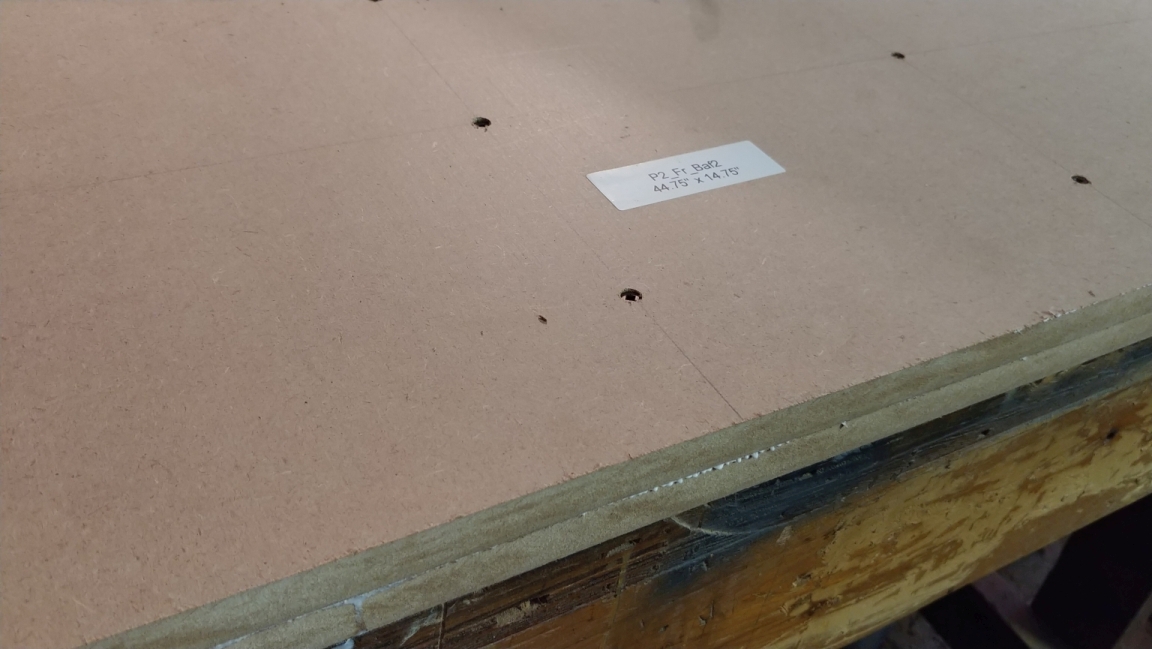
The biggest enemy of a good glue joint is dust and debris. Debris will prevent the joint from closing, and dust will simply ruin the join. The entire panel should be given a quick rub with a hard sanding block to check for anything that would prevent the joint from closing, and the edges should be lightly chamfered. I wipe my panels down with solvent before gluing. Too much pressure will force all the glue from the joint leaving it starved, and not enough pressure will mean the joint is depending on the tensile strength of the adhesive rather than the chemical bond it forms. A proper glue joint with any woodworking glue is several microns thick, and should be invisible.
My work flow for this was pick up the MDF on the way home from work, rough cut all the panels, and glue the laminations so they could cure overnight. The next day, I ripped the panels to width, and trimmed to final length. The top and bottom panels where ripped to the same width as the sides, but only 1 edge was cut square at this point.
Up Next: gluing up the panels
|
|
|
|
| Re: Build Thread: 2Pi Towers, 6Pi Corner horns (and possibly a sub and center) [message #88060 is a reply to message #88057] |
Tue, 22 May 2018 10:07   |
 joshua43214
Messages: 35
Registered: October 2016
Location: USA
|
Baron |
|
|
If this was the carcass for a cabinet, one would typically glue the 4 sides in one go, then glue on the top and bottom.
A speaker though has bracing and stuffing, both of which would be very difficult to install from the ends.
I used a somewhat unconventional method of assembly that both allowed me to keep everything square, yet still gave access for installing braces and stuffing.
My milling machine has a DRO, so I used the hole pattern feature on it to drill the mounting holes, then used a circle guide and router to cut the rabbit and cut out for the drivers. The mounting holes are deep and close to the cut out, a drill guide is a really good idea if you do not have a drill press large enough to accommodate the baffle.
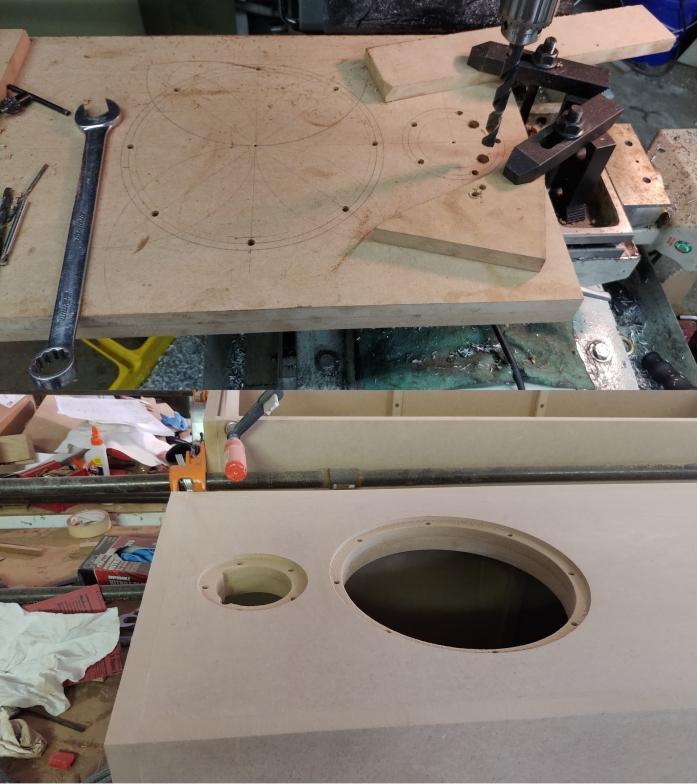
I should mention that I am a huge advocate of the "file to fit, and paint to hide" school. This is the essential element to "as built" construction. I also believe that it is almost impossible to dry fit parts too many times, and large glue up should always be practiced.
Glue seems to turn into a first class lubricant at the worst possible times leaving parts that joined up perfectly hopelessly out of alignment. Making a dry run will not only ensure you really can assemble things in your planned order, but also put clamps where you plan too. It will also ensure you have everything on hand.
My plan was as follows: glue the sides to the baffle, glue the top and bottom on, install the stuffing, install the bracing, glue in the rear panel.
My design has the front and rear panel fully captured on all 4 sides. I choose this to take advantage of the extra surface area of the doubled baffle even though it puts the raw edges of the sides to the front of the speaker. I also want the sides, top and bottom to be very slightly proud of the baffle so they can be sanded back flush.
Since the back and baffle are fully captured, it is important that the speaker carcass be glued up so the back can be installed last - in other words, the carcass cannot be allowed to twist out of shape while the glue is drying.
I began by cutting scrap to space the baffle and back. These spacers will do double duty later for attaching the bracing. I used one of the off cuts from the baffle to position the spacer, and glued them down. The pic should be pretty self explanatory. It is important that the spacers be square.
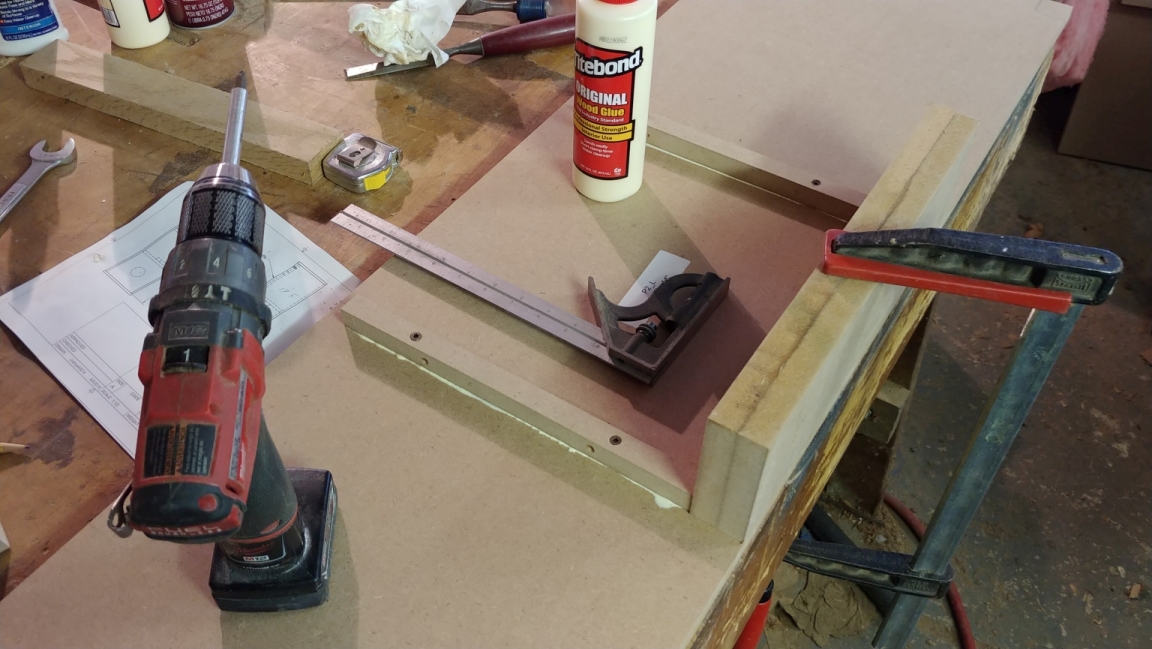
Those off cuts from the baffle proved to be extremely useful during the entire build process to lift parts off the bench for clamping. It was a happy accident for me, but I would suggest adding a few inches to the rough cut baffles for them.
I then dry assembled the parts to make sure everything fit properly.
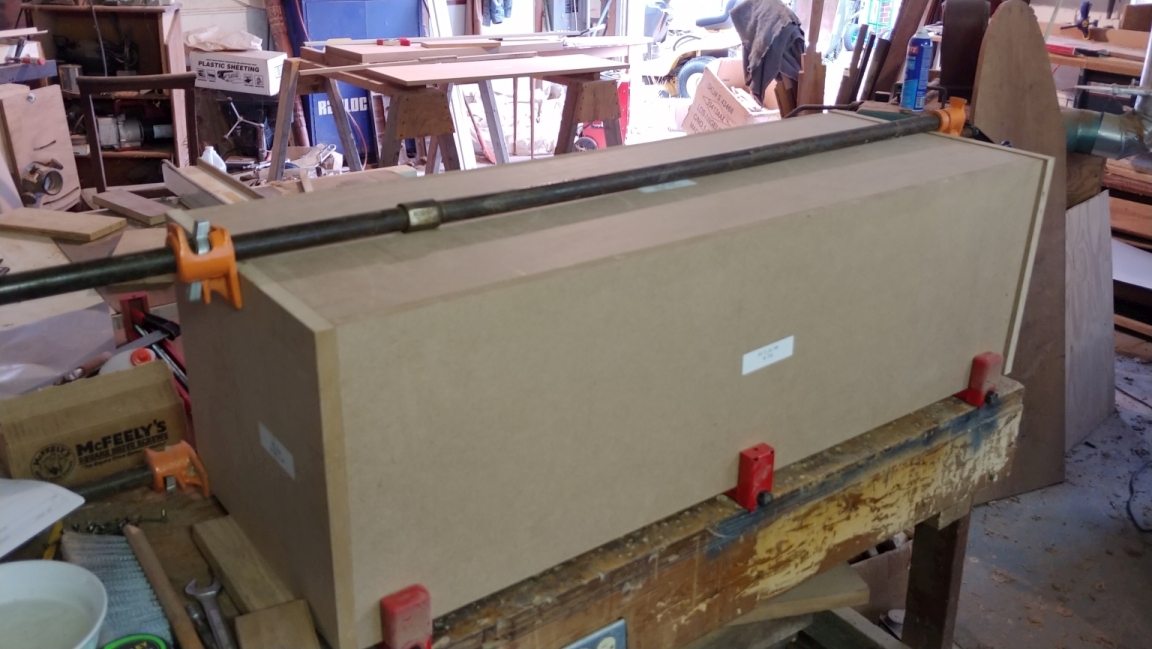
Rollers are excellent for quickly spreading glue. Not only do they easily put down the right amount, they force it into the wood. Note this is the perfect amount of glue, it is just thick enough to be almost opaque.
I used Tightbond for the carcass. In my opinion, it is the ideal glue for this. It has a very short clamping time, and well constructed joints can be handled in about an hour.
To get everything to come together in proper alignment, I used the following order of operations:
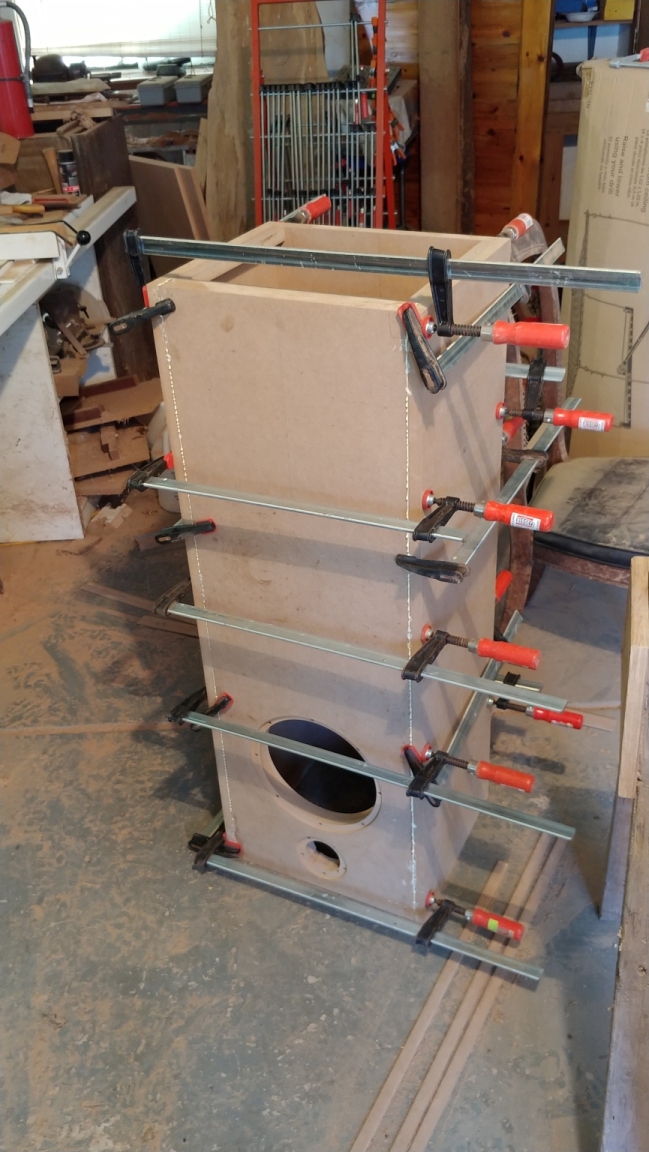
Apply glue to the edges of the baffle and the sides. Set the baffle on the bar clamps, then place the sides. close the clamps just enough to keep the sides from tipping over, but not enough to squeeze out any glue.
Set the back into place with no glue.
Place the top and bottom panels into position, and apply mild pressure with pipe clamps.
Place bar clamps front to back over the spacers to pull the baffle against them.
Double check all is lined up, and tighten the bar clamps to close the joint between the sides and baffle.
Let sit for 5 minutes for the working time to expire, then remove the pipe clamps and pop the top and bottom off. Don't wait too long or they will get glued on.
It might sound a bit complicated, but it really is not. A single practice run showed me I had to make some adjustment to clamp placement so I could remove the pipe clamps, and it took less than 2 minutes to complete the clamping.
After about 10 minutes, the carcass can be moved out of the way to dry for an hour before the next stage.
To be Continued...
|
|
|
|
| Re: Build Thread: 2Pi Towers, 6Pi Corner horns (and possibly a sub and center) [message #88061 is a reply to message #88057] |
Tue, 22 May 2018 11:26   |
 joshua43214
Messages: 35
Registered: October 2016
Location: USA
|
Baron |
|
|
After about an hour has passed, I removed the clamps. I scribbled pencil at the ends of the carcass and passed a large hard sanding block over them. It is important that the ends are planar and there is sufficient surface are for a good airtight glue joint. I placed one of the top panels on and made sure it did not rock. At this point, it is just possible to knock the carcass apart with a mallet if something went really wrong. If the ends are not planar but can be fixed, consider letting it dry overnight. In my case, the ends came out very well, and just some minor dressing with the sanding block gave a near perfect join.
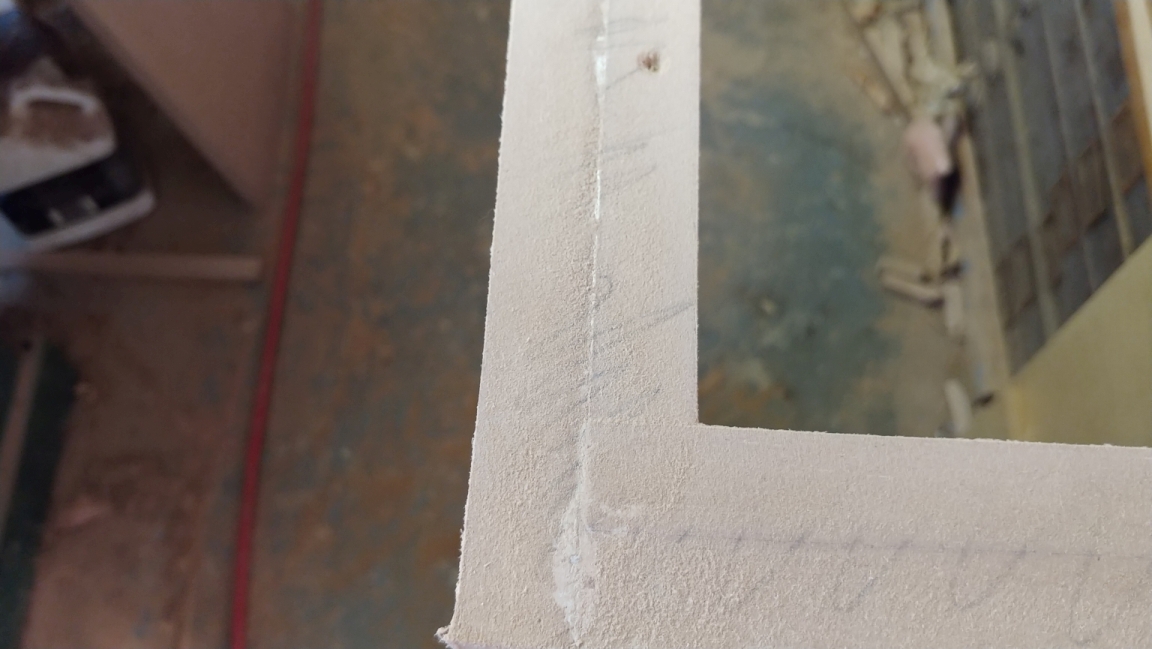
My sanding block is a piece of MDF cut to use 1/3 of a sheet of sandpaper longwise. I use a light coat of spray adhesive to hold the sheet in place. I also have an MDF sanding block covered in heavy felt that uses 1/4 sheet of sandpaper. I only use soft block for finer grits and finishing. Leveling surfaces is best done with a hard block even though it wears out the paper faster.
Next I glued the top and bottom on.
once again, the order of operations is important.
I set the carcass face down on some scrap to keep it off the bench slightly, and applied glue to all the parts.
I set the back in place with no glue.
I placed the top and bottom, and gently clamped crosswise to bring the sides tight to the back.
I then placed pipe clamps top to bottom and lightly tightened them.
I then slightly loosened the bar clamps holding the sides against the back and slightly tightened the pipe clamps so the carcass could relax or twist as needed for the top and bottom to go on square.
Once everything was aligned, I tightened up the bar clamps, then the pipe clamps.
I removed the bar clamps, and used the port as a handle to pull the back out.
The off cuts I said to save in an earlier post are used as spacers, and clamped between the sides.
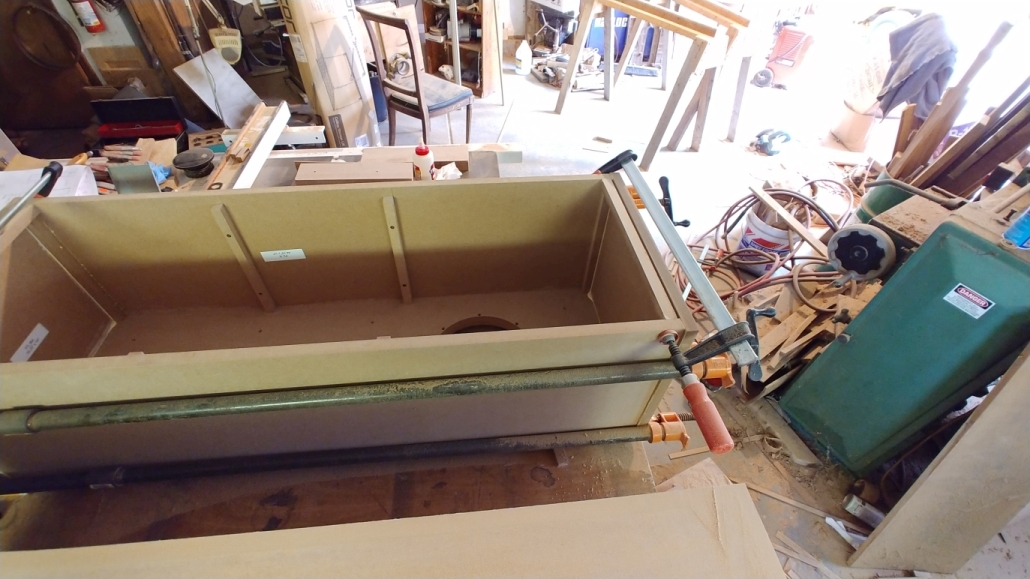
Once again, it sounds much more complicated than it is. The important thing is that the clamps go on in such a way that the carcass will take the right shape for the back to be lowered in later.
I masked off areas that glue will applied to, and use Scotch 77 spray adhesive to glue in the R13 fiberglass.
For the braces, I used 1x2 lumber. They are cut slightly overlong so the panels will all be under tension.
I gave some debate about the right material for braces. Maple is what the sound posts in violins are made from. A sound post transmits the vibration of the front plate to the rear plate and a violin will not sound without one. So maple seemed like a poor choice for bracing if I wish for sonic deadness. MDF on the other hand has essentially no tensile strength, and only modest compression strength. I am of the opinion that MDF braces do not connect the panels to each other in any meaningful way. I think they provide reinforcement by making the panel thicker where they are installed, and the very nature of MDF will cause it to absorb vibration - this makes MDF a good choice for bracing. Plain old yellow pine has better tensile and compression strength than MDF, so it will connect the panels to each other, and is soft enough to absorb vibration. My choice was made partly because it is cheaper, and partly because it is simpler to trim pine to fit, than to get MDF braces to fit tightly without resorting to dado joints.
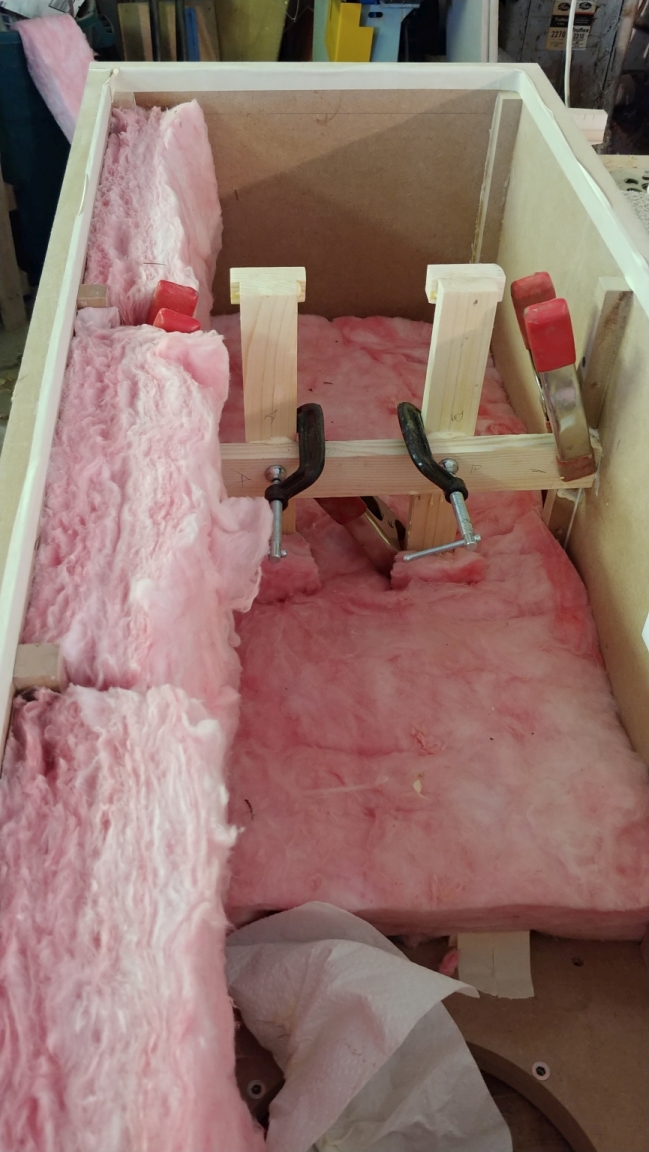
Once all the bracing was installed, more fiberglass was hung from them.
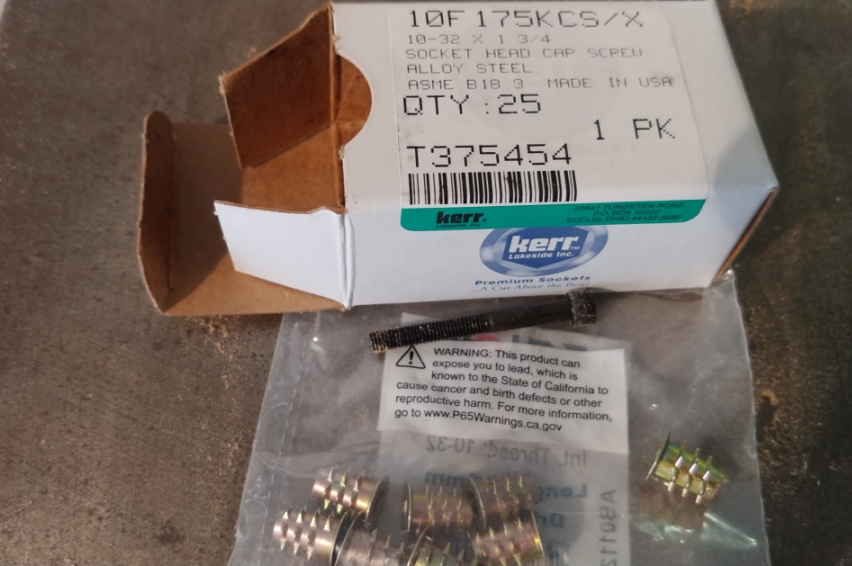
These are my preferred choice for inserts. I like them because they are about as hassle free as it gets, and they cannot be pulled through. California users beware though. It seems the State of California has knowledge otherwise unknown to the rest of humanity of the dangers of elemental lead used to alloy steels. I expect Nobel prizes to be awarded any day. In the mean time, better break out the Tyvek. Those of you in the rest of the world can carry on as normal.
Lastly the back was glued into place. It went right in with no issues or trimming on both speakers.
About this time, the parts from Pi Speakers arrived. One box with 6Pi parts got badly damaged (pics later), and another box showed up a day late containing a bent Alpha 10 driver.
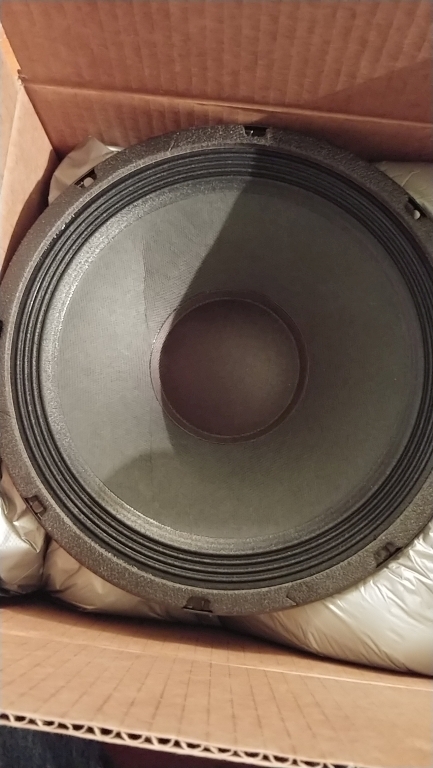
Wayne promptly shipped a replacement Alpha 10 out while he deals with UPS, and it arrived just as I was beginning to paint. Painting ended up getting delayed by nearly a week because it was too cold on dry days, and raining on warm days.
Next up, Finishing the Towers
|
|
|
|
|
|
|
|
|
|
| Re: Build Thread: 2Pi Towers, 6Pi Corner horns (and possibly a sub and center) [message #88075 is a reply to message #88057] |
Wed, 23 May 2018 22:52   |
 joshua43214
Messages: 35
Registered: October 2016
Location: USA
|
Baron |
|
|
Before I even began making the CAD drawings, I was worried about finishing. If the hulking monolith of the 2Pi gets a low WAF score, the 6Pi Cornerhorn gets a total fail. Fortunately, I no longer have to worry about WAF scores, but I do prefer things to look good.
Veneering was definitely an option. I have several hundred board feet of "African Mahogany" that I let my lumber supplier talk me into a bunch of years ago. The stuff is so awful to work with I have never sold it, but I would be otherwise "free" material. After much consideration, I decided that it just has too much figure and would serve only to draw attention to the speakers. Not such a problem with the 2Pi's but I don't really want to make the 6Pi's stand out too much. I have close to a thousand board feet of White Oak, and a fuming chamber large enough to hold even the largest parts. Fumed oak is wonderful, and would match my house nicely. Fuming veneer creates an entire new set of issues because the ammonia will attack the glue if it is too thin, and veneer thick enough to fume has a major effect on construction and joinery. I am knee deep in projects already, and I need new speakers more than I need yet another showcase piece.
In the end I decided to paint the speakers, and after looking at thousands of pictures of painted speakers, I settled on black paint. What I want is for the eye to not be drawn to the speakers. Flat chalk black actually creates a negative space that the eye is drawn too. Likewise, gloss ivory black demands attention because it is so lovely. I also knew I wanted some texture to the paint. I wanted just enough eggshell to prevent reflections, but not so much it once again creates negative space. This eliminates using my spray equipment, and eliminates high texture paints like Duratex.
I started experimenting with paints the day after I began sawing up materials, and was still experimenting with paints while I was applying primer. I finally settled on Sherwin Williams satin black All Purpose latex enamel. The color is exactly what I wanted.
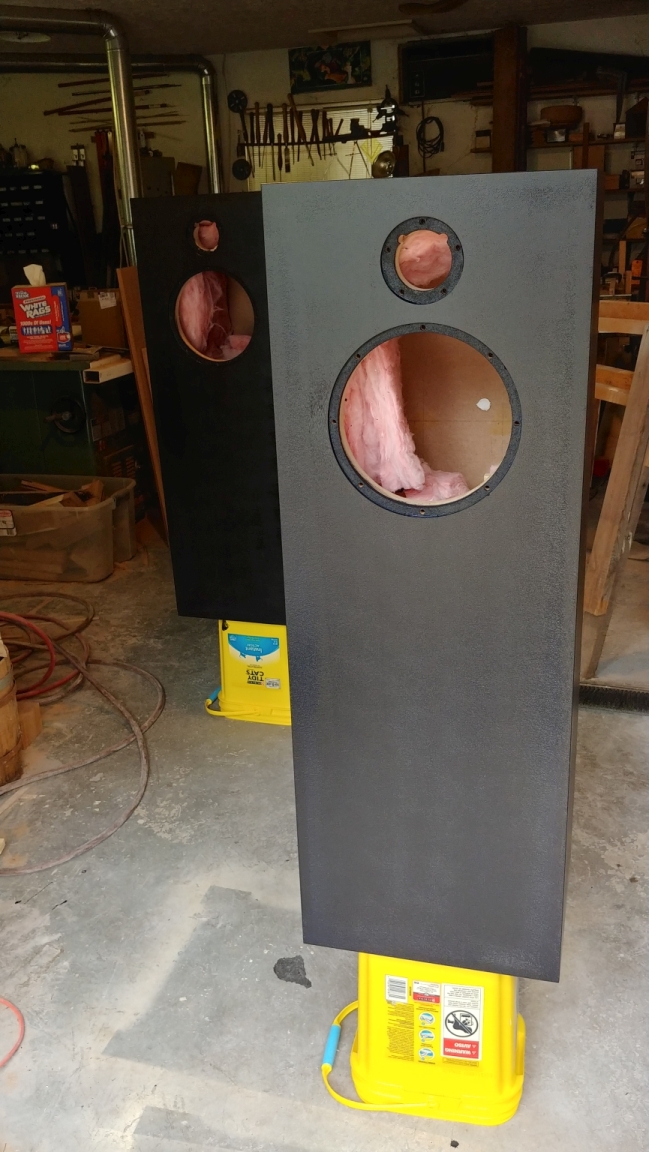
I will point out at this point that I am not an expert on the subject of paint. I have some knowledge on the topic, I would say I have enough knowledge to get myself in trouble, and not enough to bail myself out. The vast majority of my experience relates to finishing furniture where I used nitrocellulose lacquer or solvent based automotive lacquers in conjunction with stains or shellac.
While I do feel confident detailing my approach to painting these speakers, I urge anyone with real knowledge of painting to chime in and add their knowledge.
At this point, construction of the speaker is complete except for the cut out for the wires. I also still have not made a decision about whether to add acoustic fabric to the baffle or not. I decided at the last moment not to use the terminal cup that comes with the kit. By the time I made this decision, the primer was already on. A word of warning, the wire kit that comes with the 2Pi tower is about 3 feet too short, something I did not notice until after I had installed the binding posts. I drilled the holes for the binding posts as close to the floor as I could go and still be able to reach them on the inside through the driver hole (this is about mid-speaker). The wire is so short, you have to put the terminals almost directly behind the driver.
Finishing:
I began by sanding the entire speaker with 80 grit paper on a hard block, paying special attention to making sure the ends are flush with the panels. I closed off the driver cut-outs with 2" painters tape. I just stretched the tape over the holes, then used a sharp knife to cut the tape around the hole and let the tape fall into the recess. I want to make sure the inside edges of the recess get filler. I removed the tape after sanding so the recess could get a coat of black.
After sanding, I wiped the speaker down with a very lightly dampened clothe and covered the entire thing with filler. I use garden variety all-purpose joint compound meant for drywall. The stuff I use is gypsum in a vinyl binder.
Do not be shy with filler. Force it into the MDF with a trowel, especially the raw edges. I let it dry overnight, then sanded it entirely off with 180 grit paper and a hard block.
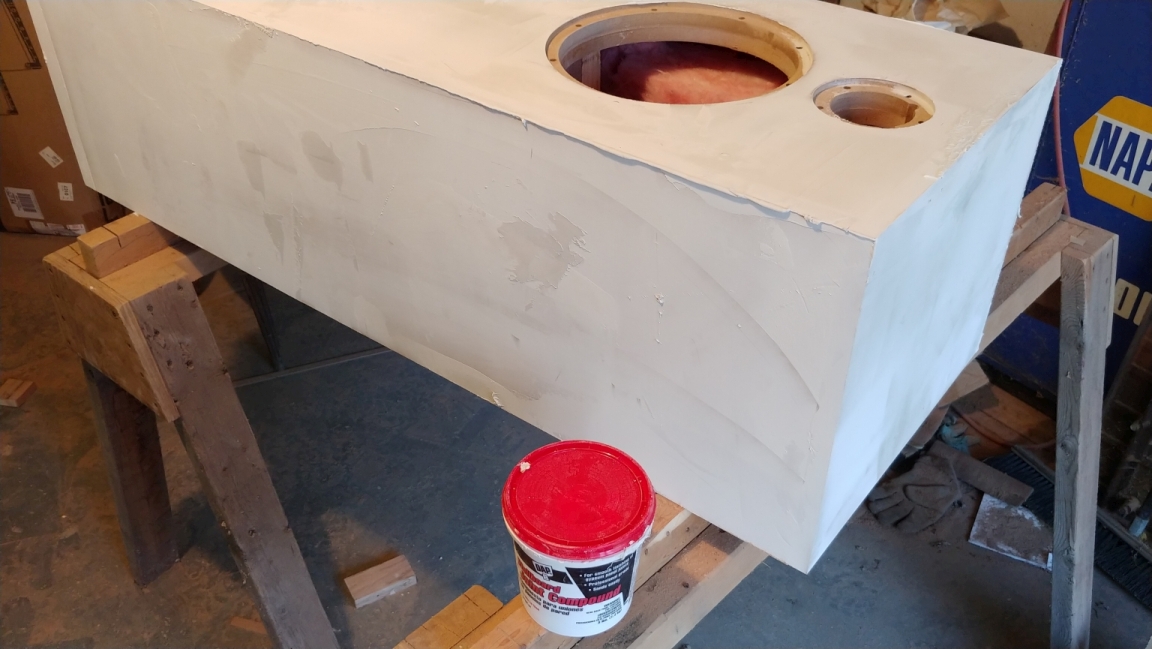
Once the filler was sanded off, I sanded the corners to about a 1/16" (1.5mm) radius. The reason for doing this last is because the MDF edges are very fragile, and the corner radius will get damaged rolling the speakers around, or even by the trowel itself. Making a consistent radius by hand is not difficult, but it does require a lot of practice for most people. A round over bit in the router, followed by 220grit on a hard block is a good idea. I suggest not using a soft or contoured block since it will ruin the nice crisp transition the router should produce if adjusted properly.
I then sprayed the speakers with Rustoleum all purpose primer. I was still experimenting with paints at this point, and I knew from experience that this primer will work with about anything. I sanded the primer back with 180grit and a soft block to remove the stubble, but not enough to remove the paint.
I should make a few notes here. A paint ready surface is a much higher quality surface than a stain ready surface. Paint will reveal and magnify the smallest flaw in the surface, and the smoother the paint, the more it will magnify it. If you plan to use a gloss paint, it is very important to get a really good surface under it.
Mixing types or even brands of filler/primer/paint can lead to binding and curing issues. This is not such a problem with latex, but it can be a huge problem with polyurethanes and lacquers. If you plan to use any type of oil, urethane, or solvent based finish, I strongly suggest using filler, primer, and paint from the same brand unless there is a real expert at the counter that can attest that the products will work together.
Lastly, just because the can says "1 coat, primer and paint in one" does not mean that it will do the job in one coat. Take this statement the same way you do "gap filling" glue - it is a fictional character that only exists in science fiction. If you are not getting proper coverage, don't just roll on more paint, wait a bit and roll on another coat.
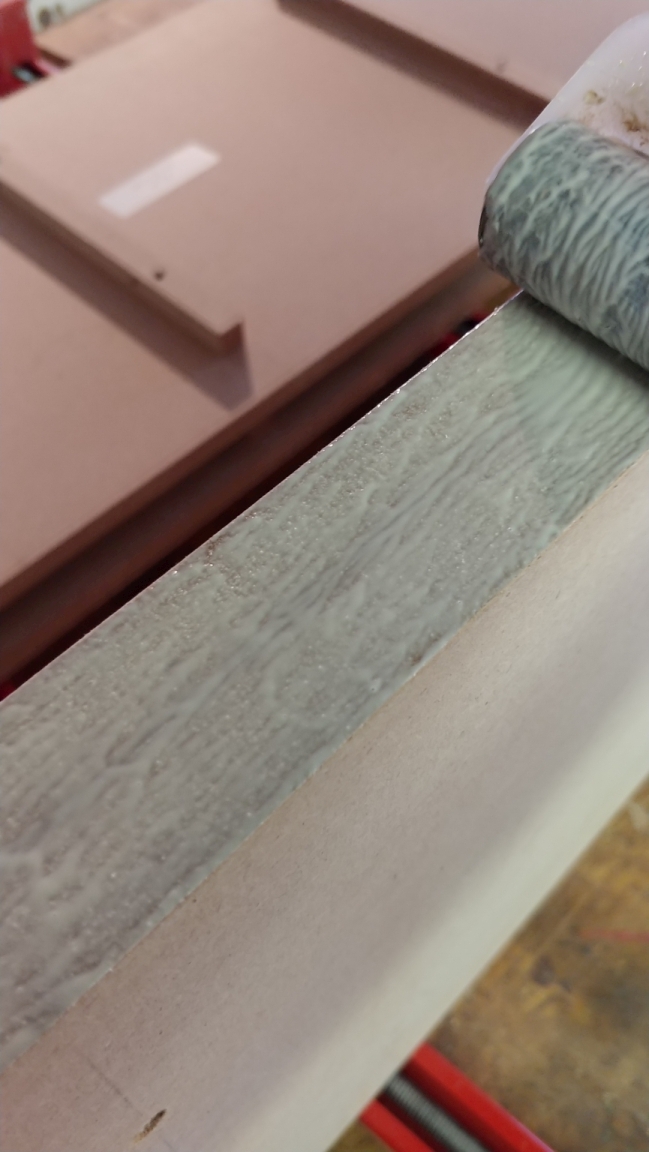
After some experimentation, I settled on a faux mo-hair roller. This produced a modest eggshell finish that looked nice on the test boards.
At this point the first of my problems emerged. The latex paint dries far too fast for the surface to fully flow out. I had some paint extender from another project a few years ago, it looks and smells like white glue. I added some to the paint, and decided I would attempt to tip off the surface after I rolled it up. Like I said, I know enough to get myself into trouble, but not enough to bail myself out. Tipping off 5 panels proved to be beyond my skills and I wound up with 3 or 4 minor sags at some of the edges. To make matters worse, the paint proved to be very slow to cure. After 5 days, it was finally hard enough to sand. It would pill up a bit, but not enough to clog the paper. I will say the paint was extremely tough, I had to use 100grit paper to cut it, 180grit would not cut through it.
I returned to Sherwin Williams where I interrupted their resident expert from his important work, and laid out the full story. He agreed the Rustoleum should not be a problem, and that the filler I used is also known to be fine. That left the extender or the weather. We had a string of days under 60 (15C), and the days it did get over 60 it rained.
I was also not satisfied with the texture, it had more texture than I really wanted (see above pic), which was why I had attempted to tip it off. After more discussion with the expert, I decided to try a flock roller, and purchased some M-1 extender.
I sanded the previous paint back enough to remove the old eggshell texture with 100grit. I probably should have done a finish sand with 180grit because some of the scratches left by the 100grit telegraphed through the next coat. My plan was to give them a final coat when they got moved to their final position as rear speakers, since I expected them to get damaged if I chose to put feet under them or add fabric. Currently they are being used as mains while the 6Pi's are being constructed.
dirty hand prints courtesy of my son 
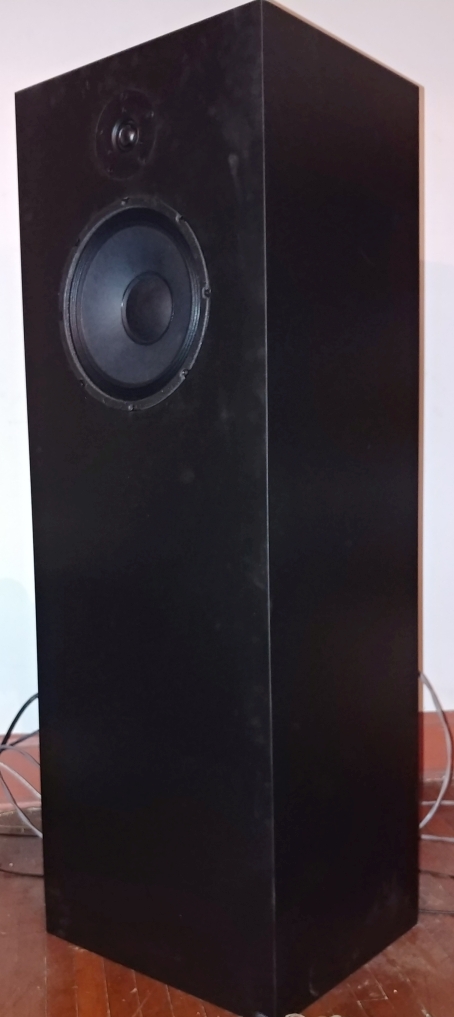
The color and texture do exactly what I want, but it also makes them difficult to photograph. After they have their final coat, I will try to get some shots of them in sunlight.
Up Next: The 6Pi's (what we are all waiting for) or a review of the 2Pi Tower sound (will depend on my mood).
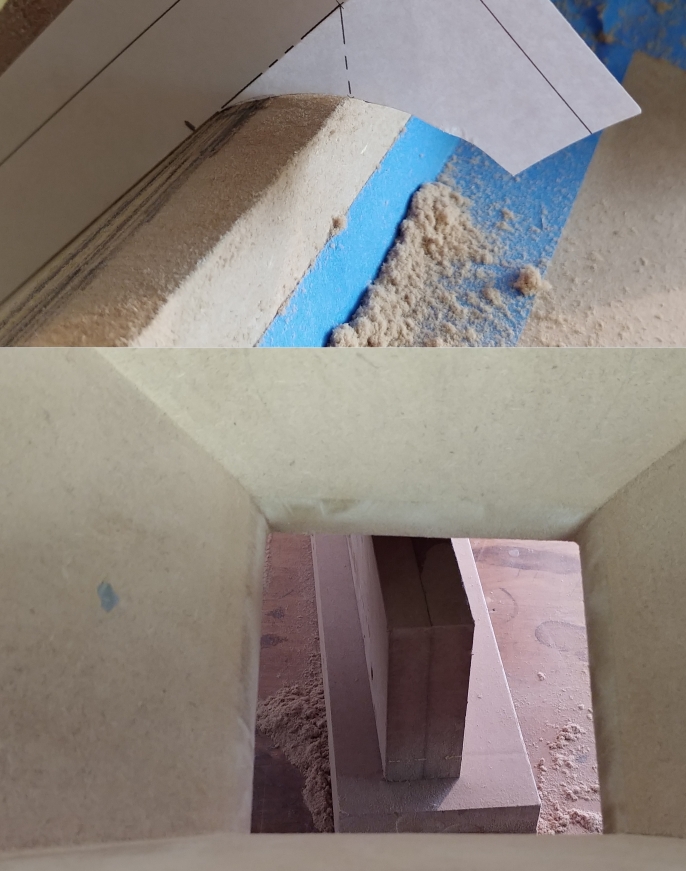
Here is a teaser from the 6Pi build 
|
|
|
|
| Re: Build Thread: 2Pi Towers, 6Pi Corner horns (and possibly a sub and center) [message #88160 is a reply to message #88057] |
Sun, 10 June 2018 20:16   |
 joshua43214
Messages: 35
Registered: October 2016
Location: USA
|
Baron |
|
|
So, how do they sound? Good.
How good? Very.
They sound so good that I felt compelled to take a break from working on the 6Pi's so I could deal with acoustic treatments. Flaws in my listening room suddenly became intolerable.
They sound so good I found myself using mostly well engineered music for critical listening (the audiophile rabbit hole).
My first thought when I hooked them up was "wow, that is big sound." Very reminiscent of the big speakers that where so popular in the '70s, the kind of speaker you want to play blues, rock, or soul through. Not to say they do not work just as well with orchestral music. Piano and cello are reproduced with amazing accuracy. Most impressive to me is how well they handle percussion though. They handle percussion almost as well as acoustic suspension speakers (which is even more impressive considering these do not have a Zobel circuit).
So far they have been put through three critical listening sessions with my son (who is musician of some skill and an audiophile), and we shared a relaxed listening session last week. For reference, I relied on 4 songs:
Tori Amos Pretty Good Year. This song is a good test because it has a fairly wide range of octaves, and it is difficult to produce the low piano notes, Tori's husky voice, and the backup vocals simultaneously. It also was very useful for speaker placement - the song will bring out room issues very quickly. The CD is very well produced, and has very good sound. The majority of the signal is inside the 2Pi Towers "sweet spot" and they effortlessly push the music into the room. A sub would be needed to fill out the bottom fully, but the Towers never sound like they are straining on this track.
Massive Attack Group Four. This song will test any speaker. The nice thing about Massive attack is that every bit of sound in the track is put there by hand, and it is clear when something is out of place. The music itself also hints at what is missing if your system is not able to reproduce it. The Towers idle right through the first section of the song which is a whimsical Trip Hop duet, and hammers out the second section which has a goth grunge sound to it without a sweat. It almost reproduces the transition between the sections flawlessly, but to be fair, very few systems can.
Yes Mood For a Day and Led Zeppelin Braun-Y-Aur. I chose these both because they are filled with rich harmonies, and because I had mastered both songs in my 20's so I know exactly how they should sound and feel. I also included Ana Vidovic's rendition of La Catedral.
The 2Pi Towers put the music right where it should be and fill them room with little effort. They do have all the limits that a 2-way speaker has, but the worst issues of bass-reflex are nicely minimized or absent. The most notable thing they are missing to my ear is that extra punch that sticks make when a drummer puts all their weight into the toms. Regular hard drumming and the kick drum come through just fine. I am a huge fan of all things percussion, so I am probably more sensitive to this than most people, my son certainly did not notice til I pointed it out. This is one of those things that only horn loaded drivers are really able to reproduce, and is always a weak point with bass-reflex speakers.
The question I keep asking myself is "are they good enough?" In other words, if I was not building a set of 6Pi Cornerhorns, would I bother to upgrade them. I honestly don't know. I am hip deep in projects, and there are other things I would much rather be doing than working with MDF. On the other hand, they sound so good, they are dragging me slowly but surely down the audiophile rabbit hole of endlessly seeking improvements. If these had to be my primary speakers, I would definitely add subwoofers and high-pass them a bit. I would probably also opt for something smaller than the 3Pi Sub since space in my room is at a premium - the Towers do not need much help at the bottom end.
I have also been using them as the mains for movie watching, and they do a very impressive job at this as well. My Athena Audio sub died right about the time I ordered the 6Pi kits, so the Towers are being used also for theater. Suffice it to say that the Towers where able to turn Blade Runner 2049 into a truly immersive experience even without a sub for LFE. I do have a sub on order, and we plan to re-watch Blade Runner, and watch Baby Driver when the 6Pi's are up and running.
I do have to withhold full judgment for the moment though. I am 95% certain the two issues I am having are my room and not the speakers. I suspect the port might be tuned too high, but it is pumping right into a corner node. I placed a piece of Rockwool Safe and Sound in the corner behind the speaker (partially blocking the bookshelves), and it helped immensely. The tweeter also seems to be a tad bit loud, but once again, room treatment helped this problem as well. I know I am still having room issues because I can improve the sound by equalization. I will try to get around to building a tester for measuring the speaker tuning sometime this week (yet another project...). I did try laying the Towers on their back over a pair of chairs, and observing the excursion at different frequencies, but it was not conclusive.
Once the Cornerhorns are completed. I can move the Towers into a better position in the room and give them another critical listen. Whether I will or not is a different question. Their primary duty will be for surrounds in my theater, and for this they are already excellent. I will also want to be listening to my 6Pi's, not moving furniture around.
One other issue, the Pi logo decals are black...
sure would be nice to have them in gold (hint hint).
Up Next: The 6Pi Cornerhorn build
|
|
|
|
| Re: Build Thread: 2Pi Towers, 6Pi Corner horns (and possibly a sub and center) [message #88170 is a reply to message #88057] |
Tue, 12 June 2018 22:14   |
 joshua43214
Messages: 35
Registered: October 2016
Location: USA
|
Baron |
|
|
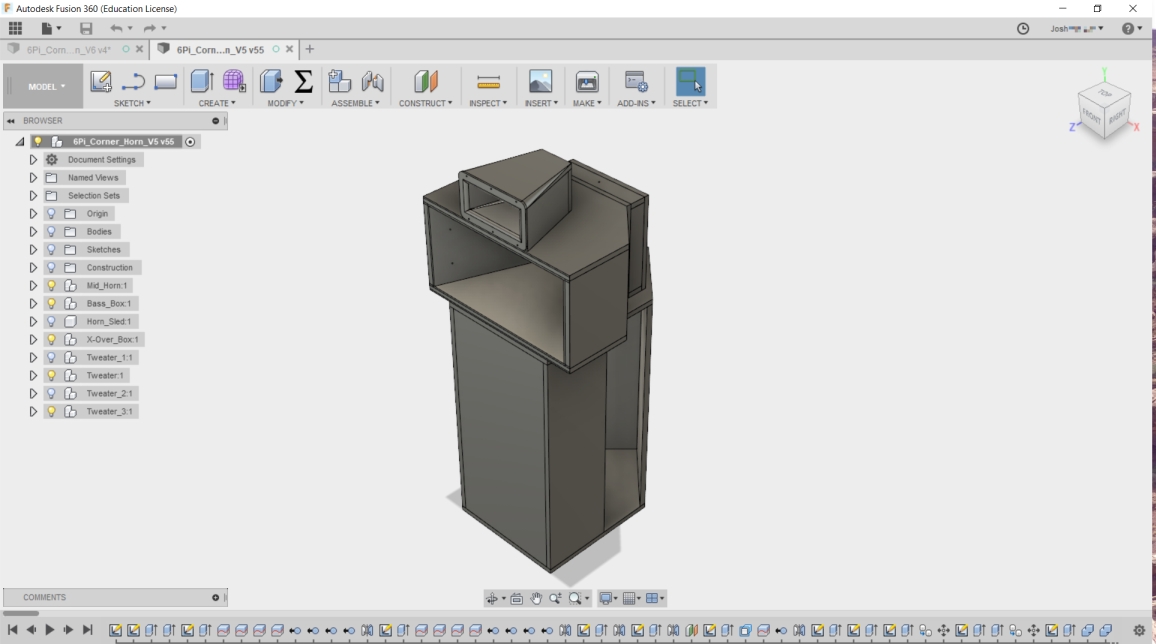
As I write this post, the replacement drivers have arrived safe and sound, and I am still waiting on the replacement cross-overs and my 3Pi Subwoofer parts. All the major construction of the 6Pi is complete, and only a handful of small parts need to be made, and some holes drilled. I have begun painting what is ready to be painted, and I expect to spend the next week or two on painting the rest. I aggravated my back injury lifting the bass bins last Thursday, so I have been working at a slower pace since then. I have also begun work on the 3Pi Subwoofer, but can't proceed until the kit arrives. I will prolly interrupt the 6Pi build with a post or two on its construction at some point.
The vast majority of this portion of the thread will be given over to the midhorns. The Tweeter boxes and bass bins are fairly straight forward, and do not require much additional to the 2Pi Towers. This forum limits the number of images you can upload for each post, so this will also be broken up into many posts since I have many pics.
During one of my previous lives, I was a furniture maker. During this time, I spent a few years making percussion instruments. I have probably tried about every method possible for cutting and gluing tapered joints. I know from experience how difficult it can be to get a proper glue joint on something like this. Proper glue joints depend on two things: surface area, and clamping pressure. It takes very little error in the cut angle to reduce the amount of surface area below the required amount, and it is almost impossible to clamp perpendicular to the joint. I consider the horn section of this build to be a somewhat advanced project, that should be doable by anyone with moderate experience in woodworking. Mostly it requires patience and fussiness at a few key points, as well as the proper tools.
The method I used is one of the methods I worked out for making tapered drums, and it works extremely well. I decided not to make a full sized jig because it would have taken most of a day to construct and cost over $50.00 to make. If I had to do it over again, I would make the jig. The time and hassle saved would have been well worth it. A properly designed jig would allow not only the flare parts to be cut accurately, it would also act as a clamp for gluing, and allow the horn box to be fitted over the flare with no hand fitting. The design and construction of a jig like this is actually more complicated than the design and construction of the entire 6Pi, if your inclination is toward this type of work, I suggest you follow your inclination.
Wayne sells flat packs for the horn flare.
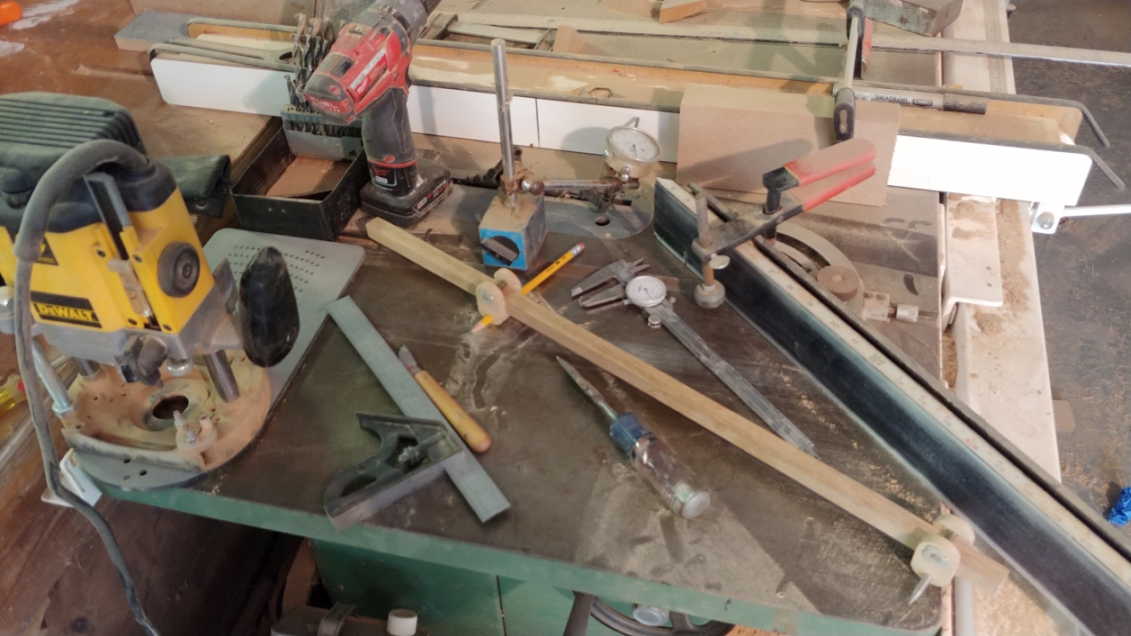
Tooling:
If you are cringing at the idea of buying tools just for this project, consider that the 6Pi costs $2700.00 + freight unfinished. Even if you spend several hundred dollars on tools, you are still coming out way ahead.
I would not even consider attempting the flare without a table saw unless I was planning on spending many hours hand fitting the joints. The flare parts are big, so the saw will need to have plenty of extensions, and a solid rip fence. The rest of the parts can be made with a circular saw if you opt to buy the flat pack.
A plunge router is a really good idea.
A decent dial caliper. If you have to chose between a cheap digital model (as in Horror Freight), and a dial, get the dial type. I have owned over a dozen dial calipers over the years, and my current daily driver is a 6" dial caliper I purchased from Shars.com, and it seems to be the perfect balance between cost and quality (cost very little, and is durable as heck). I generally work to a tolerance of 1/64" in the woodshop, which is about 0.015" (0.4mm). A dial caliper lets you measure this quickly and accurately even over rough surfaces.
A trammel. A trammel is similar to a compass. Rather than being a pair of legs, is it a long beam with points that can be moved along it. You can spend an obscene amount of money on a trammel, I made mine from some scrap oak. It pivots on a piece of 1/4" (5mm) piano wire that I pointed on the grinder, and has a pencil on the other end. I made it decades ago and it works well.
A machinists combination square. It just needs to be square, and the head needs to lock solidly. I have a Starrett (expensive), not sure what to recommend for a cheap one that does not suck. You wanted one anyway 
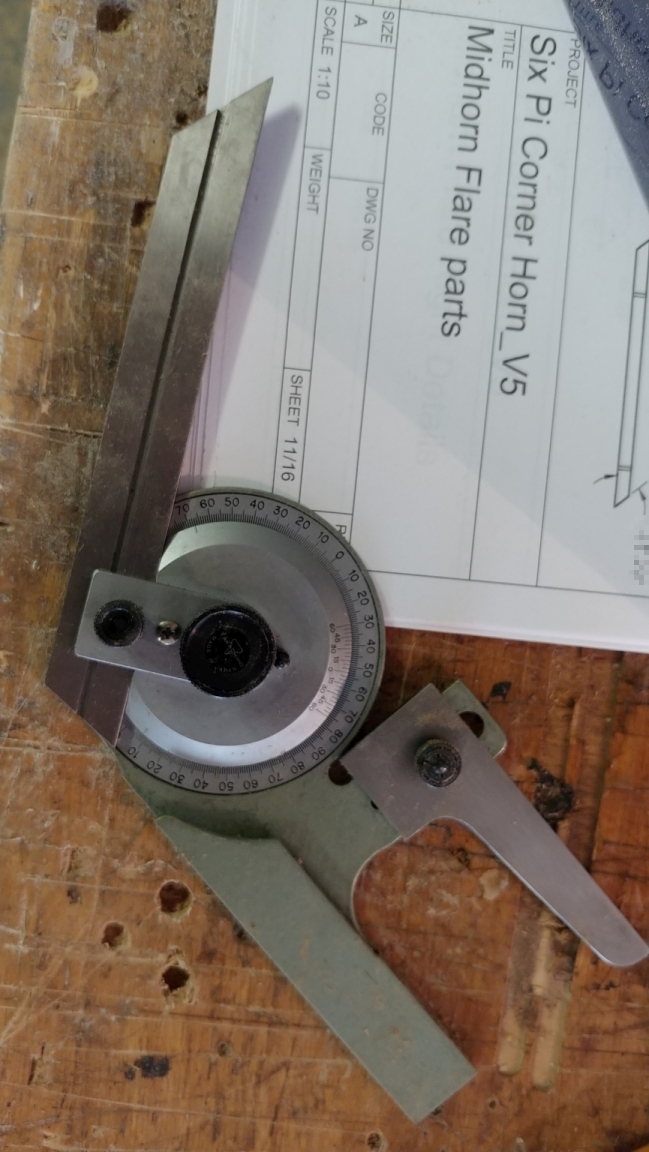
A precision protractor. One that can be set to minutes (or even seconds) of a degree. I am lucky to own a nice Japanese universal bevel protractor, but even used they are very expensive. There are cheap copies for under $60.00 that would probably work, and digitals for even less. Just make sure the moving arm can be put against the saw blade or you will have to make repeated test cuts - digitals often have trouble with this.
A decent dial indicator with a magnetic base is also very handy to have. It takes all the guess work out of nudging the rip fence over a "touch." just plop the thing down, butt it up to the fence, and tap it over the correct amount (you measured the correct amount with your dial caliper  ). My daily driver is from Shars.com, I use the mid-priced black faced version. I abuse the heck out of indicators in the metal shop. These hold up very well, and are so cheap I keep a couple spares and toss them when they finally start to get sticky. I almost never use my nice Mitutoyo ones. ). My daily driver is from Shars.com, I use the mid-priced black faced version. I abuse the heck out of indicators in the metal shop. These hold up very well, and are so cheap I keep a couple spares and toss them when they finally start to get sticky. I almost never use my nice Mitutoyo ones.
Lastly, is CAD software. I made a number of changes to the design during construction, one of which would have cost me a pair of horn boxes had I not double checked things in CAD first. Cad will help prevent major problems like putting a fastener where a driver goes, and make sure important things like binding posts are not an afterthought. CAD will also let you pull angles directly from the drawing without having to use any math. I have a math degree, I would take no pleasure in figuring out the cut angles for the parts. I use Fusion 360, it is free to hobbyists, and there are many very good tutorials on YouTube.
You will also need a ready stash of cash. The 2Pi Towers and 6Pi Cornerhorns needed 6 sheets of 3/4" (19mm) MDF at $28.00 a sheet. The fasteners ran about $100.00 total, the paint another $100.00. The bathtub liner used for gaskets and the like costs $8.00 a foot. Add in a roll of R15 fiberglass, 3 bottles of glue and other forgotten things. I opted to purchase binding posts from Parts Express, the 6Pi's required 4 pair binding posts and 3 pair banana plugs for each speaker. Expect to spend $100.00 to $300.00 on top of the material costs. All said, this project has cost about $1500.00 plus another $350.00ish for the sub, and I consider it a huge bargain. If you have a spouse type thing living with you, it might be a good idea to consider squirreling some extra cash away for the project 
I would also plan on 3 to 8 weeks for construction, and a week to 10 days for painting and curing. If I made these professionally, I would expect they would take about 15 hours over a 6 work day period to construct each speaker before finishing assuming I had all the jigs made up and was practiced at it.
The Midhorn:
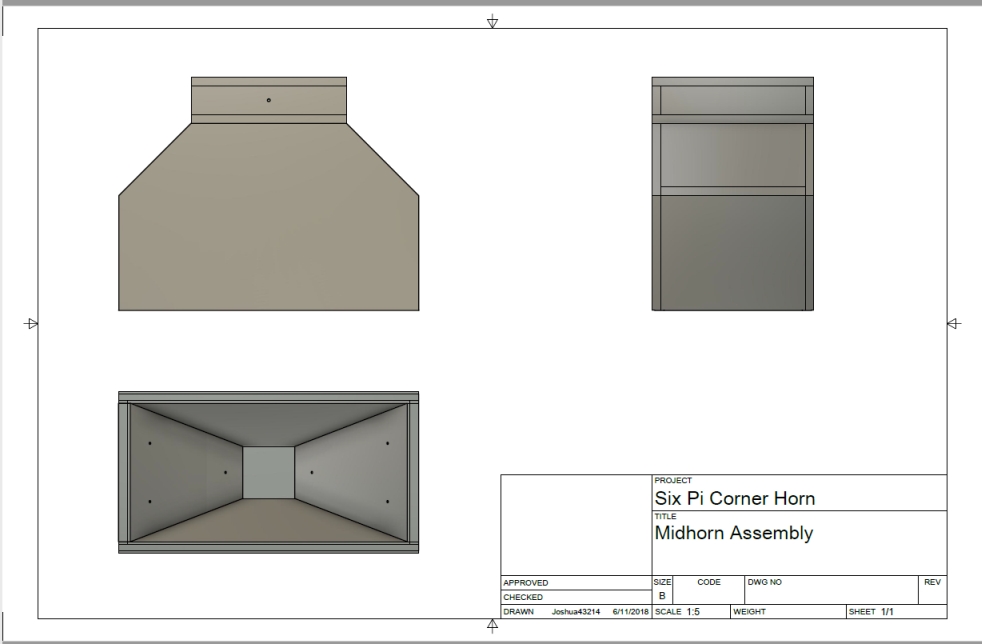
Since the midhorn is the most complex part, I started there. Some issues came up pretty quickly, and I started a thread on the topic.
https://audioroundtable.com/forum/index.php?t=msg&th=21885&start=0&
In a perfect world, I would just make my CAD model public via the Autodesk cloud. Wayne offered me this reply when I asked about doing so:
| Quote: | Also, I appreciate your offer for the CAD drawings, but we already have CAD drawings and even CNC code for some of the more complex models and parts. We don't provide those drawings or G-code because we don't want to encourage third-party flat-pack builders. There have been a few unapproved businesses that have sold flat-pack kits for our models, with one of the most aggressive being just a few years back. They usually start off offering to build cabinets or flat-pack kits as a favor or limited service, but then gradually transition to a full-fledged manufacturing operation.
|
Everything needed to work out the design issues pertaining to the horn are in the above thread, and the plans. Reading the Whitepaper helps a bit. It is more important that both horns be identical, than they meet some theoretical ideal set of dimensions.
The horn box itself is in effect an acoustic suspension speaker - in must be sealed airtight with no leaks. There are several places that can be troublesome for this. The back, which uses a gasket to seal it, must be as flat as possible, and must be able to carry strong fasteners. The join between the sides and the angled sides must be tight and well clamped. The join between the driver mount and the horn throat must be airtight and square to the box. The driver should be square to the box, the flare should not be off center, and the mouth of the horn should be perpendicular to the bottom so it is in the same plane as the front of the bass bin.
I imagine the horn is somewhat tolerant of things being off a bit. Error does accumulate though, so I consider it best to aim for things being a perfect as I can get them.
There is a great deal of geometry in the 6Pi, some is critical, some is not. For instance, the sides of the bass bin do not need to be perfectly square to the baffle. Nor does the baffle itself need to be square to anything other than mostly square to the floor. The front of the bass bin though acts as a baffle for the midhorn, so it should be planar to the midhorn driver. Likewise, the tweeter box is entirely optional, so it's only critical geometry is that it must support the tweeter horn so it is aligned properly.
When I make drawings for anything I build, I constantly ask myself "how am I going to cut that, and how am I going to install that?" It is just part of my design process. Knowing how something will be physically cut and installed can have a huge affect on the design itself. I often makes notes in the plans on construction so that when I am working in the shop I can focus my attention on other important things rather than trying to figure out how to put something together after I have cut all the parts.
My next several posts will go into detail the process I used to make the midhorn so that the horn throat is centered in the box and flare, the driver planar to the bass bin front and the horn mouth, both horn flares are as identical as possible, and that the flares themselves would be symmetric vertically and horizontally. The fact that the midhorns exceeded my design expectations is more a testament to being fussy at a few key points, than my tools or experience. I believe this is something anyone with moderate experience in woodworking can accomplish.
-
 Attachment: CAD_Pi6.jpg
(Size: 154.61KB, Downloaded 3476 times)
-
 Attachment: Tools.jpg
(Size: 468.75KB, Downloaded 3439 times)
-
 Attachment: CAD_MIdhorn.jpg
(Size: 81.54KB, Downloaded 3373 times)
-
 Attachment: Protractor.jpg
(Size: 447.26KB, Downloaded 3422 times)
|
|
|
|
Goto Forum:
Current Time: Sat Jan 24 19:54:28 CST 2026
|


