
Posted by Wayne Parham [ 64.216.178.63 ] on August 04, 2005 at 00:23:53:
In Reply to: Re: Speaker Voice Coil Cooling System - Heat Sink posted by Wayne Parham on July 03, 2005 at 01:08:23:
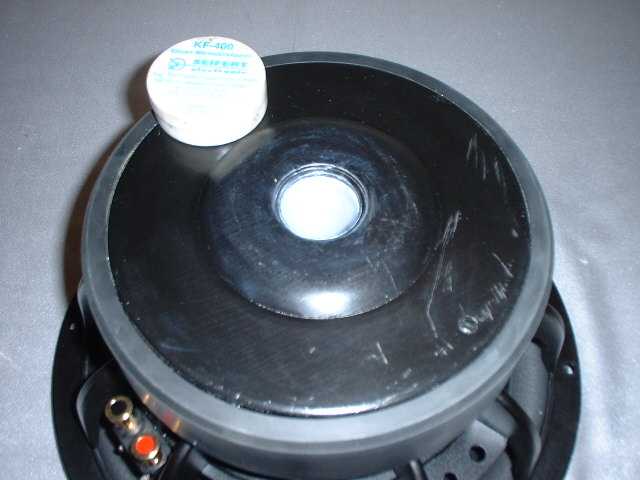
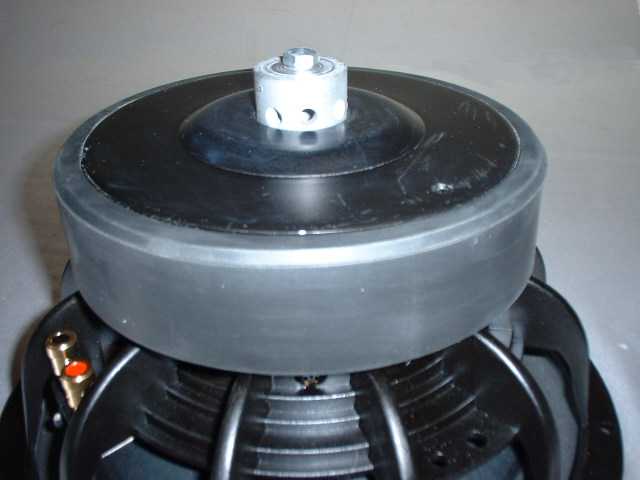
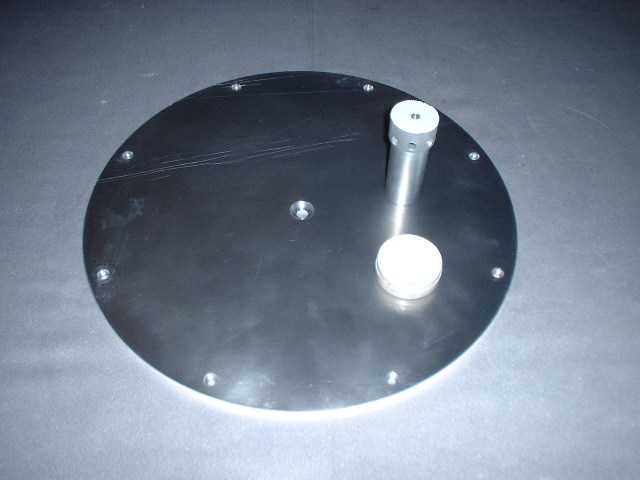
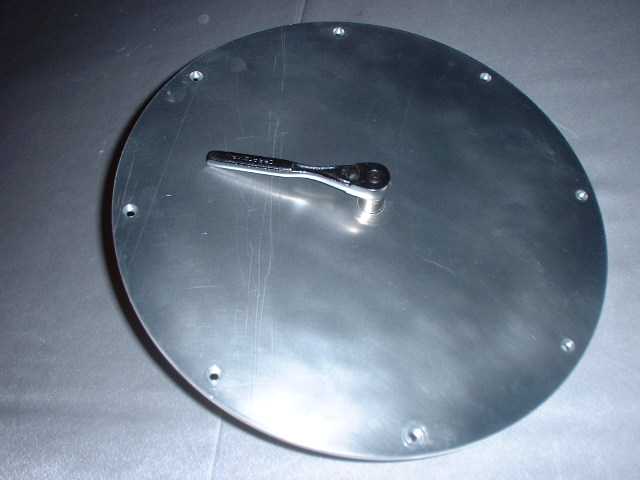
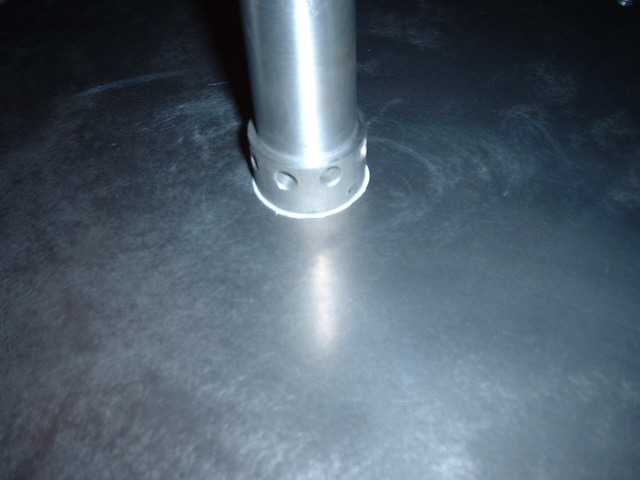
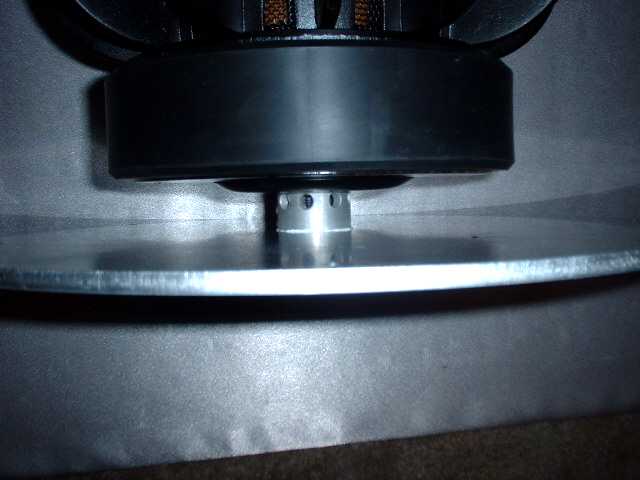
Here are some photos of the prototype device:
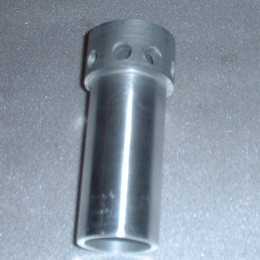 Cooling plug | 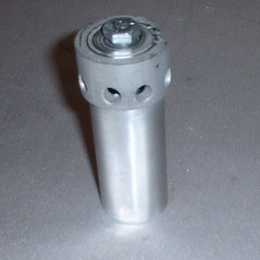 Top View | 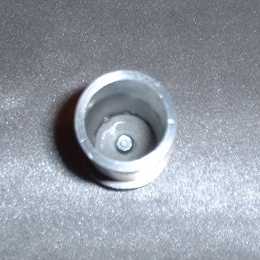 Bottom View |
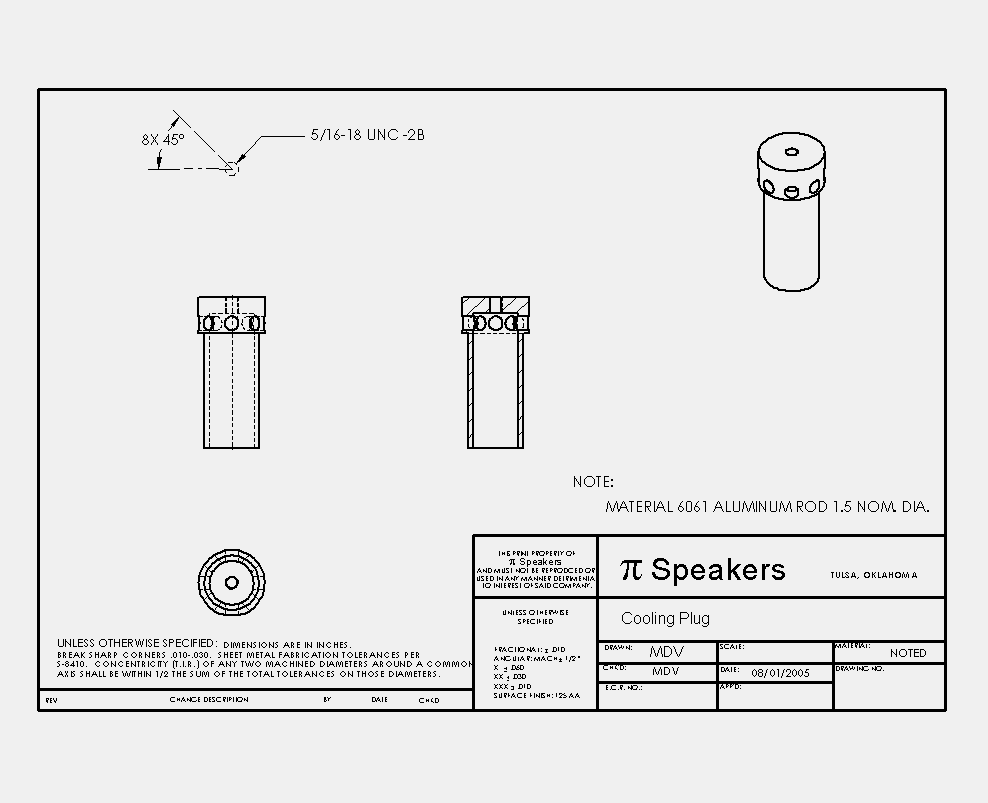
The prototype was made using a piece of 6061 aluminum tubing, lathed down to fit into the woofer cooling vent. It is sized to fit snug, not so snug that it is difficult to insert cold but when the aluminum heats up, it expands more than the iron of the pole piece, so it is difficult to move unless it is cold.
The top section is not lathed down, which acts as a stop. Holes are cross-drilled so that vent air is free to pass. An aluminum plug is fitted into the top and is press fit and pinned in place. It is threaded to accept the bolt for mounting the heat exchanger, which doubles as an access panel on basshorns.
Production units will probably be a one-piece design, cut from a billet of aluminum on a CNC machine. It will depend which is more cost effective. The two-piece design is fine, as long as the slug in the top is press fit so the interface is good for thermal transfer. The two-piece design is probably more labor intensive, so we'll see.
If you have a shop, you can build these for very little money. McMaster-Carr sells the aluminum tubing, and you only need a few inches per speaker. Measure the depth of the center pole, and cut it so that the length matches when fully inserted. Then drill holes in the top so cooling air passes through and press fit an aluminum slug to seal the hole. Drill and tap the top and viola! You have a heat transfer tube that will cool the motor a lot better than air cooling alone would do.
If you don't have a machine shop, contact me and I'll get some prices for you. I'll probably make these available on the shopping cart soon, and we'll add sizes for popular models as time allows.
When installing the device, be sure to use heat conductive grease. It is very important that the interface between the pole piece on the motor and the cooling plug is good. You want a lot of surface area contact, so the entire length of the cooling plug should be inserted and it should be covered with conductive grease. You also want the interface between the cooling plug and the heat exchanger to be good, so use conductive grease there too, and snug the panel down well. Both surfaces should be straight and smooth to maximize contact surface area.
I would suggest removing the paint from the pole piece inside the vent hole with sandpaper. It is painted black, and this may prevent the cooling plug from sliding freely, as well it may restrict heat flow.
Use very fine sandpaper, like 600 grit, and rub slowly. Make a few swipes and remove the sandpaper and check your surface. Wipe it clean with your finger to see if you've removed the paint and see shiny metal.
Once you're through the paint, stop. It goes pretty quick. If you sand the metal, the tiny filings will stick to the surface. So wipe it down pretty good after you're done.
Next, cover the surface with heat conductive grease. This will both protect the exposed metal and serve to improve heat transfer. Apply it as a thin uniform film. Insert the clean cooling plug and pull it right back out. Inspect the tube to see where you have contact. It will be white where there is contact and not where there isn't. If the tube is white all along it's surface, reapply the film and reinsert. if not, apply a slightly thicker film and try again.
The point of this is to make sure there is plenty of conductive grease and that there is no space between tube and pole piece that isn't filled with conductive grease. We want contact all along the surface. But we don't want so much grease on the pole piece that the cooling plug pushes it down into the area behind the dust cap.
Once the cooling plug is inserted, you can mount the speaker in the cabinet, and then mount the heat exchanger onto the cooling plug.
[ PiSpeakers Forum ] [ Help ]