| 12 π basshorn - Coming together - Part 1 [message #47431] |
Thu, 04 August 2005 00:19  |
 |
 Wayne Parham
Messages: 18678
Registered: January 2001
|
Illuminati (33rd Degree) |
|
|
With the help of Bill Wassilak, the first 12π basshorn is about halfway done. I took a few photos to document the process, which will help make building them easier in the future.
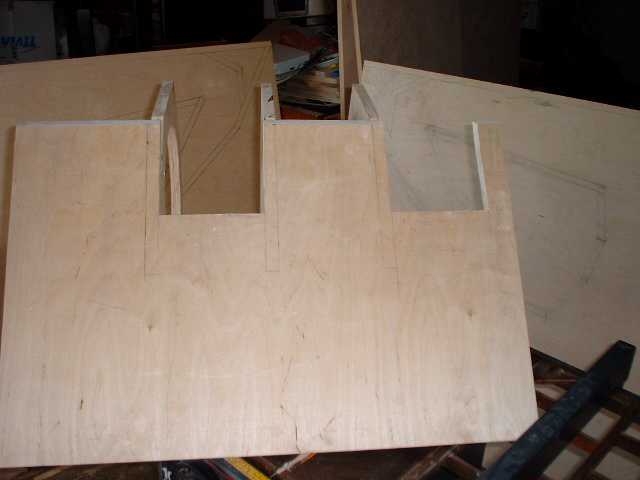
First things first, I printed plans both at 1/6th scale (8.5x11 A4 paper) and 1/2 scale (A1 paper, 23x33). We then laid out the profile on a side panel by drawing it in pencil. This helps to maintain perspective and to keep track of where things go.
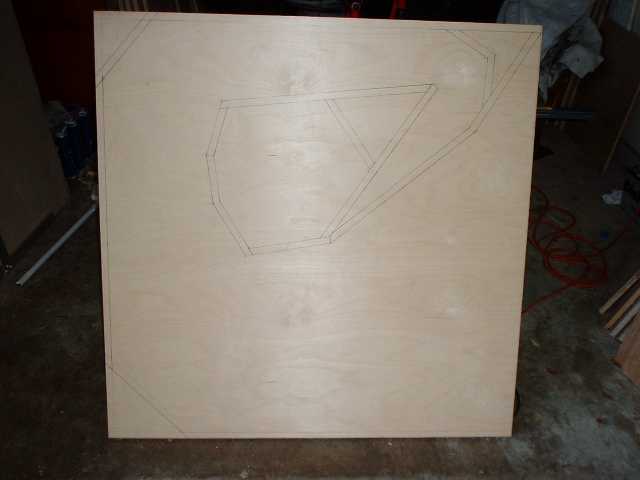 Flare profile drawn on side piece
After cutting the side panels and drawing a profile on them, we proceeded to cut the rest of the panels. You can see the cut angles used above. It's more complicated to cut than a bass-reflex box or a π cornerhorn, but it's pretty straightforward with a table saw.
After cutting out all the sections that make up the flare, the next thing we did ws to cut the baffles for the motor chamber. Two need holes for the woofers, one does not.
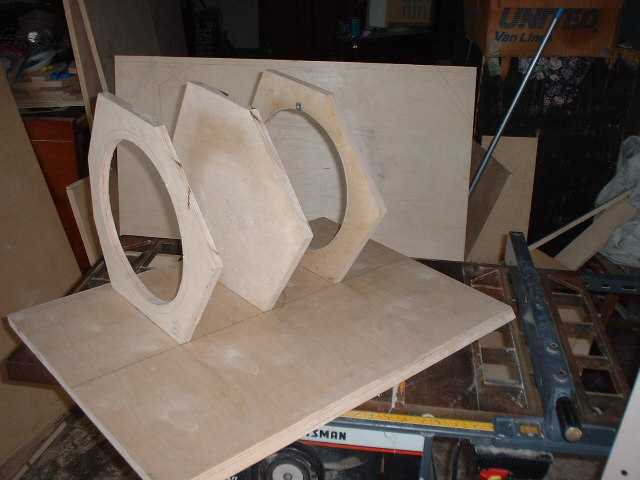 Motor chamber baffles resting on bottom piece.
Next we cut the throat piece and began to assemble the motor chamber.
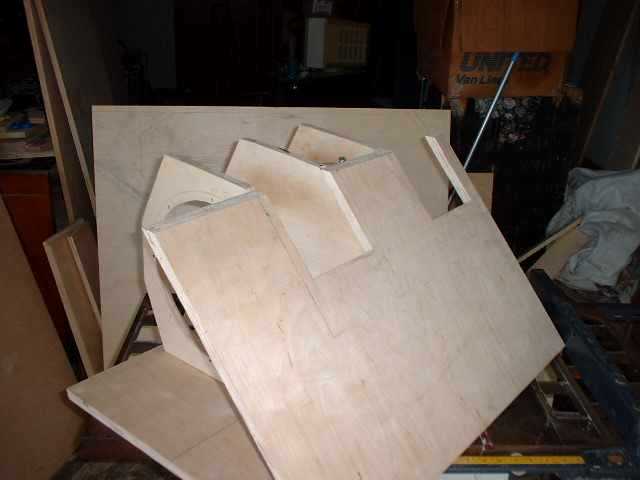 Throat piece on motor chamber
 Throat piece on motor chamber, viewed from behind
 Throat piece on motor chamber, looking at throat holes
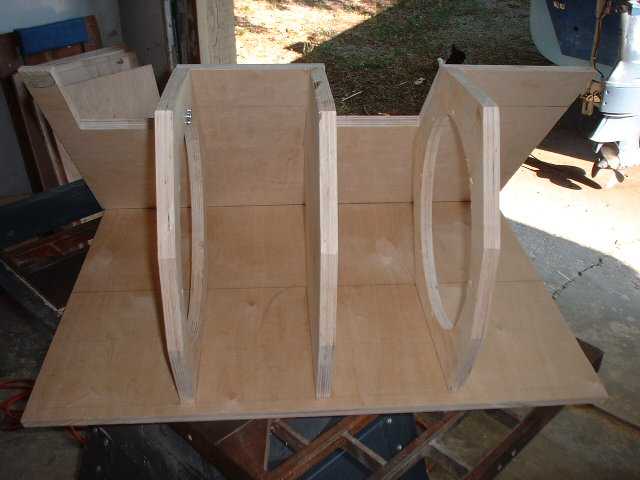
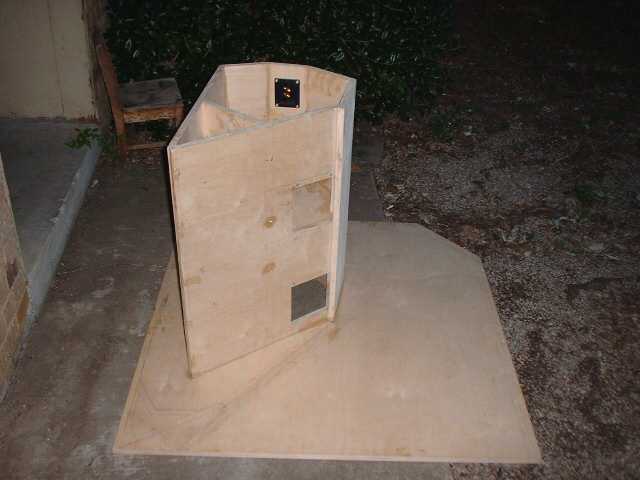
Seven panels surround the motor chamber, so now we trim and fit each one. We started with the the front piece and worked our way around the the back pieces.
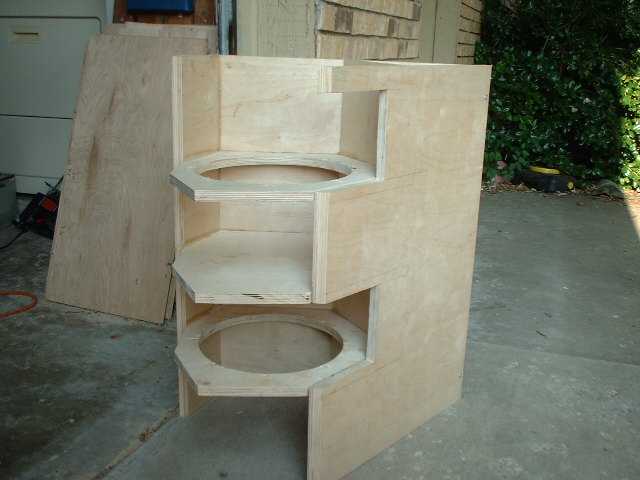 Motor chamber front piece and one of the rear pieces installed
 Motor chamber side view, showing baffles
 Motor chamber, almost finished
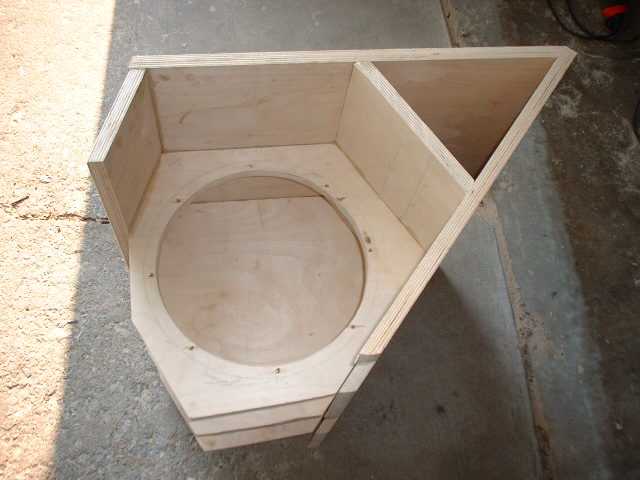
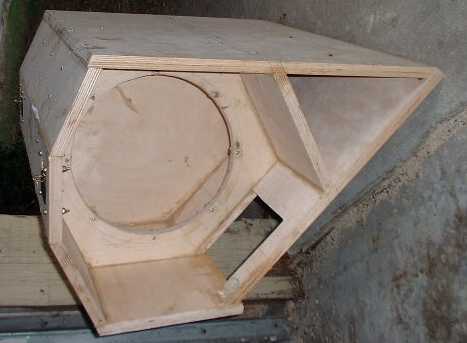 Completed motor chamber, side view
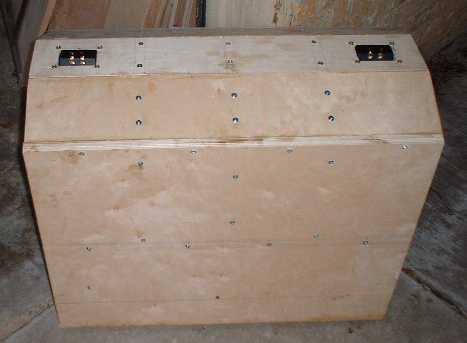 Motor chamber, top view - Notice connectors on rear panel
Next step is to add fill to the front chambers to displace some of the volume and reduce the size of the front chamber. Cut pieces and glue them in, using clamps where necessary.
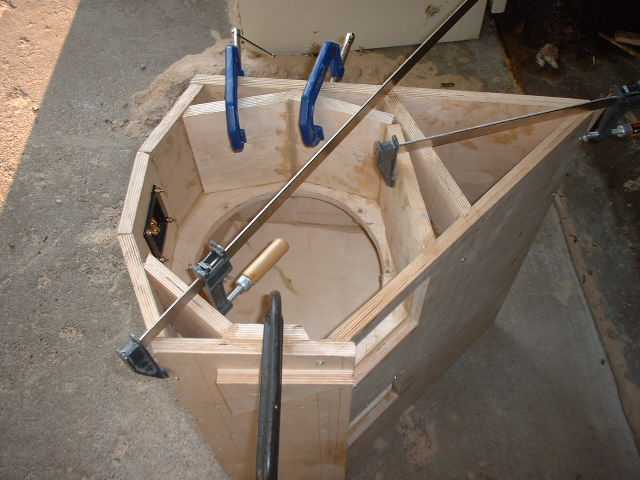 Inserting fill pieces to reduce front chamber volume
 Outer chamber fill
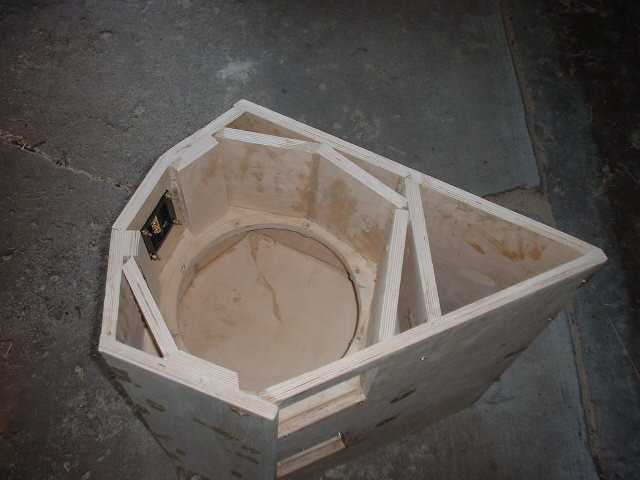
Two pieces are installed on the outer front chamber that are not installed on the inner front chamber. This is due to the difference in widths of the front chambers, and it keeps the volume of each exactly the same. Notice the two pieces near the speaker connector terminal on the outer chamber are not present on the inner chamber.
 Inner chamber fill, viewed from top
 Inner chamber fill, viewed from bottom
Now route the side panels so the access panel / heat exchanger can be installed flush. The panel is 1/4" thick, and a gasket is installed so route the edge 9/16" deep for a flush fit.
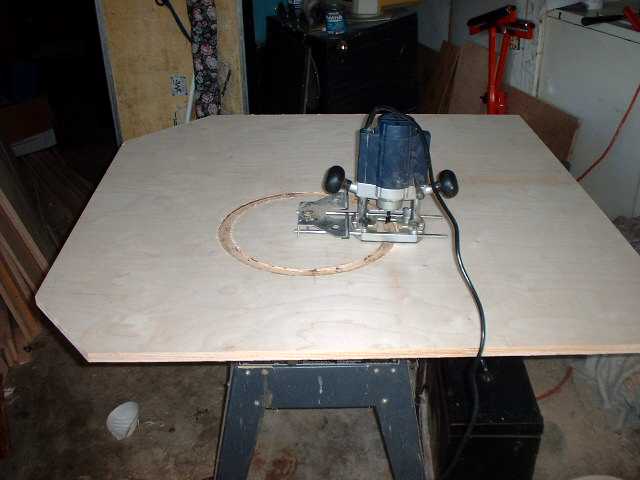 Routing access panel hole
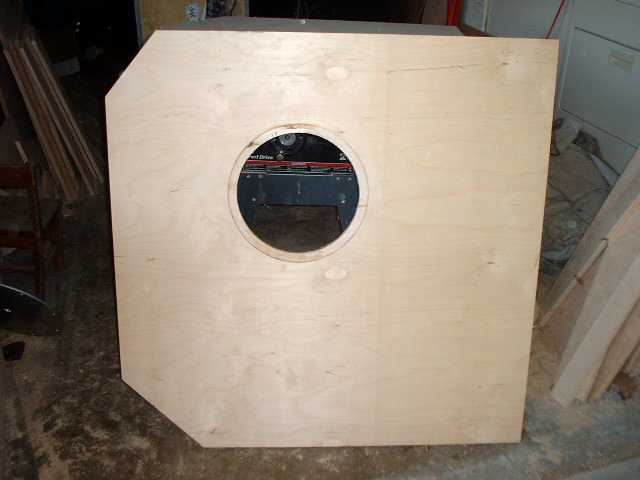 Side panels with access panel hole routed
After the side panels have access holes, install T-Nuts in each side. Apply a dab of epoxy on each and tighten them in place.
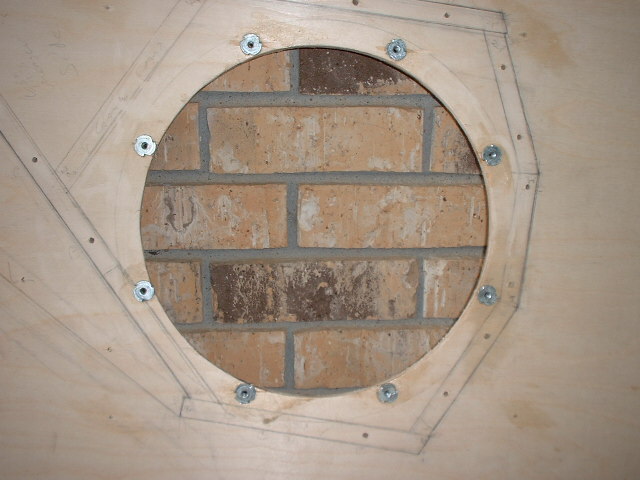 T-Nuts for side covers installed
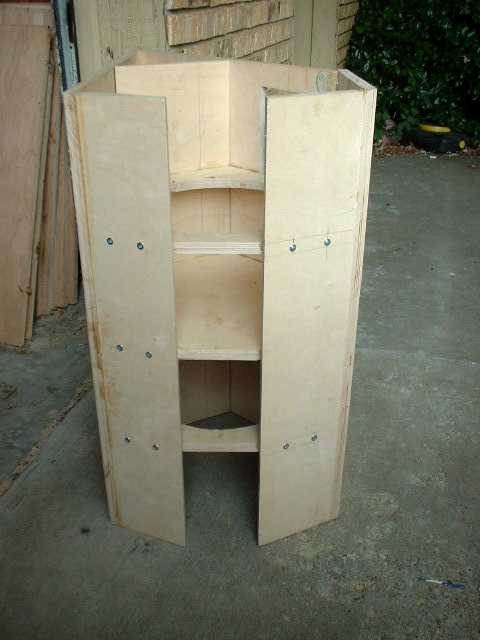
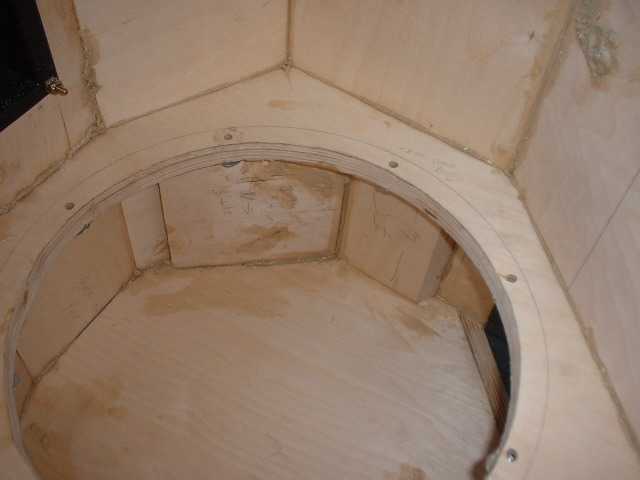
Notice that some of the T-Nuts interfere with the motor chamber or fill. Remove just enough material on the edge of the motor chamber that the T-Nuts do not standoff the sides from the motor chamber. They're about 1/16" thick when fully inserted, so you don't need to take off much. Also, drill holes in the motor chamber and fill so that screws used to attach the access panel / heat exchanger will not stop into the wood. After you have thoroughly checked that the side panel will fit flush and access panel screws can be inserted later, apply glue to the side panel and attach the motor chamber. Be sure to test fit the woofer, cooling plug and access plate and ensure proper alignment.
 Attaching motor chamber to side panel
If you use screws to pull the motor chamber to the side panel, be sure to drill starter holes in both the side panel and motor chamber. The screws should pass through the side panels, and the holes in the motor chamber should be just large enough that the wood screws bite. The concern here is that you definitely do not want the screws to split the wood, so starter holes are important. When used right, screws won't split the wood but will act as permanent clamps that pull the pieces together tightly while the glue sets.
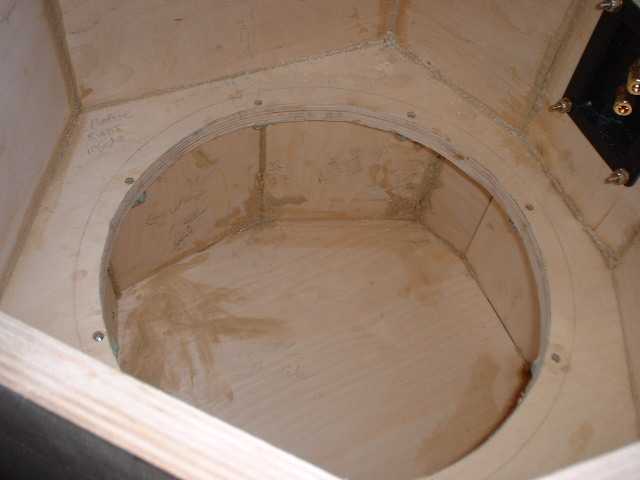
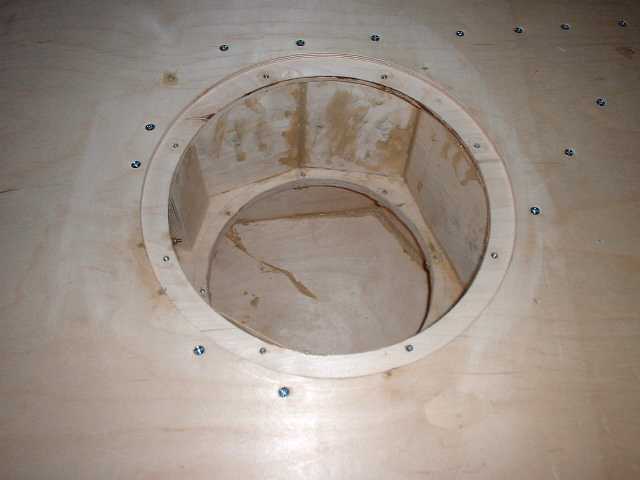 View into the motor chamber from side panel
 |
|
|
|


 Posting Rules
 Members
 Search
 Help
Help Register
 Login
Login Get a T-Shirt!


")

